Exporting Datasource Data
You can use the ProjectWise Export Wizard to export any combination of the following:
- environments
- saved searches
- work areas and folders
- documents
- configuration settings blocks used with managed workspaces
- rendition profiles and rendition profile components
The export process creates a script file with the extension .AAM under the main export folder you specify during export. It contains records of all the work areas, folders, and documents exported, as well as properties and attributes of the exported items. The script file is then used to recreate the folder structure when you go to import the data into another database. You can open or edit this file with a text editor.
All documents are exported as DAT files to a folder called files000 under the main export folder you specify during export. When you examine the contents of the files000 folder, you will notice that the folder structure does not mirror the folder structure inside your datasource. Instead, the export process replicates the folder structure of the storage area, and creates a matching folder for each storage area folder that contains one or more documents. Matching folders will not be created for empty storage area folders. This explains why you may see nonsequential folder numbering, such as dms00058, dms00059, dms00065, dms00068, in the files000 folder. Also, documents are not named the same as their counterpart in the storage area. Instead, file names are replaced by a number, and are numbered sequentially in each dms folder. For example, if there was a storage area folder that contained three documents, then in the corresponding export folder you would see 00000001.dat, 00000002.dat, 00000003.dat. For each dms folder under the files000 folder, document numbering restarts at 00000001.dat.
To Export a Datasource Using the ProjectWise Export Wizard
-
Open the ProjectWise Export Wizard.
- On Windows 8 or later /
Windows Server 2012 or later:
Go to the Start page and type Export to AAM File Wizard, or go to and click Export to AAM File Wizard.
- On Windows 7 / Windows
Server 2008:
Select .
You can also open the wizard from the command line, by navigating to the location of the PWEXPT.EXE file and entering pwexpt (currently only the 32-bit version works).
- On Windows 8 or later /
Windows Server 2012 or later:
- When the wizard opens, click Next.
-
When the
ProjectWise Log
in dialog opens, log in to the datasource you want to
export data from (password is case sensitive, user name is not).
You can log in with any ProjectWise account, but an administrator account is required to export / import environments.
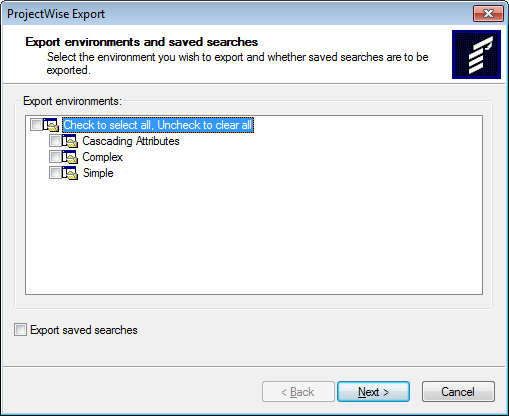
- On the Export environments and saved searches, do the following:
-
On the
Define the export settings page, do the
following:
-
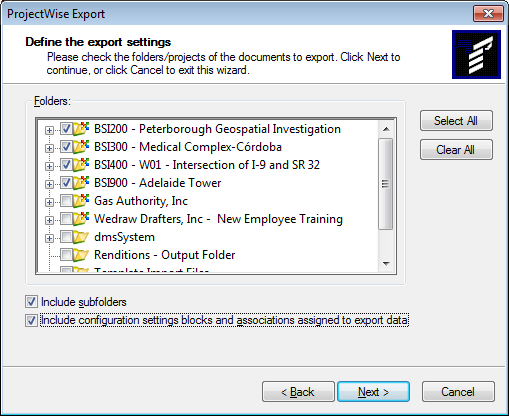
Select the folders and work areas you want to export.
You can manually select the individual folders and work areas you want to export, or click Select All to export them all.
Include subfolders is on by default, which means that when you manually select a parent folder or work area, all of its subfolders and sub-work areas will be automatically selected also.
You can manually unselect any individual subfolder or sub-work area you do not want to export.
If you turn off Include subfolders and then select parent folders or unselect subfolders, turning it back on will automatically select any sub-work areas or subfolders that were previously turned off or not selected.
- (Optional) Turn on Include configuration settings blocks and associations assigned to export data if you want to export the configuration settings blocks that are assigned to the work areas and folders selected for export, as well as the workspace associations for those work areas and folders. This will also include any configuration settings blocks that are assigned to documents in the work areas and folders selected for export. The assigned configuration settings blocks will be automatically selected for export on the next page of the wizard. Turning on this option and selecting any folder will also add any datasource level configuration settings blocks to the next page for export, and will enable datasource level associations to be exported as well. You will have a chance on the next page of the wizard to further select which specific configuration settings blocks to export (or not export). This option is disabled if no work areas or folders are selected for export.
-
Click
Next.
-
Select the folders and work areas you want to export.
-
On the next
Define the export settings page, do the
following:
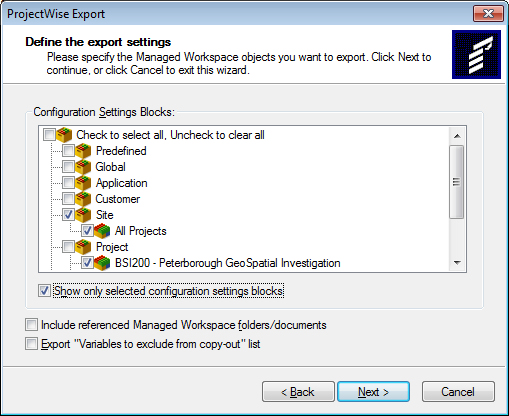
- Select any configuration settings block in the list to turn it on or off.
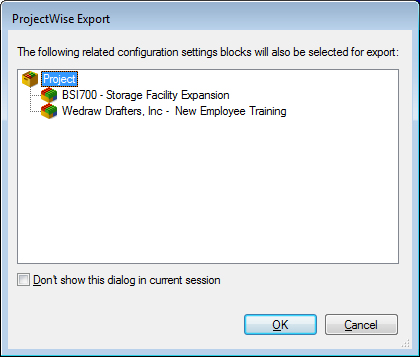
- To see all configuration settings blocks (instead of just the ones selected for export), turn off Show only selected configuration settings blocks. Use this option if you need to export configuration settings blocks that were not automatically selected for export. If you select a configuration settings block that is not currently selected for export, and it has related configuration settings blocks, a dialog opens listing the related configuration settings blocks not currently selected for export; click OK to include them in the export (if you click Cancel, neither the selected configuration settings block or the related configuration settings blocks listed will be selected for export). Also, if you select a configuration settings block that is currently selected for export, and it has related configuration settings blocks, a dialog opens listing the related configuration settings blocks that will be excluded from the export; click OK to exclude them (if you click Cancel, the selected configuration settings block and the related configuration settings blocks listed will remain selected for export).
- Turn on Include referenced Managed Workspace folders/documents if you want to export folders and documents referenced by the configuration settings blocks selected for export, if they were not already selected for export on the previous page of this wizard. Note that this option does NOT export the associations for any folders or documents that get selected for export as a result of turning on this option. That must be configured on the previous page of this wizard.
- Turn on Export "Variables to exclude from copy-out" list if you want to export those variables.
-
Click
Next.
-
On the next
Define the export settings page, do the
following:
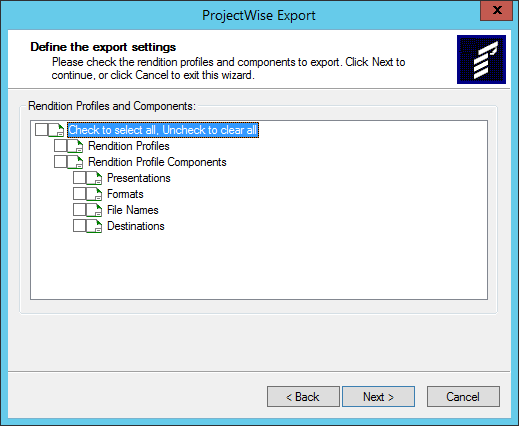
- Select Profiles if you want to export all rendition profiles.
-
Select
Rendition Profile Components if you want
to export all components from each of the categories.
You can turn off the individual categories you do not want to export. To export all rendition profiles and rendition profile components, click Check to select all. By default, no rendition profiles or rendition profile components are selected for export.
-
Click
Next.
-
On the final
Define the export settings page, do the
following:
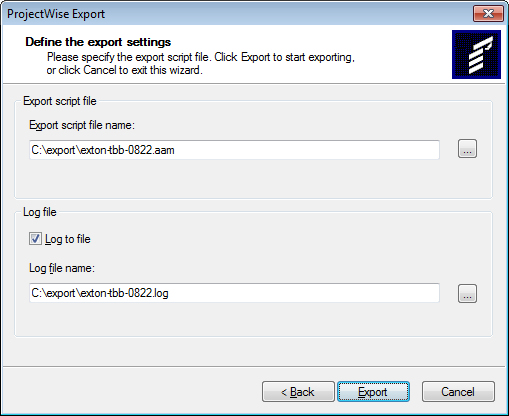
- In the Export script file field, type the path to and name of the export script file that will be created. For example, C:\export\pwtest.aam. You can also click the Browse (...) button to select the export location.
- (Optional) Turn on Log to file, and in the field below, type the path to and name of a log file that will be created. You can also click the Browse button (...) to select an existing log file.
- Click Export.
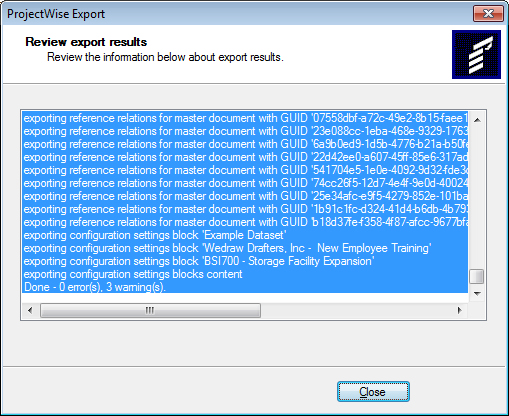
The wizard displays the progress of the export.
-
Click
Close.
The export is complete. You can now import the export script file (AAM) to another datasource using the ProjectWise Import Wizard.
To Export a Datasource Using the Command Line
- Open a command prompt and navigate to the ...\Bentley\ProjectWise\bin directory.
-
Enter your export command. For example:
pwexpt /s /ub <datasourcename> /uu <username> /up <userpassword> /ee /ed /fe <pathtoAAMfile>
This example command will export all documents (/ed) and all environments (/ee) from the specified datasource, to the specified AAM file.
The /s command switch is what runs the export command "silently" (without opening the ProjectWise Export Wizard). If you just typed pwexpt on the command line and then pressed <Enter>, the ProjectWise Export Wizard would open.
The following options are available when you use pwexpt from the command line:
Export Option Definition /s silent mode (do not display Export wizard) /ub datasource name /uu user name /up password /ee exports all environments /ed exports all documents /app exports applications /dep exports departments /queries exports saved search definitions /workflow exports workflows and states /mwcsbassoc exports configuration settings blocks (CSB's) and associations assigned to export data /mwallcsb exports all CSB's /mwcsbref exports referenced managed configuration folders and documents /mwcsbexclusionlist exports "Variables to exclude from copy-out" list /fe sets export file name /renditions exports rendition profiles and rendition profile components /fl sets output log file name Example:
pwexpt /s /ub pwtest /uu pwadmin /up pwadmin /ee
/ed /app /dep /queries /workflow /fe c:/export/pwtest.aam /fl c:/export/pwtestexport.log
In this example, the export command runs in silent mode (pwexpt /s), logs in to the datasource "pwtest" (/ub pwtest) using user name "pwadmin" (/uu pwadmin) and password "pwadmin" (/up pwadmin), and exports environments (/ee), documents (/ed), applications (/app), departments (/dep), saved searches (/queries), workflows and states (/workflow), all to a script file called "pwtest.aam" (/fe c:/export/pwtest.aam). This example also creates a log file called "pwtestexport.log" (/fl c:/export/pwtestexport.log) where you can review the results of the export.