To Create a Document and Then Attach a File, Using the Create Document Dialog
- Select a folder or work area in which to create the document.
-
Select
.
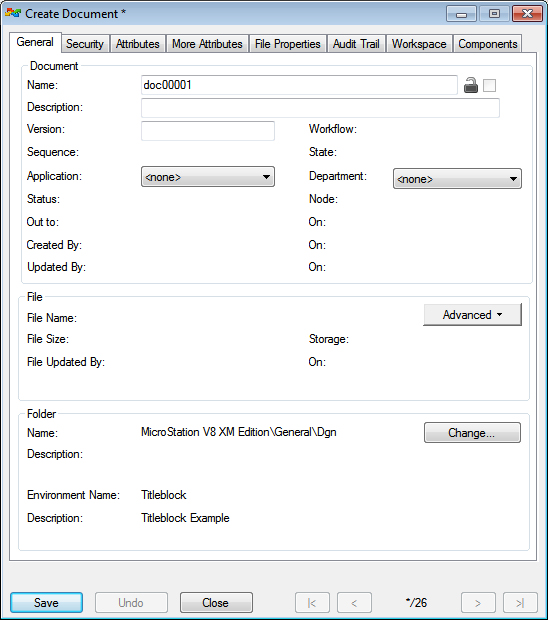
The Create Document dialog opens. The default document name is docX, where X is a self-incrementing number. For example, doc00001.
-
In the
File section:
To attach an external file, click , and in the dialog that opens select a file and click Open.
or
To attach a copy of a file that is attached to another ProjectWise document, click , and in the dialog that opens select a document and click Open.
The attached file's name displays in the File Name field, and also becomes the default name for the document.
- For the check box next to the Document Name field:
-
Edit the
Name,
Description and
File Name fields as needed.
A description for the document is optional, but the document must have a name and a file name, and both the (document) name and file name must be unique in the folder or work area in which you select to store the document.
- (Optional) Assign a ProjectWise application and department to this document from the respective Application and Department lists. You can also set either property to <none> if you do not need them.
- (Optional) Enter a label in the Version field. Depending on how default version rules are set up, you can either let ProjectWise assign a version identifier, or you can enter your own custom label for the version.
-
Click
Save.
The Create Document dialog becomes the Document Properties dialog, with the name of the document displayed in the title bar of the dialog. The new document displays in the document list with a status of Checked In.