Creating a Work Area
Work areas are created using the Work Area Creation Wizard. You can create a work area from scratch, or using any existing work area as a template.
You can create work areas inside folders, inside other work areas, or at the root of the Documents folder.
To be able to create work areas, you must have these user settings turned on:
- Select the Documents root folder, or any work area or folder in the datasource.
- Select .
-
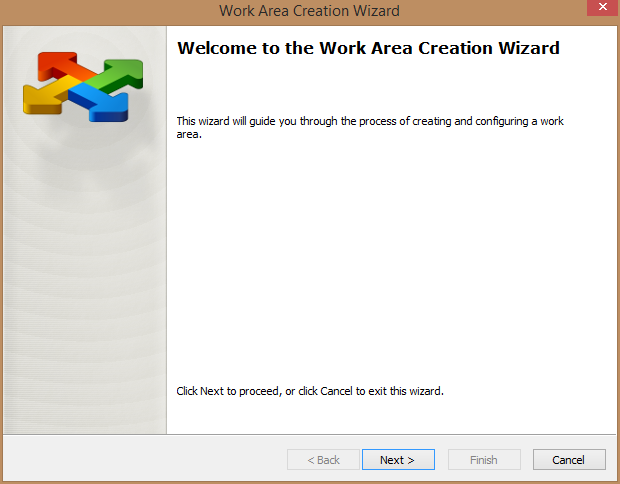
When the
Work Area Creation
Wizard opens, click
Next.
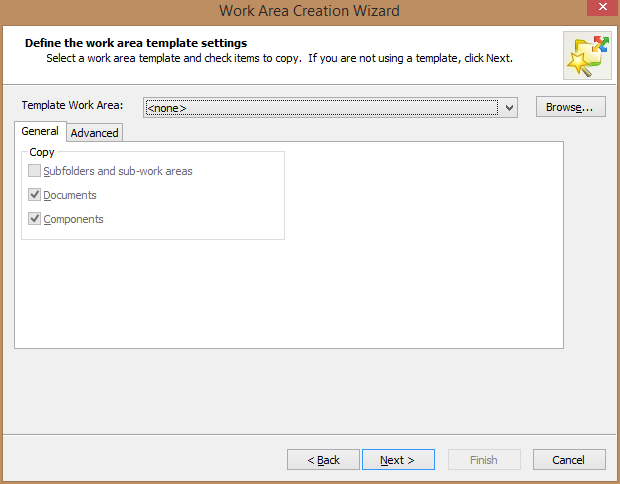
The Define the work area template settings page opens. Here you can select whether or not to use an existing work area as the basis for this work area.
The work areas available in the Template Work Area list are those that exist in the default work area template folder, which is set by your administrator. If no work areas are listed, it does not mean there are no work areas in the datasource, it just means that none exist in the default work area template folder, or that the administrator has not set up a default work area template folder.
The General and Advanced tabs are used to specify which parts of the template you would like copied over into the new work area. The controls on these tabs are disabled if you are not using a template.
-
On the
Define the work area template settings page,
do one of the following:
If you do not want to use a template, set Template Work Area to <none> and click Next.
or
If you want to use a template, select a work area from the Template Work Area list, or click Browse to select a work area from some other location. After you select a template, set the options on the General and Advanced tabs to specify which parts of the template work area you would like to carry over to the new work area. When finished, click Next.
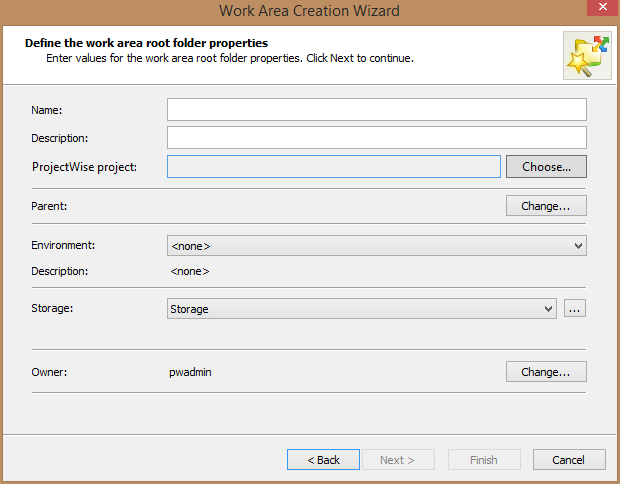
The Define the work area root folder properties page opens. Here you establish the general properties of the work area. These properties are the same as those you would define when creating a new folder, with the additional option of being able to associate this work area with a ProjectWise project.
-
On the
Define the work area root folder properties
page, do the following:
- Name - Enter a name for the work area.
- (Optional) Description - Enter a description for the work area.
- (Optional)
ProjectWise project - If you want to
associate this
work area to a
ProjectWise project, click
Choose and select the
ProjectWise project you want.
For details, see To Associate a Work Area with a ProjectWise Project Associate a Work Area with a ProjectWise Project .
- Parent - By default this work area will be created under the folder or work area that was selected when you launched the Work Area Creation Wizard. If you want to change the location this work area gets created under, click Change and select some other folder or work area.
- Environment - Select the environment to assign to this work area. If you do not want to assign any environment, select <none>.
- Storage - By default this work area will use the same storage area that is used by the parent folder or work area it will be created under. If you want to specify a different storage area, select one from the list.
- Owner - By default the user you are logged in as will be the owner of the work area. To set another user as the owner, click Change.
- When finished, click Next.
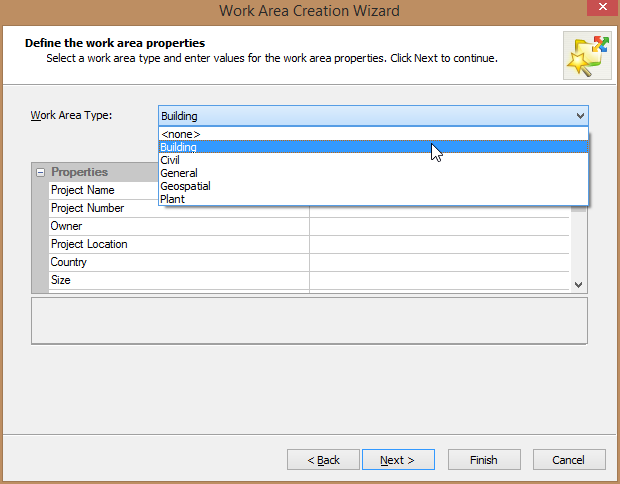
The Define the work area properties page opens, which lets you select which work area type (if any) to assign to this work area. Work area types are defined in ProjectWise Administrator. If there are none listed here, then that means your administrator did not create any.
-
On the
Define the work area properties page, do one
of the following:
Select a work area type, enter values for the custom properties as needed, then click Next.
or
If you want to set the work area type later (after the work area is created), leave Work Area Type set to <none> and click Next.
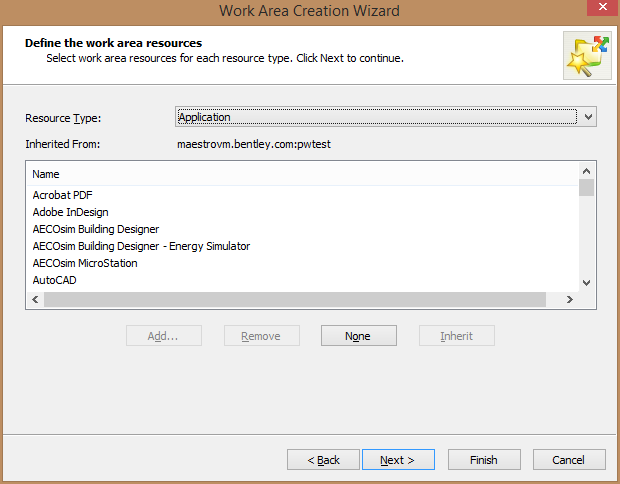
The Define the work area resources page opens, which lets you select which resources you want to be available in the work area. By default, the work area you are creating automatically inherits the resources of the work area or folder above it. Subsequent work areas or folders created under this work area will inherit the resources you set here. If you are creating a work area under the Documents root folder, all resources currently defined in ProjectWise Administrator are included.
-
On the
Define the work area resources page, do the
following:
- From the Resource Type list, select a resource type, such as Application, Department, or Environment.
- From the resource list, select which specific resources of the selected type you want to include in the work area.
- Repeat these steps for all resource types you want to make available in the work area.
-
Click
Next.
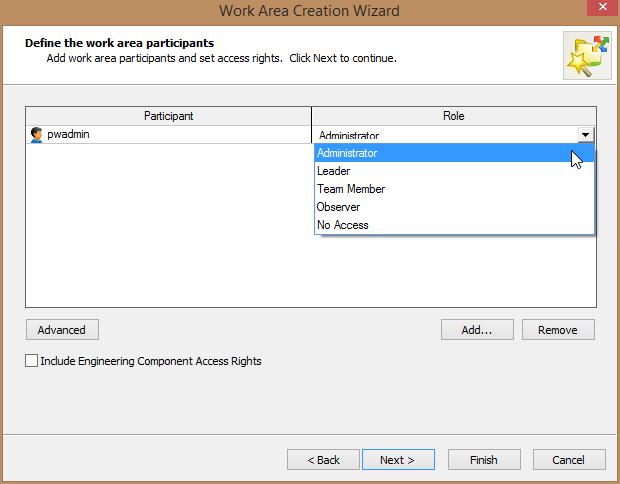
The Define the work area participants page opens. Here you can add the users (participants) you want to have access to the work area, and then set the user's access rights for the work area. You can set access rights by assigning one of the predefined roles (Administrator, Leader, Team Member, Observer, or No Access), or you can customize the access rights of each user. The user creating the work area is automatically assigned the Administrator role.
-
On the
Define the work area participants page, do the
following:
- If any participants will need component security permissions, turn on Include Engineering Component Access Rights.
-
Click
Add to add users to the
work area.
New participants are automatically assigned the Team Member role, which has a unique set of folder, document, and component security permissions. Other roles have their own unique set of permissions.
-
You can change a participant's permissions in one click by
changing their role (click in the
Role field to the right of a participant's
name).
The participant's permissions are changed accordingly.
-
You can also assign the role that most closely matches the set
of permissions a participant needs, and then customize that participant's
folder, document, and/or component security permissions as needed. To do this:
- Click
Advanced.
The Work Area Security dialog opens with three tabs for setting security - Work Area\Folder Security, Document Security, and Component Security. (The Component Security tab only displays if Include Engineering Component Access Rights is on.)
- As needed on each tab, select a user and then turn on or off the required permissions.
- If the user you want to set permissions for is not listed on a particular tab, click Add to add them to the tab and then turn on or off the required permissions.
- Click OK.
Back on the Define the work area participants page, any user whose permissions you changed will have the Custom role next to their name. Also, any user you added through the Work Area Security dialog will be added to the Define the work area participants page and have the Custom role next to their name.
- Click
Advanced.
- When finished adding participants and defining their roles, click Next.
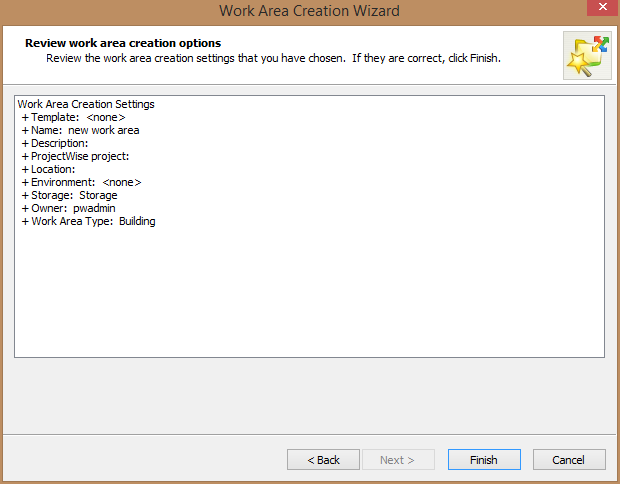
- When the Review work area creation options page opens, click Finish.
- When a message displays stating that the work area has been created successfully, click OK.