To Set or Change the Workflow of a Folder or Work Area
- Select a folder or work area.
- Select .
-
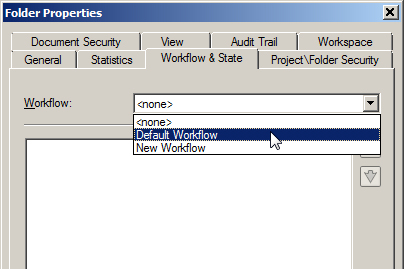
On the Properties dialog, select the
Workflow & State tab.
The Workflow list contains all the workflows defined in the datasource. When you select a folder or work area that does not have a workflow assigned to it, the Workflow list reads <none>, and the list below is empty. If a workflow has already been assigned to the folder, the name of the workflow displays and the list below it displays all of the states in the workflow.
-
From the
Workflow list, select a workflow.
A message appears, asking you to confirm that you want to change the workflow of the folder or work area.
-
Click
OK.
The selected workflow is assigned to the folder or work area, and all documents at the root of the folder or work area are placed into the first state of the workflow. Existing subfolders or sub-work areas do not inherit the workflow assigned to their parent folder or work area, however new folders or work areas you create will automatically be assigned the same workflow as its parent folder or work area.
- Click OK.