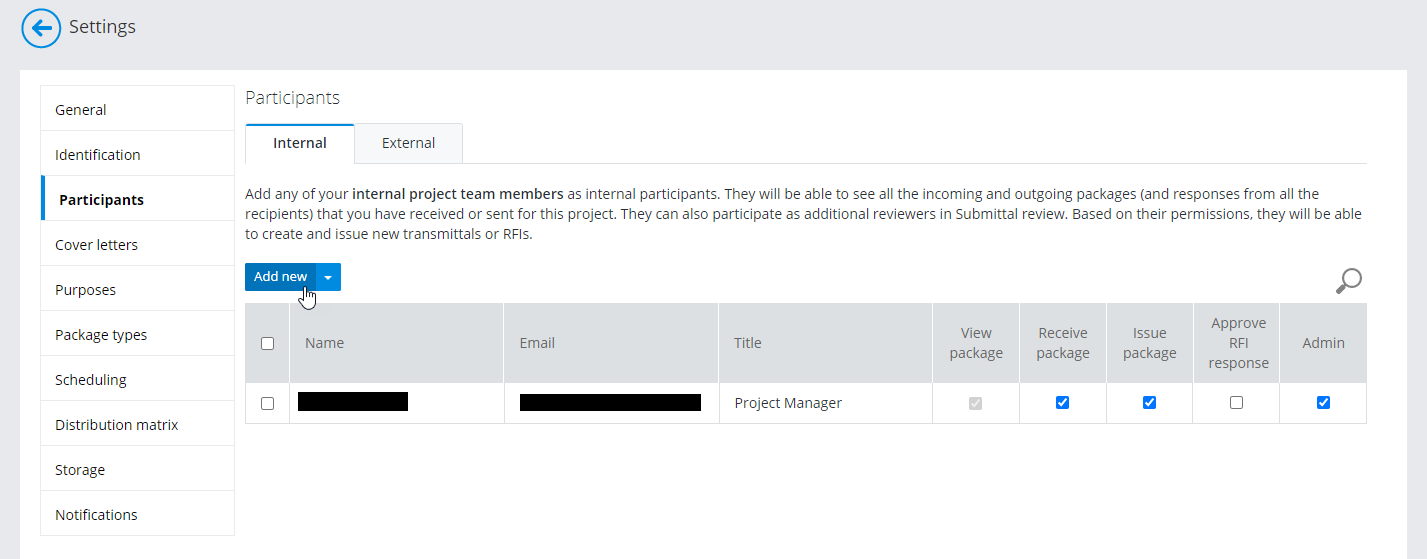
Adding an Internal Participant (portal)
-
Click the
Settings icon
 to open the
Settings page.
to open the
Settings page.
-
Click the
Participants tab.
-
On the
Internal tab, click
Add new.
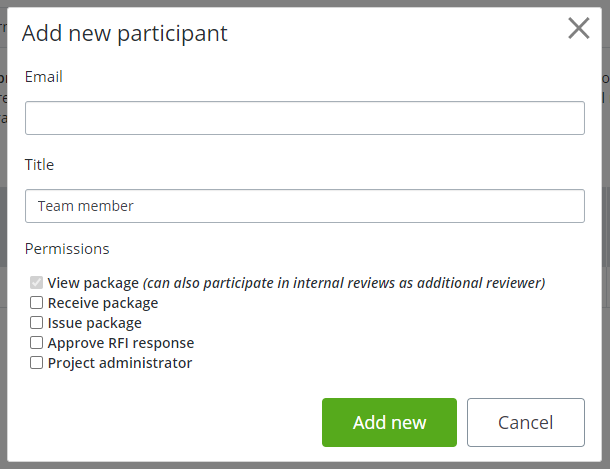
The Add new participant dialog opens.
- In the Email field, enter the email address of the person you want to add.
-
In the
Title field, enter a title for the
participant.
The title of "Team member" is entered by default. You can keep the default title or change it now. You can also change the title after you add the participant.
-
In the
Permissions list, turn on the permissions you
want the participant to have:
-
Click
Add new.
If the person you are adding has a different email domain than your organization, a warning message opens. Click Show more information to read the full message.
Because internal participants are typically from your organization, this is a warning to let you know that, by adding someone from another organization, you are essentially giving another organization access to all of your project deliverables.
Click Yes if you still want to add the person to the internal participants list.
If this is not what you want, click Cancel, and consider inviting the person to the external participants list instead, where they would only be able to see the packages they received or created.