RFI Attributes and Settings
The tab of the portal settings is where you manage attributes and settings for all RFIs in this project.
RFI Settings
| Setting | Description |
|---|---|
| Request RFI draft response to be reviewed and approved prior to sending it back to RFI author |
You can send your RFI response to another internal participant for review and approval, before the response is sent to the RFI author. The internal reviewer can either approve or reject your response. If they reject your response, the response is sent back to you to make changes, after which you can either send your response to the RFI author, or send it back out again for internal review. If the internal reviewer approves your response, the response is then automatically sent to the RFI author. To enable this functionality, there are two settings that must be turned on. First, you must turn on this portal setting, Request RFI draft response to be reviewed and approved prior to sending it back to RFI author. Then, you must turn on the permission Approve RFI response for each internal participant you want to have that capability. Permissions can be turned on from either ProjectWise Explorer (Deliverables Management Settings dialog > Participants and Permissions tab) or the portal (Settings > Participants > Internal). When the Request RFI draft response... setting is on, your incoming RFIs will contain two options: Send response and Request draft response approval. When this setting is off, the incoming RFI will only have the Send response option. When you select Request draft response approval, only internal participants who have the Approve RFI response permission turned on will be listed as possible approvers. Also, when the Request RFI draft response... setting is on, sending your response for internal approval is considered optional but recommended, therefore you will get a warning if you send the response to the RFI author without having it internally approved first. |
Default Question and Response Attributes for RFIs
The RFI attribute list determines which additional attributes display on outgoing and incoming RFIs, so that the senders and receivers of those RFIs can enter appropriate attribute values for the RFI.

For new projects, the RFI attributes list comes with default attributes for outgoing RFIs (question attributes) and incoming RFIs (response attributes).
If the project is associated with an AssetWise community, then the RFI attribute list will include several AssetWise attributes in addition to the default RFI attributes:
You can use the provided RFI attributes as is, you can modify them (for example, changing the name, making them required or not, adding more predefined values, or changing existing values), or you can add more attributes if needed. For existing projects (projects that were created before the RFI attributes feature was introduced), you will have to manually add the default RFI attributes if you want to use them in your project.
You can have as many 'Text' type RFI attributes as you need, but you can have only one 'Impact Assessment' type attribute in each list (one for the question attributes list and one for the response attributes list).
For the AssetWise RFI attributes, you can have as many of each AssetWise attribute type as you need.
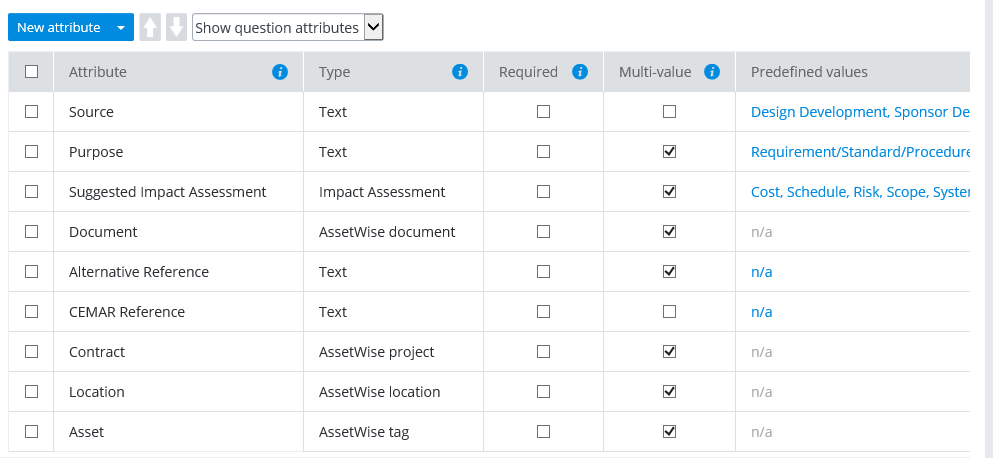
The following image shows the RFI question attributes list for a project that is associated with AssetWise.
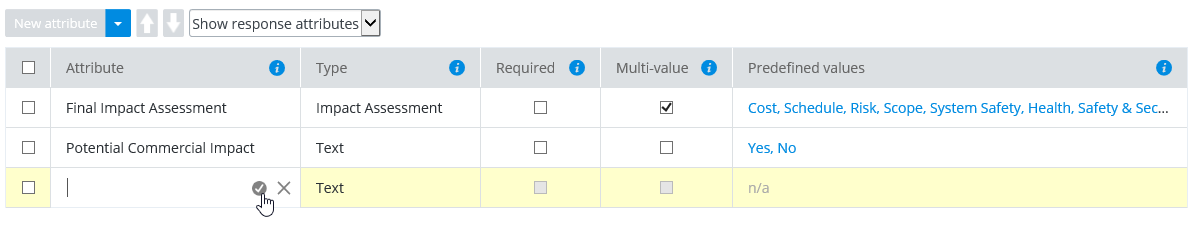
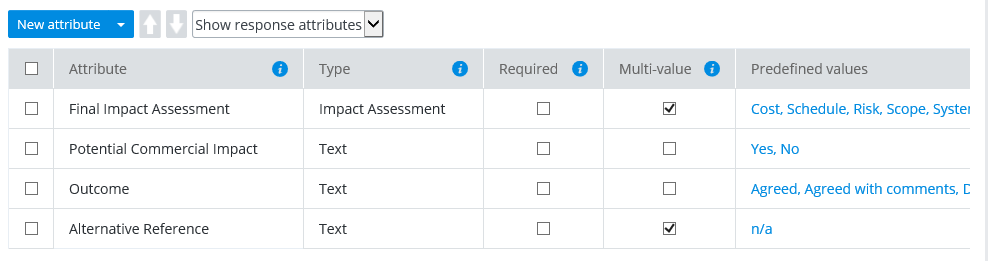
The following image shows the RFI response attributes list for a project that is associated with AssetWise.
Outgoing RFI > Question tab > Details > Question Attributes
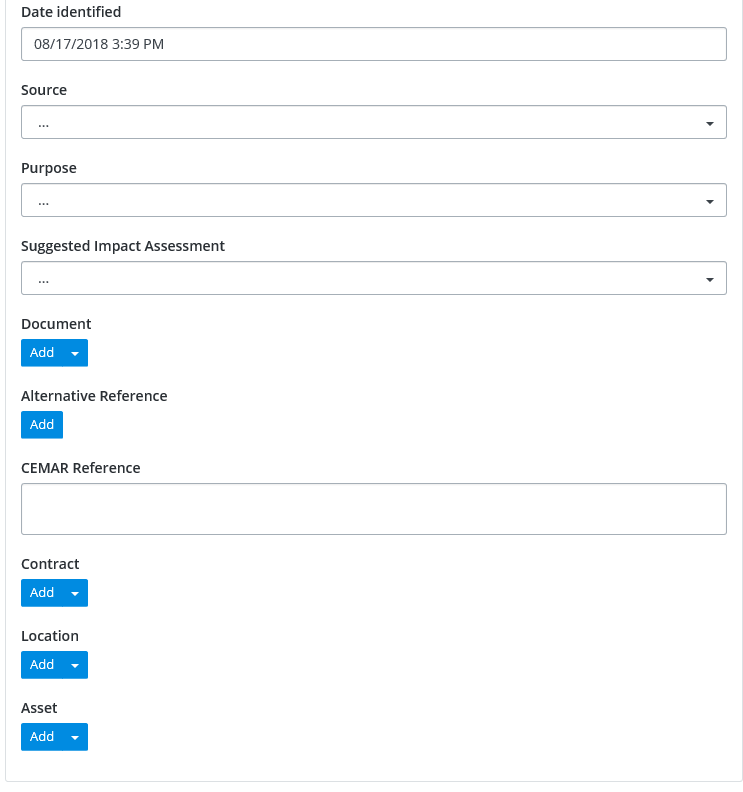
This is how the RFI question attributes appear to a portal user who is configuring an outgoing RFI:
Incoming RFI > Response tab > Details > Response Attributes
This is how the RFI response attributes appear to a portal user who is responding to an incoming RFI:
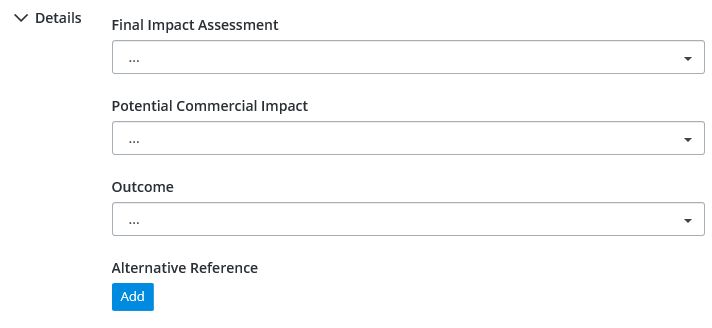
If the sender of the RFI fills out the Suggested Impact Assessment field on the outgoing RFI, then the responder will fill out the corresponding Final Impact Assessment field when they respond to the RFI.
Adding, Renaming, Removing, or Reordering Attributes
-
Click the
Settings icon
 to open the
Settings page.
to open the
Settings page.
- Click the Package types tab.
- On the RFI attributes tab, filter the list to either Show question attributes or Show response attributes.
- On the
RFI attributes tab, do one of the following:
To change the display name for an attribute (which changes the name of the attribute in future RFIs):
- In the Attribute column, click in one of the attribute fields, change the name as needed, and press <Enter>.
To change the order of the attributes (which changes the order of the attributes in future RFIs):
- Click the check box next to the attribute you want to move, then click the Up or Down arrow to move the attribute up or down in the list.
To remove an attribute from the list (which means the attribute will not appear in future RFIs):
- Click the check box next to the attribute you want to remove, then click the menu next to the New attribute button and select Delete.
To add a new attribute to the list (which will appear in future RFIs):
- Click
New attribute.
A row is added for the new attribute.
- In the
Attribute column, click in the attribute
field, enter a name for the attribute, and press <Enter>.
You can name the attribute whatever you want, but it must be unique in this list.
- In the
Type column, select
Text or
Impact Assessment.
In each project, for both question and response attributes, you can have as many Text attributes as you want, however you can only have one Impact Assessment question attribute, and only one Impact Assessment response attribute.
- Set the
Required check box to determine whether or
not this attribute is required.
When the Required check box is on, it means that the user sending or receiving the RFI must enter a value for that attribute. When off, the user can leave that attribute blank.
- Set the
Multi-value check box to determine whether
the user can select just one value, or multiple values, for this attribute.
When the Multi-value check box is on, it means that the user sending or receiving the RFI will be able to select more than one value for that attribute. When off, the user can only select one value from the list.
- In the
Predefined values column, add the values
you want your users to be able to select from.
The values in this column are comma separated. To the user, they will appear as separate items with a check box.