To Add Documents to a Transmittal Draft
A transmittal can contain any combination of documents from ProjectWise, the network, or your local computer or device.
Because you can work on the same transmittal draft from both ProjectWise Deliverables Management client interfaces (the portal or the connector for ProjectWise Explorer), you can create and save the transmittal draft from one interface and then work on it from another interface as needed. Use the ProjectWise Deliverables Management portal when you need to add documents from the network or local file system.
-
If the transmittal
draft is not already open, go to the
Drafts folder and open it now.
-
Select the
Documents tab.
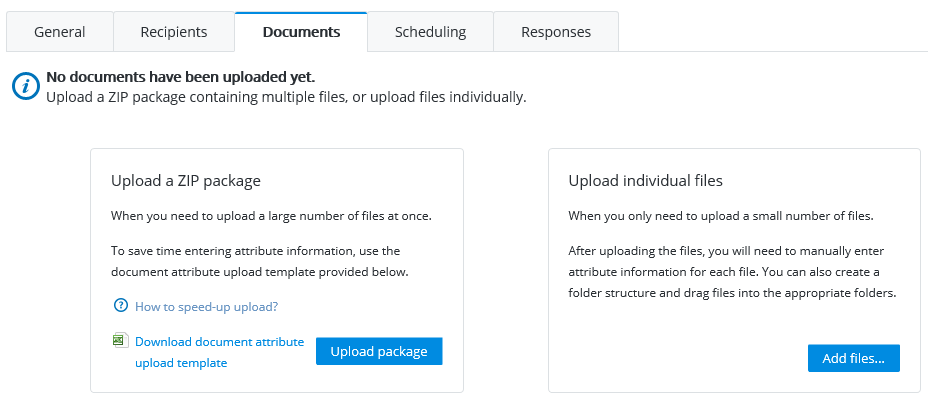
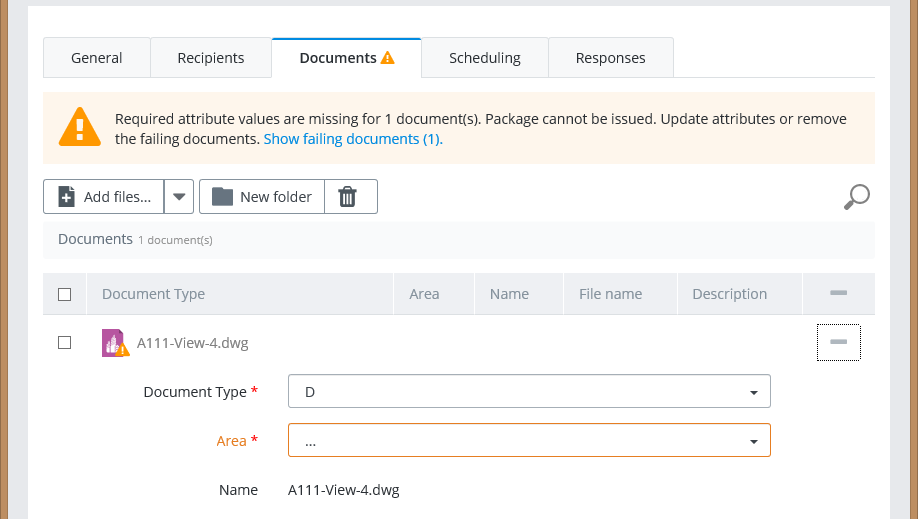
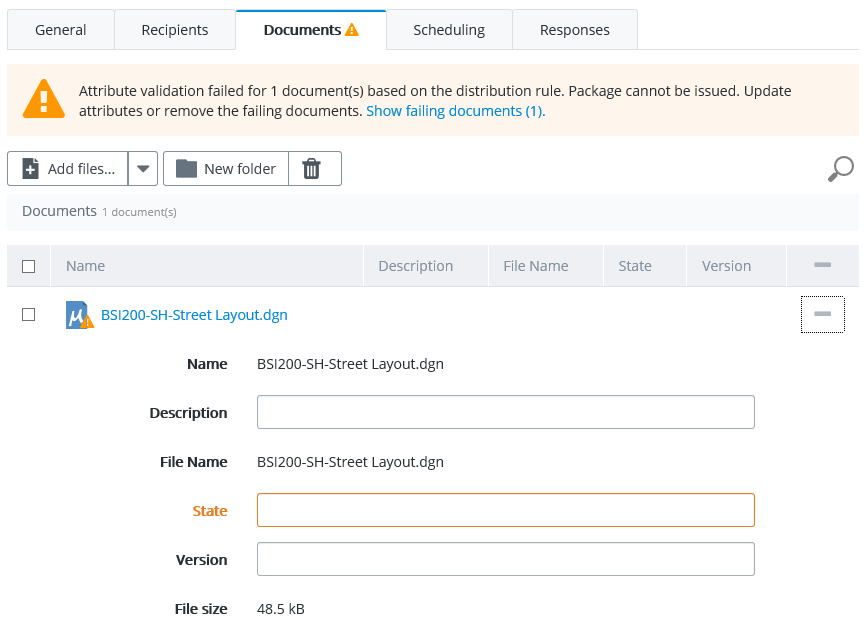
In a new transmittal where no documents have been added yet, the Documents tab will look like this:
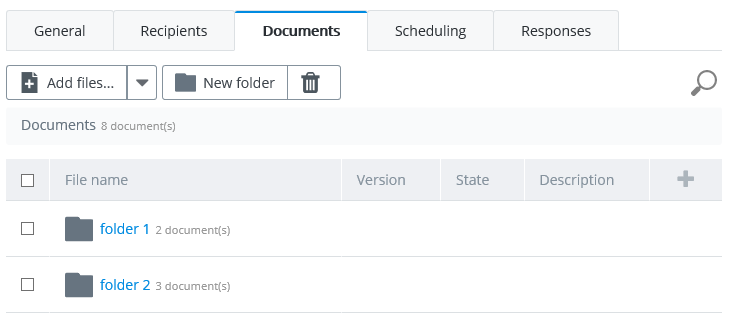
Once you add some documents, whether from the portal or from ProjectWise Explorer, the Documents tab changes to look like this:
-
To add ProjectWise documents, click
Add new documents.
In the window that opens, navigate to and select the documents you want to add, and click Add.
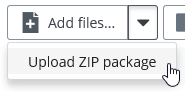
- To upload individual files from the network or local file system, click the menu next to the Add new documents button and select Add files. In the window that opens, navigate to and select the local or network files you want to add, and click Add.
-
To upload a ZIP or 7z package from the network or local file
system with pre-filled attribute data for each document, do the following:
-
If the transmittal has not been saved as a draft yet, save it
now.
You cannot upload a package until you save the draft.
-
If no files have been added to the transmittal yet, click
Upload package.
Or, if some files have been added or a folder structure already exists, click the menu next to the Add new documents button and select Upload ZIP package).
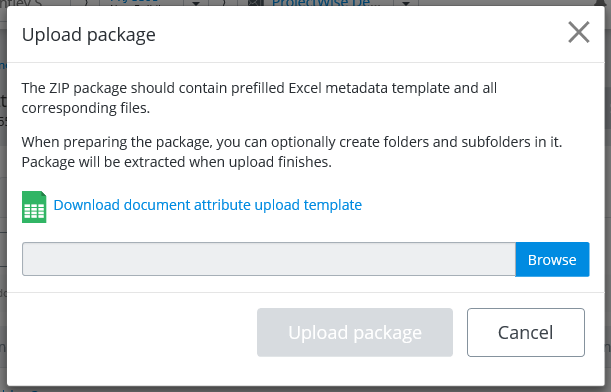
The Upload package dialog opens.
-
Click
Download document attribute upload
template and when prompted, save the attribute template to a local
folder.
The attribute template is a Microsoft Excel spreadsheet in which you will specify the relative file path and appropriate attribute values for each file in the ZIP.
-
Configure the ZIP file and the attribute template as follows:
- Create a local folder.
- Add the attribute template to the root of this folder.
- Add all of the
files you want to upload to this folder.
You can add all of your files to the root folder, or you can create subfolders under the root folder and add files to the subfolders as needed.
- Open the attribute
template file.
You will see the following column headings at the top of the file:
- In the
FilePath column, enter the relative
path of each file in the folder.
For each file that you added to the root folder, just enter the full file name in this column (for example, drawing.dgn).
For each file that you added to a subfolder of the root folder, enter the relative path to the file (for example, Subfolder1/drawing1.dgn).
- In the rest of the attribute fields, enter the appropriate attribute values for each file that you added.
- Save and close the attribute template.
- Create a
compressed zip package of the folder that contains all your files and the
attribute template.
(Right-click the root folder and select .)
- Back in the portal, click Browse to find the ZIP package to upload, then click Upload package.
-
If the transmittal has not been saved as a draft yet, save it
now.
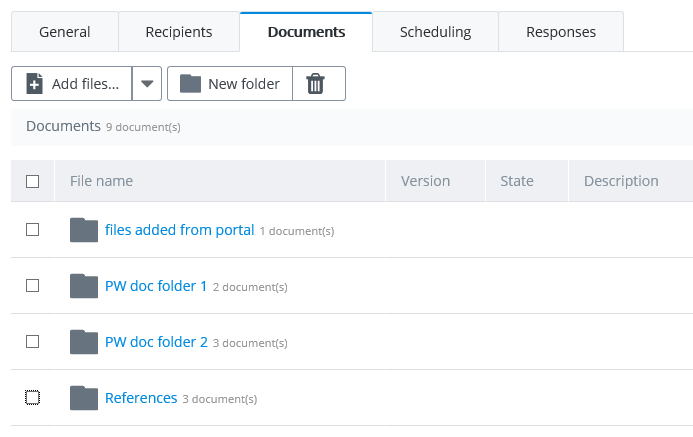
- (Optional)
Use the
New folder button to create a folder structure
inside the package, then add or move documents to the appropriate folders.
You can add documents to the default Documents root folder, or you can create logical subfolders under the Documents folder and add your documents to the appropriate subfolders. You can move documents to other folders by dragging them.
To rename a folder, place your cursor over the folder name and click the pencil icon that appears.
- (Optional)
To remove a document or folder from a transmittal draft, click the
check box next to the document or folder in the list and click the
Delete (trash can) icon
 .
.
-
When finished
adding documents, click
Save draft.