Configuring Distribution Rules for Transmittals
Distribution rules are an optional feature in the project that can be used to ensure that transmittals are always sent to, reviewed by, and approved by the right people, and within the right time frame.
Distribution rules are configured in the document distribution matrix. A document distribution matrix template (a Microsoft Excel spreadsheet) is provided in the portal settings for you to download, configure, and then upload back into the portal settings. Once the configured matrix is uploaded, distribution rules are enabled for the project.
In the document distribution matrix, you can define as many distribution rules as you need for each purpose in the project. Then, when you are creating a transmittal, the purpose you select determines which of the distribution rules in the matrix you can choose from to assign to this transmittal (only the distribution rules that are associated to the selected purpose will be listed).
The distribution rule that you assign to a transmittal draft determines:
- which project participants
are automatically added as recipients to the transmittal draft
(you can still manually add more participants to the transmittal draft, but you cannot remove any of the automatically added participants, unless you remove them from the distribution rule, or select another distribution rule, before issuing the transmittal)
- what actions (if any) are
required for each automatically added participant
(you cannot change the pre-set actions for the automatically added participants)
- the maximum number of days
(up to 999) that can be set for the transmittal's acknowledgement and response
due dates
(you can adjust the due dates to be less than the maximum, but it can never go over the maximum)
- the specific attribute
values that are required for all documents in the transmittal
(each document is validated against the distribution rule when it is added to the transmittal draft)
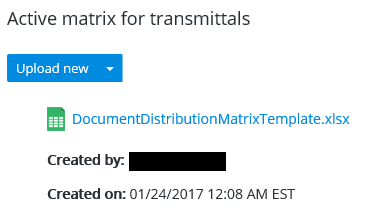
Download the Document Distribution Matrix Template
In order to configure the document distribution matrix, you must first download the document distribution matrix template. If you have made changes in the portal settings since you last downloaded the template, you should download a fresh copy of the template to make sure the template includes the latest/current purposes, attributes, and participants.
Configure Distribution Rules
To begin configuring distribution rules, open the downloaded document distribution matrix template in Microsoft Excel.
Each row in the template represents a distribution rule. There are two pre-configured example distribution rules for each purpose, which you can re-configure as needed and then use. You can add more rows if you want to configure more distribution rules for any of the purposes. You can also delete any rows (rules) you do not need.
To configure a single distribution rule in the matrix (make these changes all on the same row):
- In the
Package Purpose column, click inside the cell
and select the purpose that you want to associate this distribution rule to.
When you click inside the cell, you get a list of the available purposes in the project (Settings > Purposes).
- In the
Name column, click inside the cell and enter
or edit the name of the distribution rule.
The name can be anything you want. This is the name you will see when you select a distribution rule on the General tab of a transmittal draft.
- In the
Max response period (calendar days) column,
click inside the cell and enter the maximum number of days (up to 999) that can
be set for a transmittal's acknowledgement and response due dates (default is
14).
For example, if you enter 25, then when this distribution rule is applied, the person configuring the transmittal can set the acknowledgement and response due dates to be anywhere between 1 and 25 days from the date the transmittal is issued.
- (Optional) If you want
this rule to force all documents in the transmittal to have specific attribute
values, then in the
Attributes section, click inside the cell of
each attribute you want to make a required attribute and enter the specific
attribute value that the document must have. If the attribute has predefined
values, select one of the predefined values from the list that opens when you
click in the cell.
If you leave a cell blank for a particular attribute, then the rule will not require documents in a transmittal to have a value for that attribute.
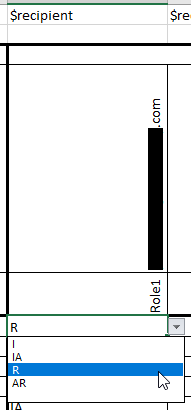
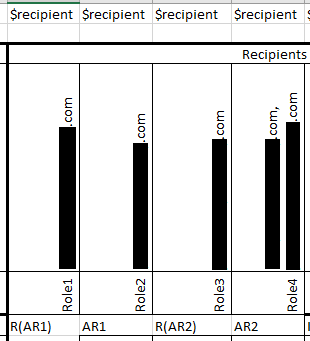
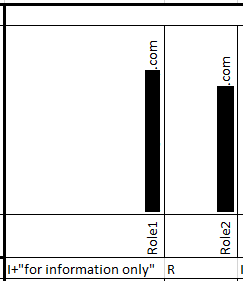
- In the
Recipients section, configure one or more
recipient roles that define which
project participants will be automatically added as recipients to the
transmittal draft, and which reply actions are pre-assigned to them, when this
distribution rule is applied to the transmittal draft.
The document distribution matrix template contains six example roles, which you can configure as needed. You can also add or delete roles as needed.
To configure a recipient role in a distribution rule (basic):
A submittal recipient who is required to respond can send a request to one or more internal participants (additional reviewers) to also respond to selected documents in the submittal. Another way to add these additional reviewers is to configure a distribution rule so that one or more recipients who are required to respond are automatically added to the transmittal draft with their additional reviewers already assigned.
When the distribution rule is applied to the transmittal draft, a note is added in the Details column (on the Audit Trail tab in ProjectWise Explorer, or on the View History page in the portal), listing which additional reviewers were selected to send responses to which responder. When the transmittal is finally issued, either the responder, or any of their pre-assigned additional reviewers, can acknowledge the submittal. This allows the additional reviewers to begin reviewing and responding to the documents in the submittal without having to wait for their responder to acknowledge it.
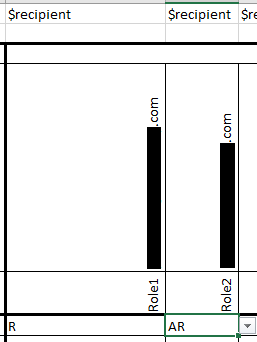
To add additional reviewers in a distribution rule where only one responder is defined:
If your distribution rule includes more than one responder role and you want to add additional reviewers, then you will need to enter custom values (instead of the standard R and AR values) to define which specific additional reviewer role or roles will be assigned to which specific responder role or roles.
In order to enter a custom value, you need to clear the expected values (which are R, IA, I, AR, or blank) from the cell, by copying an unformatted cell from anywhere else in the spreadsheet, and pasting it over the cell where you want to enter a custom value. Some custom value examples are described below.
To add additional reviewers in a distribution rule where more than one responder is defined:
(Optional) To Enter the Default Text That You Want to Appear Next to a Recipient's Name in the Transmittal
When the distribution rule is applied to the transmittal, the default text will be automatically added to the Comments field on the Recipients tab of the transmittal for all recipients assigned to this role. The person configuring the transmittal draft can keep or change this default text as needed.
- In the
Recipients section, configure one or more
recipient roles that define which
project participants will be automatically added as recipients to the
transmittal draft, and which reply actions are pre-assigned to them, when this
distribution rule is applied to the transmittal draft.
- The Comment column (the last column) is for internal use only, and is where you can add a note or comment about the distribution rule, to make it easier for you to identify in the list. These comments are not seen anywhere else but in this spreadsheet.
- Save and close the document distribution matrix when you are finished making changes to it.
Upload the Configured Document Distribution Matrix
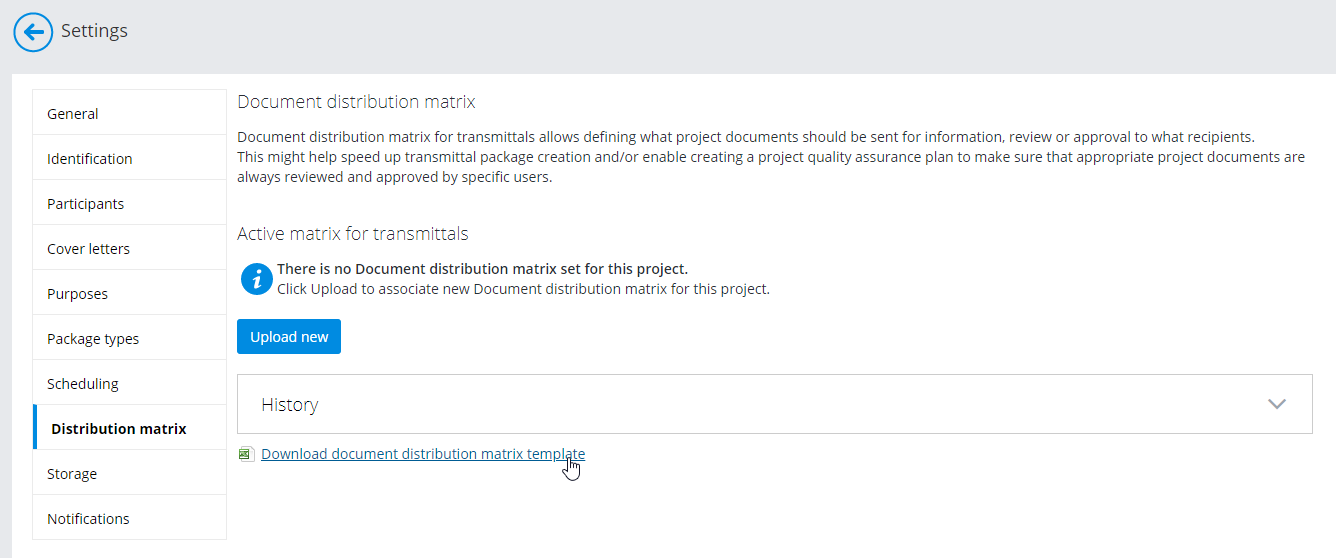
Distribution rules are disabled by default in each project. To enable distribution rules for a project, you need to upload a document distribution matrix in the portal settings.
- Click the
Settings icon
 to open the
Settings page.
to open the
Settings page.
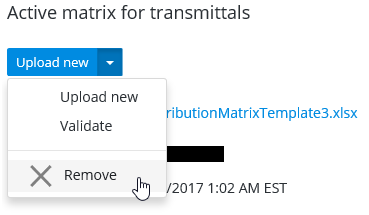
- Click the Distribution matrix tab.
- Click Upload new and select the matrix you just configured.
Once the matrix is uploaded and validated, distribution rules are enabled for this project.
Validating the Document Distribution Matrix
The contents of the matrix are automatically validated when you upload it.
If you configure the matrix incorrectly, it can invalidate the matrix, and you may or may not be able to upload it.
For example, in these cases, it will still be possible to upload an invalid matrix:
- Adding the email address of someone who is not a project participant will invalidate the matrix, but it can still be uploaded: adding that person as a project participant fixes the matrix.
- Adding a purpose that is not in the purposes list of this project will invalidate the matrix, but it can still be uploaded; adding that purpose to the purposes list fixes the matrix.
- Adding an attribute that is not in the transmittal attributes list of this project will invalidate the matrix, but it can still be uploaded; adding that attribute to the transmittal attributes list fixes the matrix.
However, it will not be possible to upload an invalid matrix if:
- the reply actions set for a role contradicts the reply actions that are set in the purpose that is associated to the rule containing the role. For example, if a purpose does not allow recipients to respond, then you cannot configure a role in the associated rule that allows recipients to respond.
- the same purpose has two distribution rules with the same name
- the $purpose, $name or $responsePeriod column is missing
Email Notifications About Invalid Matrix (after transmittal issue)
If a user assigns an invalid distribution rule to a transmittal draft and then tries to issue the transmittal, the user will receive an error message and will not be able to issue the transmittal until the distribution rule is fixed, or a valid distribution rule is selected instead.
If a user assigns a valid distribution rule to a transmittal draft, but the distribution matrix itself is not valid (because it contains one or more invalid distribution rules), the user will be able to issue the transmittal, and an email notification will be sent to the Deliverables Management administrator once every 24 hours after the transmittal is issued until the distribution matrix is made valid (that is, until all of the invalid distribution rules in the matrix are made valid).