Creating Revit Advanced Integration Projects
All the work you do in Revit advanced integration takes place within the Revit advanced integration project, which you create, configure, and use from the ProjectWise browser inside Revit.
The Revit advanced integration project is stored as a document in ProjectWise, has the file extension, .PwdiProj, and is associated to the ProjectWise application, 'ProjectWise Revit Advanced Integration'. You can apply access control settings to the .PwdiProj document in ProjectWise Explorer as you normally would, in order to make it available or unavailable to other ProjectWise users who are also using Revit advanced integration. You can also right-click the .PwdiProj document in ProjectWise Explorer and it will launch Revit and open the project in the ProjectWise browser.
The first project you create will be an empty project, to which you will add:
- documents - links to the Revit project and family documents you are working on, whether local or in ProjectWise
- locations - links to source and destination folders for your Revit content, whether local or in ProjectWise
- environment mappings - Revit-to-ProjectWise attribute mappings, where selected Revit document properties are mapped to ProjectWise environment attributes.
- project mappings - ProjectWise-to-Revit attribute mappings, where selected ProjectWise project properties and/or CONNECTED project properties are mapped to Revit document properties.
Create a New and Initially Empty Project
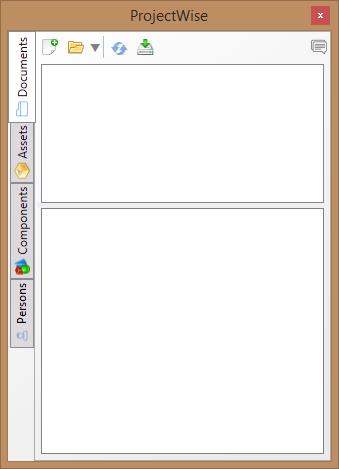
- In Revit, open the ProjectWise browser ().
- On the
Documents tab, click the
Create Project icon
 .
.
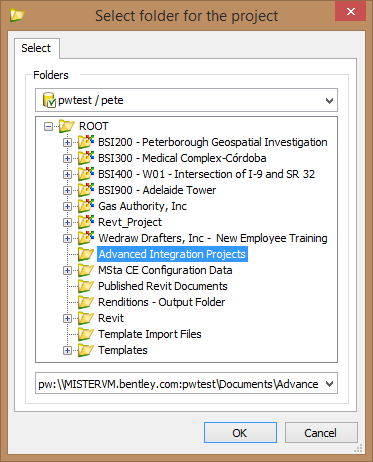
The Select folder for the project dialog opens.
- Select an existing project
or folder in
ProjectWise (or right-click in the dialog to
create a new one) where you want to store the new advanced integration project
and click
OK.
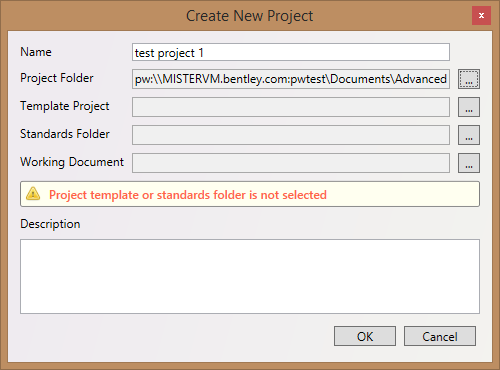
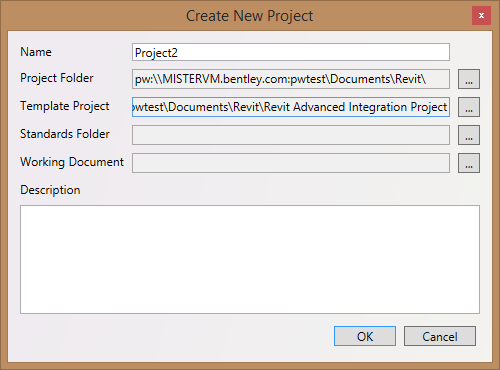
The Create New Project dialog opens.
- Enter a
Name and optional
Description for the project document.
The Name field defaults to the name of the selected folder or project in ProjectWise. You can change it to be whatever you want.
The Project Folder is the location in ProjectWise that you selected to store the project document in, in the previous step. You typically do not need to change the project folder, but you can change it from this dialog if needed (for example, if you accidentally selected the wrong folder).
Do not select a Template Project, Standards Folder, or Working Document yet. These will be described in other sections.
- Click OK.
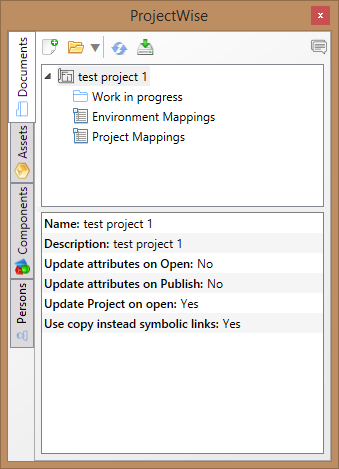
The new project is loaded in the ProjectWise browser. You can now begin configuring the project, including adding Revit documents to the Work in progress folder, and adding locations to the project.
Open an Existing Project
To open an existing project, do one of the following:
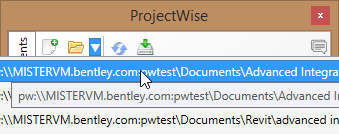
- In the
ProjectWise browser, click the
Open Project icon
 .
.
- In the ProjectWise browser, click the Open Recent Project icon (next to the Open Project icon) and select one of the recently opened projects from the list.
- In ProjectWise Explorer, right-click the .PwdiProj document and select Open. The document is checked out, Revit opens, and the project is loaded into the ProjectWise browser.
Create a Project from a Template
You can also use existing projects as templates to create new projects. For example, create an empty project, and then define your locations and mapping configurations in that project. Once configured, you can use that project as a template when creating new projects. This way you can quickly create new projects with the locations and mapping configurations already defined.
The steps for creating a project from a template are the same as creating a new project, except that when you get to the Create New Project dialog you will select which Template Project (which existing .PwdiProj project document) you want to use as the basis for this new project.
Create a Project Using a Standards Folder
As the alternative to Project template, you may point standard folder in project creation dialog. This folder should be ProjectWise project with some subfolders (as needed). This folder could have the predefined environments in its subfolders, and so it could help you to save a time on creation of folder structure on ProjectWise and on configuring environment.
When using a standards folder, you can turn on the option to copy the standards folder (with environment and settings) to your project folder.
Note: If you create a template project with a standards folder included, and then use the template project to create a project, you do not need to explicitly select a standards folder - in that case the standards folder that is included in the selected template project will be used.
Setting the Default PDF Printer
In order to use the Publish to PDF command, you must have a default PDF printer set in the properties of the Revit advanced integration project.
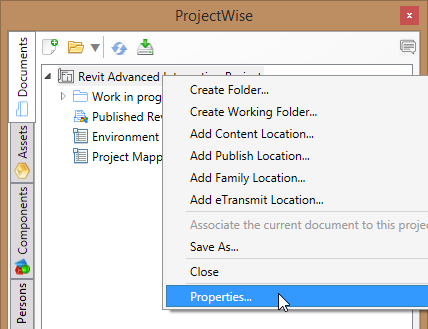
Right-click the project in the ProjectWise browser and select Properties.
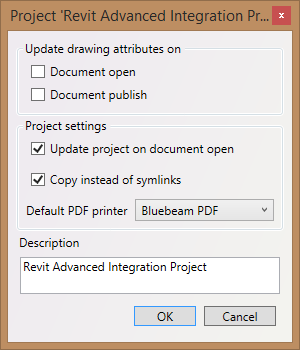
In the Project Properties dialog, set Default PDF printer to the installed and supported PDF printer you want to use and click OK.
Project Commands
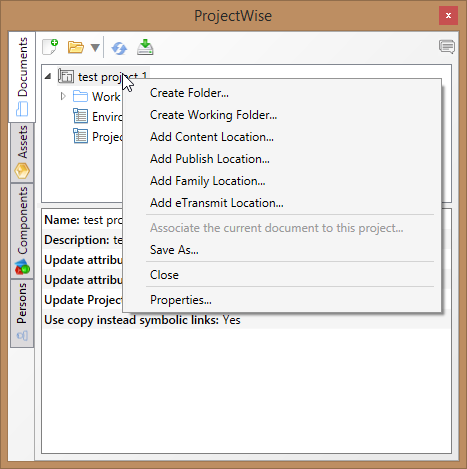
When you have a project open in the ProjectWise browser, you can right-click the project to open the menu of project commands.
| Setting | Description |
|---|---|
| Create Folder | Used to create any of the possible location types. You will specify the location type and other settings when the Create Folder dialog opens. |
| Create Working Folder | Creates another Work in progress folder, which is a folder in the project where you keep track of the Revit documents in this project. You can group your Revit documents into multiple working folders within the project as needed. |
| Add Content Location | |
| Add Publish Location | Used to create a publication location, which is a folder in the project that is linked to some destination folder, for the purpose of publishing Revit project files (RVT) in the project. |
| Add Family Location | Used to create either a family source location or a family publish location. A family source location is a folder in the project that is linked to some folder that contains the Revit family files (RFA) you want to use in your project. A family publish location is a folder in the project that is linked to some destination folder that you want to send your Revit family files to, to make them available to other users. The destination folder of your family publish location might be used as the source folder of another user's family source location. |
| Add eTransmit Location | Used to create an eTransmit location, which is a folder in the project that is linked to some destination folder, for the purpose of sending Revit project files (RVT) using eTransmit. |
| Associate the current document to this project | This command is enabled when you have a Revit project file (RVT) open in Revit. Associating an RVT file to the project makes it so that the opening the RVT file will also open its associated project in the ProjectWise browser. |
| Save As | Lets you save the open project under a new name or to a different folder in ProjectWise. |
| Close | Closes and checks in the open project. |
Project Properties
Through the properties of the project you can set some project options.
To open the Properties dialog, right-click the project in the ProjectWise browser and select Properties.
| Setting | Description |
|---|---|
| Update drawing attributes on - Document open |
Here you can select Revit project attributes (Project Information) automated update conditions ('Document open', 'Document publish') |
| Update drawing attributes on - Document publish | |
| Update project on document open | Makes it so that the recent project is opened when you open a Revit document with an associated project. |
| Copy instead of symlinks | It is recommended that you disable the Copy instead of symlinks' option, that will allow to use the references without copying to mapped location but with using symbolic link creation. However you will need a special permissions to create the symbolic links to make this functionality work. So it is not recommended to use this setting in usual workflows. |
| Default PDF printer | Used to set the PDF printer you want this project to use, when using the Publish to PDF command. |
| Description | The description of the advanced integration project. |