To Create an Output Destination Folder Component That Puts Renditions in a Specified Folder
- Expand .
-
Right-click Output Destination Folders and select .
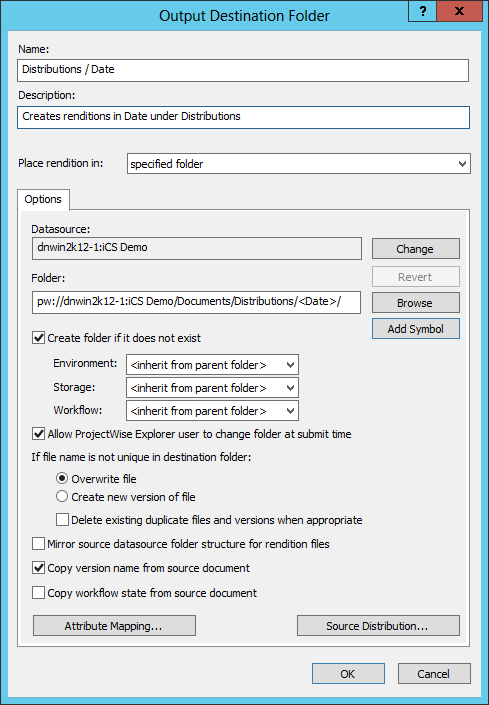
The Output Destination Folder dialog opens.
- In the Name field, enter a unique name for the component.
- (Optional) In the Description field, enter a description for the component.
- Set Place rendition in to specified folder.
- (Optional) Click the Change button next to the Datasource field if you want to change the datasource that the new renditions will be stored in.
- In the Folder field, enter the datasource path to and name of the folder you want to store the new renditions in. You can also click Browse to select a folder.
- (Optional) If the specified destination folder does not exist, turn on Create folder if it does not exist and then select an environment and a storage area to be assigned to the new folder.
- (Optional) Turn on Allow ProjectWise Explorer user to change folder at submit time.
- Under If file name is not unique in destination folder, select either:
- (Optional) Turn on Mirror source datasource folder structure for rendition files.
- (Optional) If you want to map attributes from source documents in the input set to the newly created renditions, click Attribute Mapping.
- (Optional) If you want to distribute source documents from the input set to some destination folder, click Source Distribution.
- Click OK.