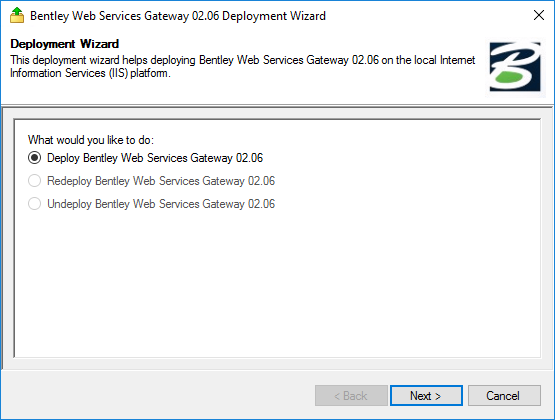
To Deploy Bentley Web Services Gateway and the ProjectWise Plug-in
- Go to the Start page and type Deploy Web Services Gateway.
- When the Deployment Wizard opens, select Deploy Web Services Gateway and click Next.
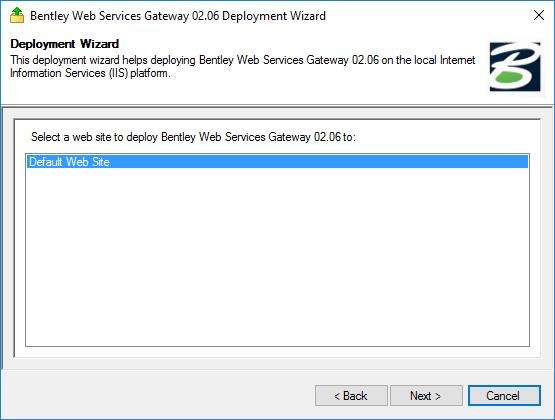
- On the Web Site page, select the IIS website you want to deploy Bentley Web Services Gateway to and click Next.
-
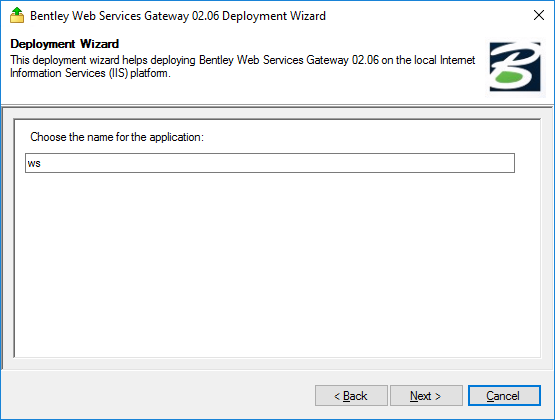
On the
Virtual Directory page, enter the name of the
directory you want to create for Bentley Web Services Gateway under the selected IIS website.
The name is set to 'ws' by default. You can accept the default or change it if needed. When the ws is used, users connecting to this Bentley Web Services Gateway website from a mobile app only need to specify the fully-qualified domain name of the computer on which Bentley Web Services Gateway is installed (for example, servername.domain.com). If you change the default virtual directory name from ws to anything else, then ProjectWise Explorer Mobile app users will have to specify the fully-qualified domain name of the computer plus the virtual directory name, when entering the address (for example, servername.domain.com/virtualdirectoryname).
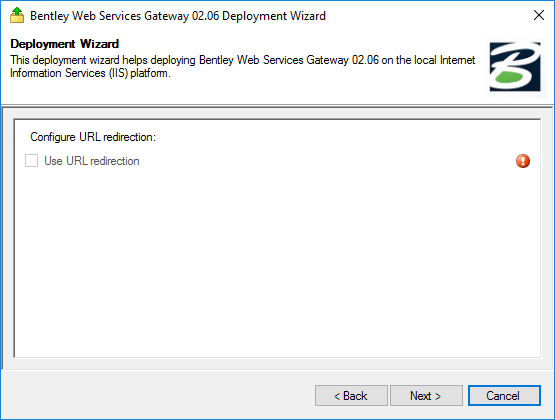
- (Optional)
On the
Configure URL redirection page, turn on
Use URL redirection and click
Next.
You can skip this page if URL redirection is not needed.
URL Rewrite must be installed to be able to turn on Use URL redirection. You can download URL Rewrite from here: https://www.iis.net/downloads/microsoft/url-rewrite
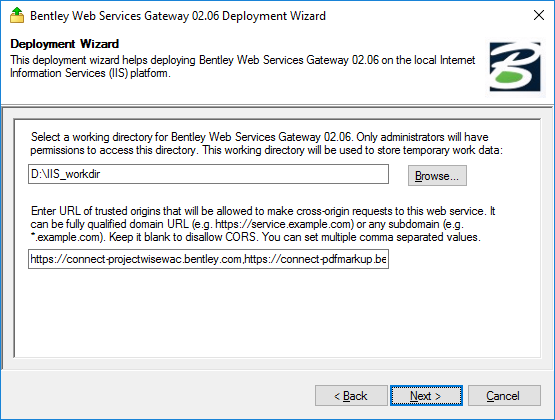
-
On the
Working Directory and CORS page:
- In the first field, accept the default working directory (C:\ProgramData\Bentley\WSG\WorkDir\02.06) or click Browse to select a different folder.
-
In the second field, enter the URL of each Bentley web service
(separated by a comma) that needs to communicate with (make cross-origin (CORS)
requests to) this particular
Bentley Web Services Gateway deployment.
If you plan to use both ProjectWise Web and ProjectWise Web View with this deployment, these are all of the URLs you need to enter:
For this service Enter this URL ProjectWise Web https://connect-projectwisewac.bentley.com PDF Markup Service https://connect-pdfmarkup.bentley.com Microsoft Teams integration (work area connection as a tab in Microsoft Teams) https://connect-projectwiseteamshost.bentley.com older work area connections (those created in old ProjectWise Web / ProjectWise Share) https://projectshareportal.bentley.com ProjectWise Web View https://connect-projectwisewebview.bentley.com Microsoft Office for the web integration (only used by ProjectWise Web View) https://connect-mswopiclient.bentley.com In the deployment wizard, you would enter them all together on one line, like this:
https://connect-projectwisewac.bentley.com,https://connect-pdfmarkup.bentley.com,https://connect-projectwiseteamshost.bentley.com,https://projectshareportal.bentley.com,https://connect-projectwisewebview.bentley.com,https://connect-mswopiclient.bentley.com
-
Click
Next.
Notes about the working directory:
- The working directory is used by Bentley Web Services Gateway to store files that are being transferred between the main ProjectWise server and the app making the request.
- Make sure the folder you specify is not already being used by any other deployment.
- The working directory must be located on the Bentley Web Services Gateway computer.
- The working directory cannot be located under the website's home directory (for example, it cannot be here: C:\inetpub\wwwroot)
- Make sure the local system account has Write permission to the specified folder.
- UNC paths (\\servername\sharename) are not supported.
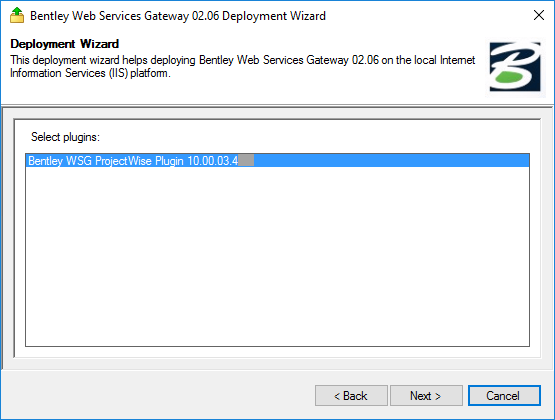
- On the Select plugins page, select the Bentley WSG ProjectWise Plug-in and click Next.
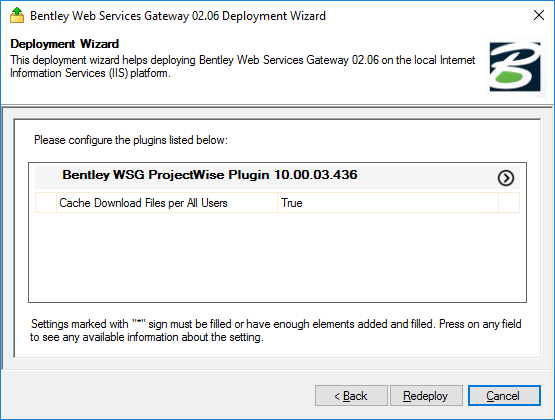
- Configure the setting on the ProjectWise plugin settings page and click Deploy.
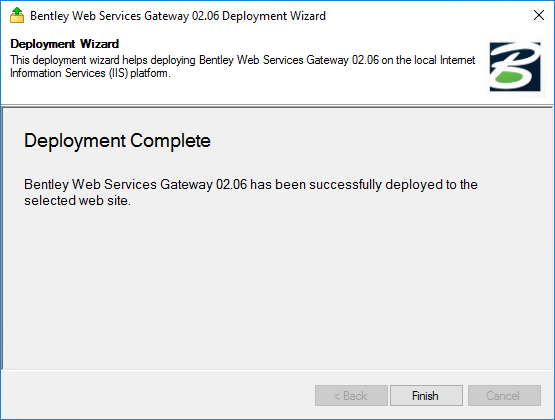
- When deployment is complete, click Finish.