Setting Up Attribute Classes for Microsoft Office Attribute Exchange
For users to be able to work with attribute exchange in integrated Microsoft Word and Microsoft Excel, you first need to set up two specific attribute classes for Microsoft Office attribute exchange in ProjectWise Administrator: one called BuiltinProperties, and one called CustProperties. For Microsoft Office attribute exchange, these are the only attribute class names that will work, as the attribute exchange macros delivered with iDesktop Integration for Microsoft Word and Excel are hard-coded to expect only these two attribute class names. You can set them up in one step by importing the delivered Example Attribute Exchange Rules.ini file, which populates the node in ProjectWise Administrator with the BuiltinProperties and CustProperties attribute classes already configured. Each class contains a predefined list of ProjectWise properties (attributes) that users can insert into their Word and Excel documents stored in ProjectWise. The Example Attribute Exchange Rules.ini file can be imported as part of the datasource creation process, but if it was not imported then, you can import it after the datasource is created.
- If you have imported the Example Attribute Exchange Rules.ini file, and the delivered attribute classes contain all the attributes your users need for Microsoft Office attribute exchange, then you can skip the rest of this section, and users can get started inserting any of these properties into their Word and Excel documents.
- If you have not imported the Attribute Exchange Rules template, or if you have but you need to add additional attributes to the CustProperties class, then continue with this section.
If necessary, you can manually create the BuiltinProperties and/or CustProperties classes. When you create the BuiltinProperties class, you can add some or all of the attributes that are in the delivered BuiltinProperties class, but you cannot add more. When you create the CustProperties class, you can add some or all of the attributes that are in the delivered CustProperties class, but you also have the flexibility to add more attributes to it. If you do add attributes to the CustProperties class that are different from the delivered attributes, then your users need to add a corresponding custom property in integrated Word / Excel for each additional attribute you added to the CustProperties class.
The process for manually setting up the BuiltinProperties and CustProperties classes involves:
- Creating the attribute classes called BuiltinProperties and CustProperties.
- Adding the necessary attributes to BuiltinProperties and CustProperties (using the New Attribute Wizard). For reference, the default attributes in the delivered BuiltinProperties and CustProperties classes are listed in the procedure, To Import the Example Attribute Exchange Rules.ini File.
- Binding one or more ProjectWise properties to each attribute you add (using the New Attribute Wizard, or the Attribute Properties dialog).
- (Optional) Defining the display format for the properties bound to each attribute (using the New Attribute Wizard, or the Attribute Properties dialog).
While it is possible to perform the following procedures as one long procedure using the New Attribute Wizard, for clarity they are broken into three short procedures.
The type of property (numeric, date, or text) that you select to bind to the attribute determines the formatting available for that property. Use one of the following procedures to change the way your attribute values get displayed.
To Import the Delivered Example Attribute Exchange Rules.ini File
-
Right-click the
Attribute
Exchange Rules
node and select
Import Mappings.
The Import Mappings warning window opens. This window states that the import will delete all existing classes, attributes and bindings for mappings that exist in the import file. Are you sure you want to continue?
-
Click
Yes.
-
In the Open dialog, navigate to the
Example Attribute Exchange Rules.ini file,
select it and click Open.
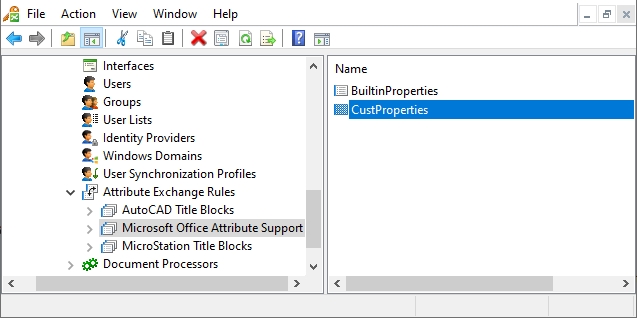
The BuiltinProperties and CustProperties attribute classes are added to the Microsoft Office Attribute Support node in the datasource. The following table lists the attributes that are included by default in each of these attribute classes.
Delivered Attribute Class
Delivered Attributes BuiltinProperties Author Category Comments Company HyperlinkBase Keywords Manager Subject Title CustProperties ApprovedBy Budget ContactName ContactNumber Contractor Country Created Date DocPath Document_FileName Document_Name Document_Number Document_Version Document_VersionSeq DocumentDescrip EndDate Folder_Code Folder_CreateDate Folder_Creator Folder_CreatorDesc Folder_Description Folder_Manager Folder_ManagerDesc Folder_Name Folder_Number Folder_Storage Folder_StorageDesc Folder_UpdateDate Folder_Updater Folder_UpdateDesc Location Owner PercentComplete ProducedByLong ProjectDescrip ProjectName ProjectNo ProjectStatus StartDate
To Manually Create the BuiltinProperties and CustProperties Attribute Classes
- Right-click Microsoft Office Attribute Support and select .
- In the New Attribute Class Properties dialog, enter BuiltinProperties and click OK.
- Right-click Microsoft Office Attribute Support again and select .
-
In the
New Attribute Class Properties
dialog, type
CustProperties and click
OK.
You can now add the required attributes to these classes. See the table above for the list of attributes you can add to these attribute classes.
To Add a New Attribute to the CustProperties Attribute Class
- Under Microsoft Office Attribute Support, right-click CustProperties and select .
- When the New Attribute Wizard opens, click Next.
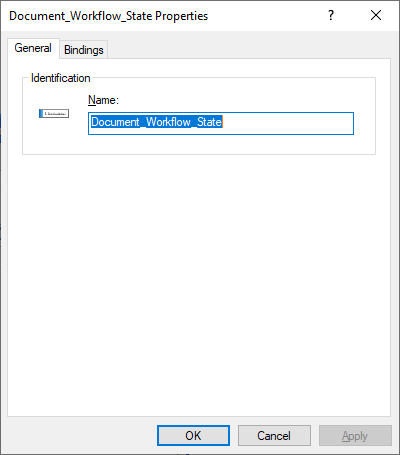
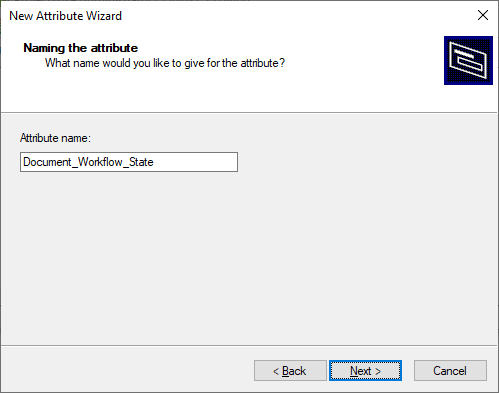
- When the Naming the attribute page opens, enter a name for the attribute and click Next. The name you enter must be unique in the class you are adding it to. Whatever name you use here will be the same name that your users will use when creating the corresponding custom property in Word or Excel, so try to make it a concise and logical name (for example, Document_Workflow_State). If you are adding an attribute to match a custom property that has already been added to the custom properties in Word or Excel, then make sure the name you enter exactly matches (including the correct case) the name of the custom property.
- When the Binding the attribute page opens, click Next.
-
When the
Finish New Attribute Wizard page opens, click
Finish.
The new attribute displays under CustProperties.
To Add Bindings to Your New Attribute
-
Right-click your new attribute and select
Properties.
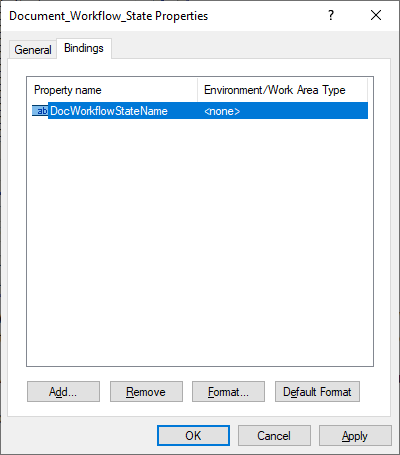
The Attribute Properties dialog opens.
- Select the Bindings tab.
-
Click
Add.
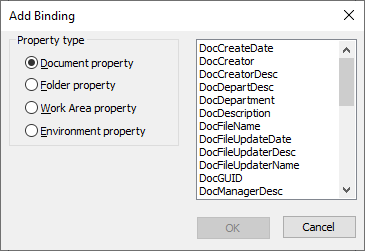
The Add Binding dialog opens, which is used to select which ProjectWise property you want to bind to this attribute. In other words, you will select the ProjectWise property that will define the content that gets displayed when the corresponding custom property gets inserted into the Word or Excel document.
-
In the Add Binding dialog, first select a property type —
Document Property,
Folder Property,
Work Area Property, or
Environment Property. If you selected
Work Area Property or
Environment Property, then select the work
area or environment containing the property you want to bind to this attribute.
Finally, select a specific property from the list and click OK.
The selected property is added to the Bindings tab.
You can bind more than one property to an attribute, but each binding must be created one at a time. Also, while you can bind multiple properties to your attribute, you are limited as to how many properties from each property type you can add. In total you can add:
— one property from the Document Property list OR one property from the Folder Property list (but not one from each)
— one attribute from each environment defined in the datasource
— one property from each work area type defined in the datasource
- Repeat steps 4 and 5 to bind more properties as needed.
- When you have finished binding properties to this attribute, click OK on the Attribute Properties dialog.