Configuring Application Action Associations
For each ProjectWise application, you can define action associations. Action associations determine what program launches when a ProjectWise Explorer user selects to open, view, markup, or print a document associated to an application.
To Create or Modify an Application Action Association
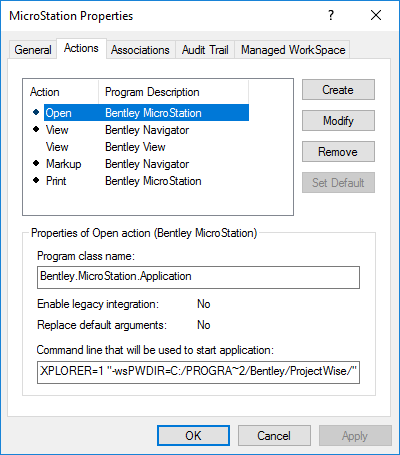
- Open the Properties dialog
for the application you want to modify and select the
Actions tab.
The application's current action associations are listed.
- To create an association,
click
Create.
or
To modify an existing association, select the association from the list and click Modify.
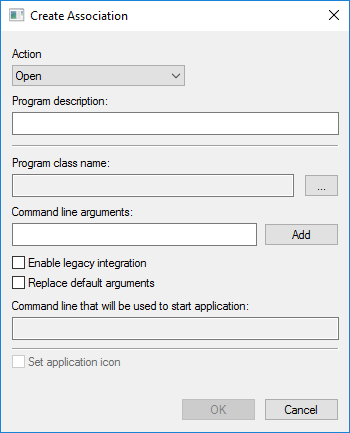
Depending on your selection, either the Create Association dialog or the Modify Properties of Action dialog opens. Both dialogs are essentially the same; they both allow you to configure an action association.
- Select an action from the Action list.
- Enter the name of the program you are associating to the action in the Program description field.
- Set the program class name
by clicking the Browse button to the right of the
Program class name field and the specifying
the appropriate program in the Select Associated Program dialog.
The Select Associated Program dialog lets you specify which program to associate to the action. Using any one of the tabs, specify the program to use. The tab you use is a matter of preference, however not all methods may apply to your situation.
- On the Programs tab you can select from the Windows list of installed products. This list displays the products installed on the ProjectWise Administrator computer, so while this may be the easiest way to identify a program, it is only practical if you also have installed the same programs that your users have installed.
- On the Executables tab you can navigate to and select the executable file (.exe) for the program. Once selected, you can select to use the program executable's path, or you can select the program's registry class name.
- On the Advanced tab you can enter the program's registry class name or the directory path to the program.
- In the
Command line arguments field, enter any
required or optional command line arguments for your application. You can also
click
Add if you want to add a system (ProjectWise) variable or Windows environment variable.
The arguments you enter or add are dynamically entered into the Command line that will be used to start application field.
- Click OK to close the Create Association or Modify Properties of Action dialog, then click OK to close the Application Properties dialog.