Setting Up Views
The columns that users see at the top of various document lists are determined by the view that is applied to the selected folder. Global views are created by administrators in ProjectWise Administrator, or by a user with administrative rights in ProjectWise Explorer, and can be used by all users in a datasource. Personal views are created by users in ProjectWise Explorer, and are only available to the user who created them. Administrators can apply global views to folders as necessary in either ProjectWise Administrator or ProjectWise Explorer, and ProjectWise Explorer users can choose to leave the default views applied, create and apply their own personal views to folders, or select from other available global views. All views are stored in the database so that a user's personal views will always be available to them no matter what computer they log in from.
You can add or remove columns from a view, or you can change the order in which columns display in a view. You can change a view's environment, but only after you have removed any environment attributes from the view.
To Create a Global View
-
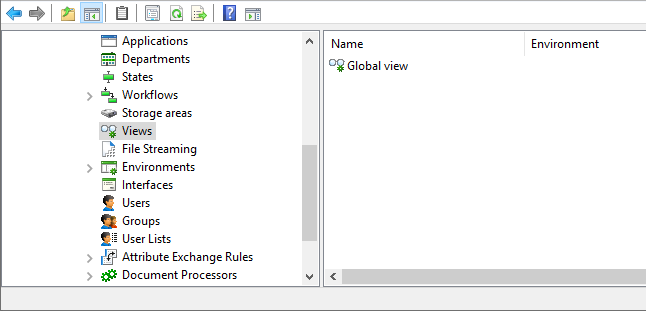
In your datasource, right-click the Views datasource node and select .
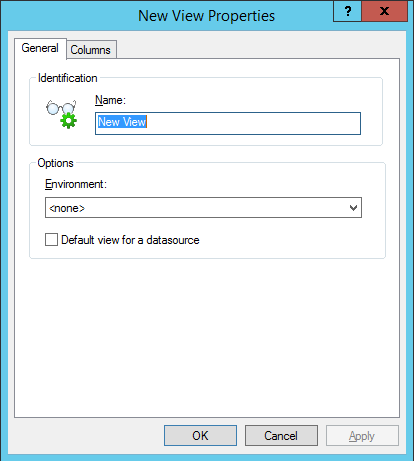
The New View Properties dialog opens.
- Enter a name for the view.
- Required:
Select an environment to associate to this view, or select <none> if you do not want to associate any environment.
Associating an environment to the view enables you to add attributes from that environment to the view.
- (Optional)
Turn on Default view for a datasource.
When set, users who log in to this datasource in ProjectWise Explorer will see this view automatically displayed in the View toolbar, and the view will be applied to all folders and projects that do not otherwise have other global or personal views assigned to them.
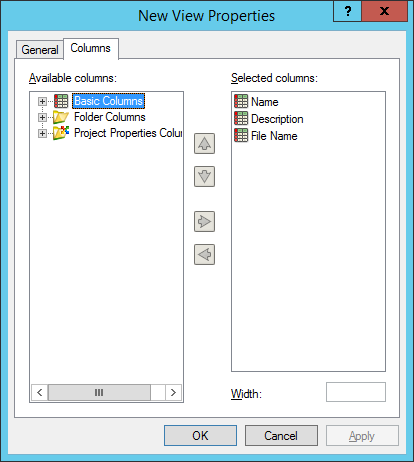
- Select the Columns tab.
- In the Available Columns list, double-click a category to expand it and show the property columns that exist for that category:
-
To add a property column to the view, double-click the property in the Available columns list on the left, or select the property in the list and click the right-arrow button in the center of the dialog.
This adds the property to the Selected columns list on the right, which adds it to the view. Once a property is added to the view, a check mark displays next to that item in the Available columns list.
- (Optional) To remove a property column from the view, double-click the property in the Selected columns list, or select the property in the list and click the left-arrow button.
- (Optional) To change the default order for columns in the view, select a property in the Selected columns list and click either the up or down arrow button to move the item up or down in the display order.
- (Optional) Each column comes with its own default width. To change the width as it will be used in this view, select the property in the Selected columns list, then in the Width field change the value as necessary.
-
Click
OK.
To Change a View's Environment
- Under the Views datasource node, double-click a view to open the View Properties dialog.
-
On the Columns tab, remove any environment attributes from the Selected columns list.
To do this, either double-click the attribute in the Selected columns list, or select the attribute and click the left-arrow button.
-
Once all the attributes are removed, click the General tab.
The Environment list is now enabled so you can select a different environment.
- Select an environment, then go back to the Columns tab to add attributes from the new environment to the view.
- When finished, click OK.