| Type
|
Here, you enter the type of the position number.
- Numerical – The
position numbers are composed of numbers only.
- Alphabetical –
The position numbers are composed of letters only. The order then is A, B, ...,
Z, AA, AB, ... etc.
- Alphanumerical
(Mixed) – The position numbers are composed of a numerical and an
alphanumerical part. The numerical part is following the alphanumerical part,
the order is A1, A2, ..., A9, B1, B2 etc. The number of numerical positions can
be preset under ‘Limits‘.
|
| Last Single
|
Here, you see the single part position set last. At
the beginning, you have to enter the value 0 at numerical position numbers, if
you want to start counting at 1.
|
| Last Group
|
Here, you see the group position set last. At the
beginning, you have to enter the value 0 at numerical position numbers, if you
want to start counting at 1.
|
| Last Subgroup
|
Here, you see the subgroup position set last. At the
beginning, you have to enter the value 0 at numerical position numbers, if you
want to start counting at 1.
|
| Last Assembly
|
Here, you see the assembly position set last. At the
beginning, you have to enter the value 0 at numerical position numbers, if you
want to start counting at 1.
|
| Increment
|
Enter the automatic increase in numbers (normally the
increment is 1).
For example, type
1 to assign the next integer. Type
10 to increment numbers by 10.
|
| Next
|
Displays the next position number to be assigned.
Enter the single part position number that has to be added to the first part to
be positioned a new. The next positioning number assigned is the
"Last" (part or concrete, cages, rebar) number
plus the specified Increment.
|
| Level
|
Sets the level selected from available drop-down
options.
|
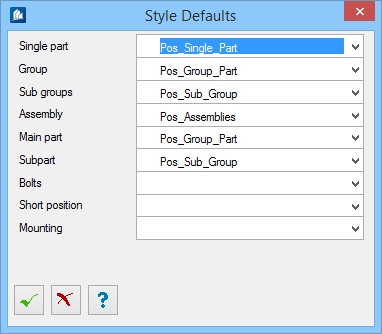
 Set Default Styles.. Set Default Styles..
|
Opens the Style Default dialog, used to assign the
corresponding position flag styles to the selection commands described below.
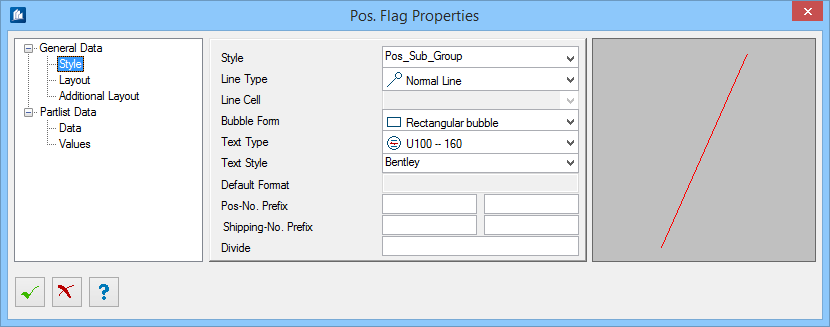
This style describes the depiction of the position
flag, i. e. which information is depicted in which way.
|
 Set Position flag style Set Position flag style
|
Enabled for Alphabetical and Alphanumerical types.
Opens the
Position Number Line dialog where when
Without I,O is checked, the 0 and 1 shall be
used with alphanumeric / mixed numeric position number.
|
 Reset Position Numbers Reset Position Numbers
|
Resets the manual positioning to standard values,
by setting the position number to standard values —Numerical: 0, Alphabetical:
A, Alphanumerical: A0. All these reset "last numbers" to 0, A, or A0 serve as
the "starting points" for assigning new position numbers.
|
| Use Shipping Number
|
In
ProStructures, you have the possibility
to add a position number and a shipping number to a component part. When
checked, the shipping number will be displayed in the position flag.
|
| Register
|
When checked, writes the position number into the
properties of the part. The number specified here will be taken over as
position number or as shipping number into the parts properties.
|
| Scale
|
Sets the scale for positioning flag. Enter the
scale for display scaling of the position texts and other things. The scale
should correspond to the scale of the detail. If a global scale has been
defined, it will be automatically taken over here.
|
 Single part Single part
|
Attaches position flag to a single part.
Select the part to which a position flag has to be
attached. Then, the position flag is created with the set style for single
parts.
|
 Group Group
|
Attaches position flag to a group using group style.
Select the part to which a group position flag has
to be attached. Then, the position flag is created with the set style for
groups/subgroups/assemblies.
|
|
Groups-single part
|
Attaches position flag to a group either as a main
part flag or as a sub-part flag.
Select the part of a group to which a position flag
has to be attached. Depending on the part hierarchy, the position flag is
created with the set style for main part or accessory parts.
|
 Bolt Bolt
|
Select the bolt connection to which a position flag
has to be attached. Then, the position flag is created with the set style for
bolts.
|
 Short position Short position
|
Select the part to which a position flag has to be
attached in form of a short position. Then, the position flag is created with
the set style for short position.
|
 Mounting position Mounting position
|
Select the part to which a position flag has to be
attached in form of a mounting flag. Then, the position flag is created with
the set style for mounting.
|
 Free Free
|
Inserts a position flag without relating to a part.
Select the insertion point to which a position
flag has to be attached. Specify the position flag properties such as style,
position number, etc. in the following dialog.
Attaching the position flag via
Free permits you to create position flags
even without direct reference to a component part. You can make use of this
option e.g. for position flags in 2D drawings the parts of which have been
dissolved or drawn manually.
|