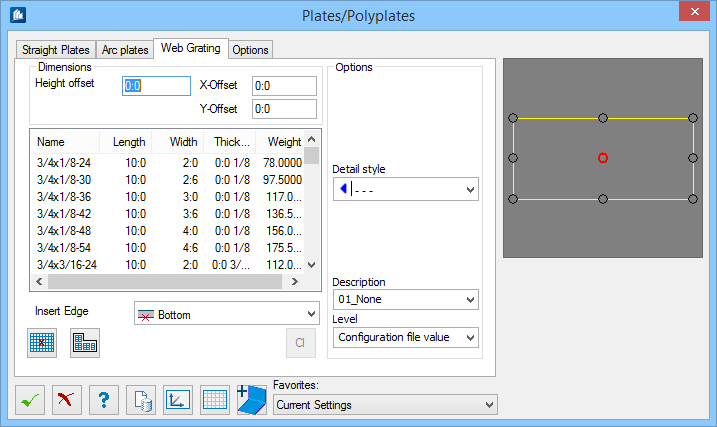
| Dimensions
|
- Height
offset - Sets the height of the plate above the current UCS.
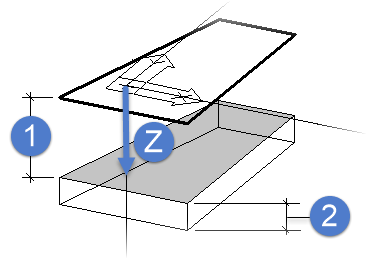
1)
Insertion height, 2) Plate thickness, Z) negative direction
- X-Offset - Sets
an offset in the X direction of the plate relative to the selected insertion
position. You can either enter this value or define the insertion point by
means of the data points.
- Y-Offset - Sets
an offset in the Y direction of the plate relative to the selected insertion
position. You can either enter this value or define the insertion point by
means of the data points.
|
| Options
|
- Part
Family - If part families are defined, you can set them here. The
selection of part family can influence the colour of the component part.
- Detail
Style - If detailing styles are defined, you can determine them
here.
- Display
Class - If display classes are defined, you can determine them
here.
- Area
Class - If area classes are defined, you can determine them here.
- Description -
If general part descriptions are defined, you can determine them here. The
selection of the description can influence the colour and the layer.
- level - Here, you can specify on
which layer the plates have to be stored.
|
| Selection List
|
Here, you select a grating element for insertion.
The dimensions are determined by the database and cannot be modified later.
|
| Insert Edge
|
Sets the vertical insertion position of the plate
relative to the current UCS or ECS system, depending on the selected option.
They are:
|
| Preview
|
Displays the selected plate in a plan view.
Insertion points are shown as well. Select one of these points to insert the
plate at this insertion point.
|
 Checker plate by
insertion point Checker plate by
insertion point
|
Inserts the grating element selected from the list
at the selected insertion point.
|

|
Distributes the selected grating element
automatically within a boundary. You first have to select the border (smartline) and then specify the alignment
and the origin of distribution (see also
"Roof and Wall Covering").
|
 Accept current Accept current
|
After insertion, plates are still connected to the
dialog. Modifications are still possible. Click to interrupt this connection,
thus preventing further modifications (via this dialog) to already inserted
plates.
|