Manual 2D Cut
 Used to insert a cut into 2D
details.
Used to insert a cut into 2D
details.
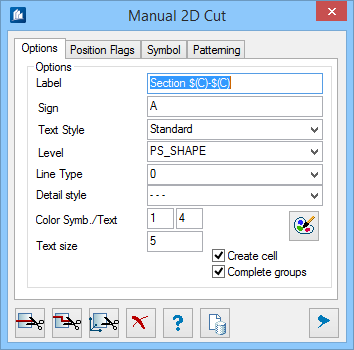
The prerequisite is that the details are still intelligent details. From object selection, the program independently recognizes which objects can be cut and which objects only represent the borders of the cutting arrows (e.g. dimensioning). This means that the cutting arrows are in any case attached outside of dimensioning if you select e.g. a completely dimensioned group including the dimensions.
Dialog Controls
| Setting | Description |
|---|---|
 Line Line
|
Used to create a cut through component parts along a
line to be selected.
Select the parts to be depicted, then the cutting line. Then, you have to indicate the depth of the cut. If you press ESC here, only a cut at the corresponding position will be made. Otherwise, the parts will be cut at the position and the projection of the rest will be displayed. After having created the cut and after having attached the cutting code, you can place the result anywhere you like. |
 Object Object
|
Used to create a cut on the base of a cut object. This may be a view frame or an offset cut. You only have to select the object; selection of the parts is carried out automatically. |
 UCS UCS
|
Used to create a cut of 3D component parts at the current UCS. After selection of the parts, the cut is created at the XY-plane of the current UCS. |
 Cancel Cancel
|
Closes the dialog without saving changes. |
 Help Help
|
Opens online help. |
 Template Template
|
Saves and retrieve (Using Templates) settings to be used on other projects. |
| Favorites | |
  Show /Hide
Preview Show /Hide
Preview
|
Opens or closes, respectively, a flyout panel to display an illustration based on the tool. |