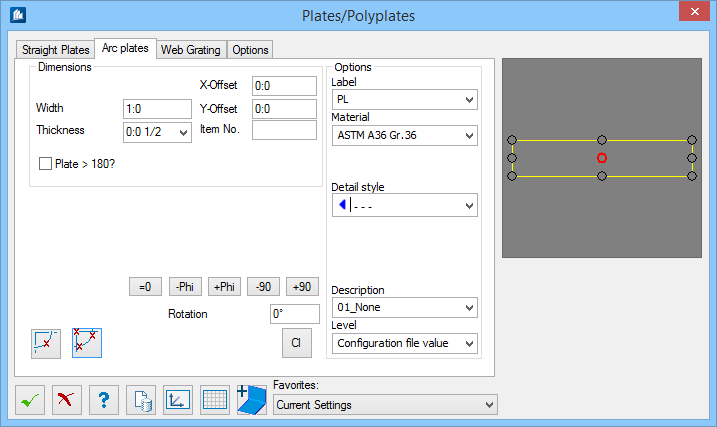
| Dimensions
|
- Width - Sets
the plate width for rectangular insertions.
- Thickness -
Selects the plate thickness from the drop-down list.
Tip: To edit or add available plate
thicknesses, click
 . The file
pro_st3d.ptt is opened in the default
text editor which you can use to edit the file.
Tip: Alternatively, to overwrite any
values, you can select the
Allow user input for Plate Thickness
option on the Options dialog
Arc Plates tab. Otherwise, only values
from this list may be selected.
- X-Offset - Sets
an offset in the X direction of the plate relative to the selected insertion
position. You can either enter this value or define the insertion point by
means of the data points.
- Y-Offset - Sets
an offset in the Y direction of the plate relative to the selected insertion
position. You can either enter this value or define the insertion point by
means of the data points.
- Item
No. - Specifies an item number.
- Plate
> 180? - When on, the tool creates an arc plate greater than
180° when using the three point insertion method.
|
| Options
|
- Label - Assigns
a name for your plate from an editable file. The content of this file is
displayed in this list. Click
 to open
Pro_St3d.pdc. In addition to the name, you
can define a weight as well which is indicated with plain text. After selection
of a name, the material is directly set as well. to open
Pro_St3d.pdc. In addition to the name, you
can define a weight as well which is indicated with plain text. After selection
of a name, the material is directly set as well.
- Material -
Lists all available materials.
- Part
Family - If part families are defined, you can set them here. The
selection of part family can influence the colour of the component part.
- Detail
Style - If detailing styles are defined, you can determine them
here.
- Display
Class - If display classes are defined, you can determine them
here.
- Area
Class - If area classes are defined, you can determine them here.
- Description -
If general part descriptions are defined, you can determine them here. The
selection of the description can influence the colour and the layer.
- level - Here, you can specify on
which layer the plates have to be stored.
|
| Preview
|
Displays the selected plate in a plan view.
Insertion points are shown as well. Select one of these points to insert the
plate at this insertion point.
|
 On arc On arc
|
Inserts a bent plate by selecting an existing arc
element.
|
 By three points By three points
|
Inserts a bent plate by entering three data points.
Tip: Hold <ALT> upon
entering data points so you can enter an arc with and angle greater than 180°.
|
| Rotation options
|
- =0 – Resets a
rotated bent plate to its original position prior to any rotations.
- -Phi – Rotates
the plate in a negative direction using the
Rotation angle entered here.
- +Phi – Rotates
the plate in a positive direction using the
Rotation angle entered here.
- -90 – Rotates
the plate in a negative direction by 90°.
- +90 – Rotates
the plate in a positive direction by 90°.
|
| Rotation
|
Sets the value used for rotation by either the
+Phi or
- Phi options.
|
 Accept current Accept current
|
After insertion, plates are still connected to the
dialog. Modifications are still possible. Click to interrupt this connection,
thus preventing further modifications (via this dialog) to already inserted
plates.
|