To Create Saved Views in 3D View
In addition to the
standard
Views, you can create and share views with the
Saved Views tool located on the toolbar.
-
Click
Views (
 ) in the Toolbar.
The Saved Views panel opens. For example,
-
Enable
Show All Views.
The saved view list is updated listing all saved views in the project, including the standard Views.
-
Select a saved view in the list that you want to use to create a
new saved view.
The saved view opens in the 3D View.
- You can manipulate the model in the view such as change settings or the view, apply filters, and so on.
-
When you are finished, click
Views (
) in the Toolbar, and then click
Create (
 ).
).
The Create Saved View dialog opens.
-
Enter a
Name for the saved view, and then click
OK.
The saved view appears in the list.
-
You can edit a saved view by clicking the ellipse menu (
 ) on a saved view.
-
Select
Update.
The saved view definition is replaced with the current view settings.
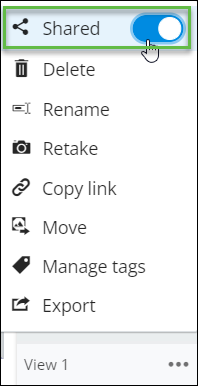
-
To share the saved view, click the ellipse menu (
) , and then enable
Shared.
The saved view is now shared with all project team members.