To Modify Column Options for Grids
You can customize your Class table to display columns of your choosing, rearrange the order of columns, hide, and also mark columns as "read-only".
Follow these steps to edit the column options for a grid.
- Open Tag Browser.
-
In the iModel tree, click
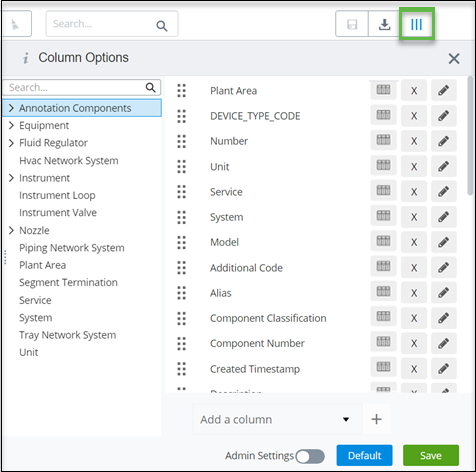
Column Options for Grid (
 ) and select the Class that you
want to work on.
) and select the Class that you
want to work on.
The Column Options dialog appears, listing all visible grid columns for the selected Class. For example,
-
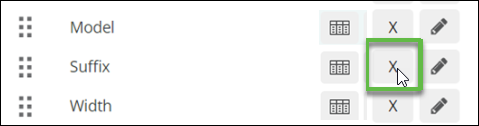
To remove a column, click its
Hide button (
 ).
For example,
The selected column is hidden in the grid.
).
For example,
The selected column is hidden in the grid.
-
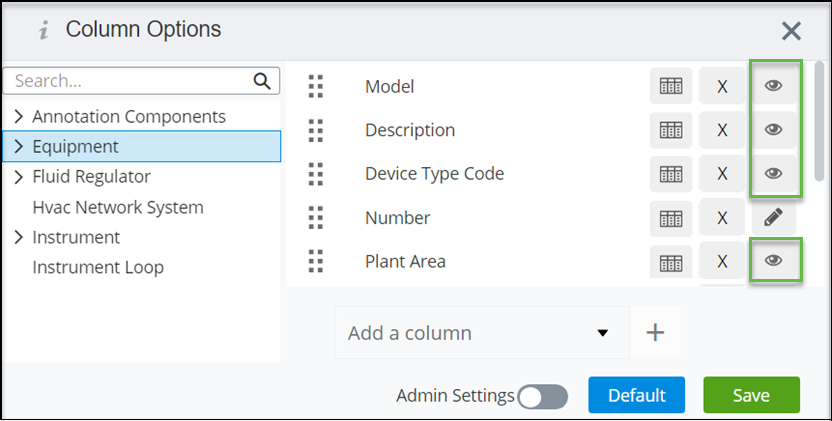
To add hidden columns to the grid, expand the
Add column(s) list, then select the column(s)
that you want to add, and then click the
Add icon (
 ).
For example,
).
For example,
The column(s) are added to the bottom of the list.
- You can rearrange the order of columns by selecting the row that represents the column you want to move, and then dragging and dropping it into the desired position. For example,
-
To prevent users from editing contents in a column, click the
ReadOnly icon (
 ) to change the column to
read-only status.
The icon changes to
Editable (
) to change the column to
read-only status.
The icon changes to
Editable (
 ) and no changes can be made to
the column in the grid. For example,
) and no changes can be made to
the column in the grid. For example,
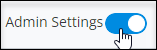
- (Optional) Enable Admin Settings to update the spreadsheet layout on Project level.
-
When you are finished, click
Save and close the dialog.
The grid is updated with your selections.