Creating Saved Views
In addition to the
standard
 Views available, you can create and share views
with the
Saved Views tool located on the toolbar at the
bottom of the 3D View.
Views available, you can create and share views
with the
Saved Views tool located on the toolbar at the
bottom of the 3D View.
-
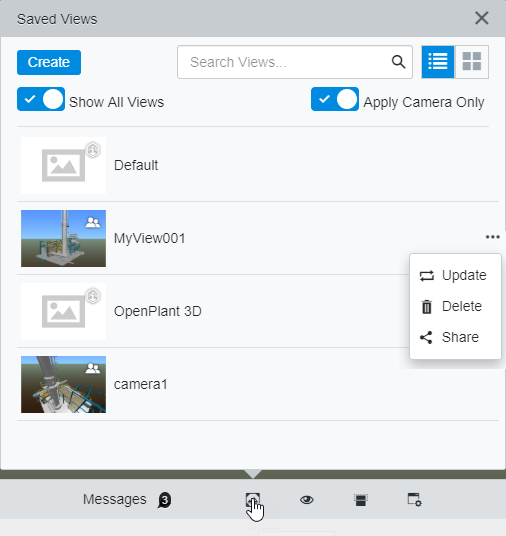
Click the
Saved Views icon in the toolbar.
This opens the Saved Views pop up settings tab.
-
Click Show All Views.
The saved view list is updated listing all saved views in the project, including the standard Views.
-
Click on any saved view in the list.
The saved view is applied in the 3D View.
- Manipulate the model in the view, change some settings, etc. to prepare a new saved view.
-
Click
Create.
The Create Saved View dialog opens.
-
Enter a name for the new saved view, and click
OK.
The new Saved View is added to the list.
-
Click on the new saved view in the list of saved views.
Your new saved view is applied.
-
You may not be satisfied with the new saved view. Make a change in
the current view. For instance, rotate it slightly. Click the
··· button that appears on the saved view you
just created.
A menu appears with options for the saved view.
-
Select
Update.
The saved view definition is replaced with the current view settings.
-
Click the
··· again, and select
Share.
The saved view is now shared with all team members in the project.