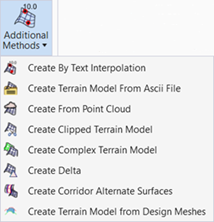
Create Corridor Alternate Surfaces
 Used to create a terrain model from user-specified points in a corridor model along any given path.
You can access this tool from the following:
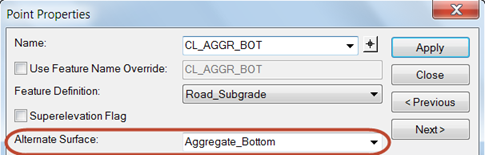
The Create Corridor Alternate Surface tool creates a terrain model from user-specified points in a corridor model along any given path. For example, it may be desirable to obtain a surface for the bottom of the aggregate lift in a pavement layer structure. In this example, each point along the bottom of aggregate path would have set the name to be used for that particular surface. It is important to use the same name for each point that is to be part of the aggregate surface path. All points with an Alternate Surface name specified are added to an alternate surface. Specify the alternate surface name in the Corridor Modeling > Create Template > Edit Point > Point Properties dialog. The options are to key in a new name or select from a previously keyed in name.
All alternate surfaces (and corresponding points) for a specified template can be viewed in the listing for the active template.

The software scans the template points for Alternate surface(s). If one is found, a terrain model is created. It copies all breaks, boundaries, etc. into the alternate surface and assigns template points feature definition from the corresponding point in the Template. The resultant terrain model is named with the alternate surface name prepended by the corridor name.
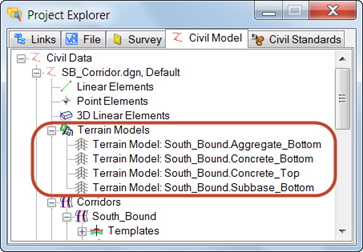
Project Explorer
The created alternate surfaces are listed under Terrain Models within the Project Explorer.
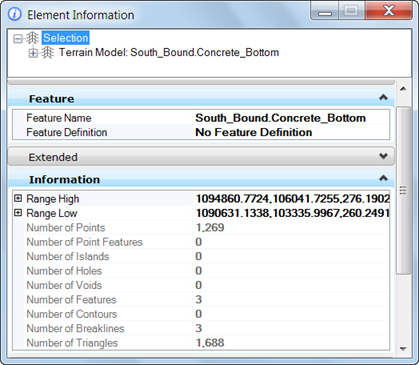
Right click on any terrain model to open the context sensitive menu and select Properties to view properties and change display settings, etc.
Element Info
Workflow: To Create Alternate Surfaces
-
Select the Create Alternate Surfaces tool and follow the heads-up prompt to select the corridor. The processing progress bar is displayed at the bottom of the screen.
-
Open the Project Manager to view the created terrain models. Use Properties to view attributes or change display settings. Properties can also be accessed by graphically selecting any terrain model, right click and select Properties (Element Information).