Road Template
The Modify Road Template tool lets you edit the template of a road section.
From the Road Placement Tools, select the Road Template tool.

Tool Settings
Once selected, the Modify Road Template settings dialog displays. Clicking on the Template will open the Templates library dialog from which you can select the template to be used.
Refer to this section for details: Library Picker.
- Select the template to be used.
- Click on the road from which the new template should be applied.
- Move your mouse and click again to complete. The new template will be applied on the defined section and will automatically create the transitions.

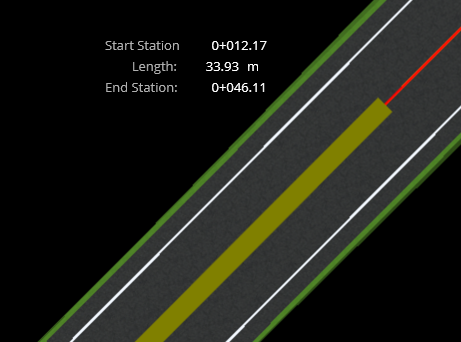
Heads-up Display
When using the Modify Road Template tool, the heads-up display dialog appears and display the Start Station, the Length and the End Station values.
Road Transitions
Whenever the template of an existing road is changed (for example, changing the template from a two-lane road to a four-lane road), a transition is automatically created to bridge the gap between the different road templates.
By default, the lane striping in the road transitions are displayed so that the lanes are added or subtracted from the outside.
-
Select the transition by left-clicking twice with the Element Selection tool. The transition will be highlighted and a sprite will appear in the center.
-
Left-click the sprite in the center of the transition to alter the lane striping. The lane striping will change to show the lane(s) added or subtracted from inside.

