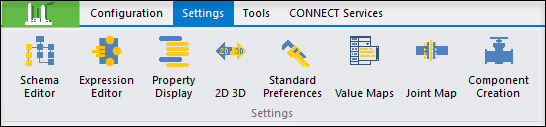
| Define Class Name
|
The Defined Standard Preferences section has a drop down which
lists the classes that currently have properties defined that are displayed in
the Standard Preferences dialog. Each class is associated with a task pane
which is defined in the Associated task panes section.
Note: The classes
displayed in the Schema Configuration utility above are the default classes for
which Standard Preferences are defined.
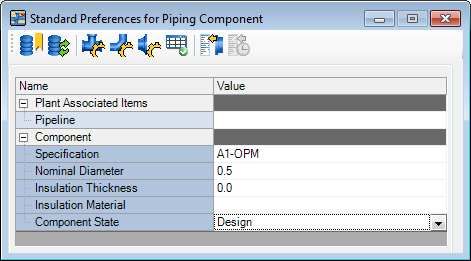
When a task bar is opened in
OpenPlant Modeler, such as Piping, then the
Standard Preferences dialog displays the preferences defined for the Piping
Component class, which is associated to the Piping taskbar.
Use the
Add New Class
 or
Delete or
Delete
 buttons to the right of the grid
to add or delete a class. When adding a class the Select Class dialog displays
providing a list of classes to choose from. Select a class from the list to add
it. buttons to the right of the grid
to add or delete a class. When adding a class the Select Class dialog displays
providing a list of classes to choose from. Select a class from the list to add
it.
|
| Define Properties
|
This grid allows you to define which class properties are to be
included in the Standard Preferences dialog. Also defined are how the
properties are displayed and the type of user input to be used to define a
value for the property.
Some of input methods require arguments while others do not. For
example, the
KEYIN method has no arguments, thus the
argument cell will become read-only. However, for the
LOOKUP type you will be prompted to select
a class from the schema inheriting from
LOOKUP_VALUE_MAP_CLASS.
|
| Property Name
|
Lists the property name to be displayed in the Standard
Preferences dialog. To add a new property, click the
button and select a new property
from the Select Property dialog shown below.
Highlight a property name and click
Select Property to add to the list.
|
| Box Order
|
Determines the numerical order in which the property will be
displayed in the Standard Preferences dialog.
|
| Input Method
|
Defines how the user will input values for the property in the
Standard Preferences dialog. The following options are available:
- Values: This
method allows you to enter available values, (comma separated such as 4,6,8,10
for Nominal Diameter) which will display as a drop down list in the Standard
Preferences dialog.
- Keyin: Provides
a text box in the Standard Preferences dialog allowing you to manually key in
the value for the property.
- Query: This
method will query the current spec and list all of the unique values for the
property in a drop down list.
- LoadInstances:
Queries the current
.dgn for class instances as defined in the
arguments. Double-click in the
Input Method Arguments to display the
Select Class dialog (shown earlier) and select a class.
- Lookup: This
method displays all properties of the value map class.
- Internal: Works
only for Standard, Specification and Nominal Diameter properties. For internal
use, the implementation is Standard Preferences specific and hard coded.
|
| Input Method Arguments
|
For input methods such as
Values,
Lookup,
Query, the arguments define how those input
methods populate the Standard Preferences fields. (For example: If you are
using a
Query input method, the actual query would
be defined here.)
|
| Group Name
|
Used for grouping the attributes together. You can enter any
group name here.
|
| Associated Task Panes
|
Standard Preferences need to be associated with a task pane, so
when the task panel opens, standard preferences dialog can refresh itself with
that associated class. It is possible to associate more than one task pane with
a class. To associate a task pane with the selected class, click the
button to display the following
dialog.
Enter the name of the task pane and click OK to add it to the
list. You can delete an associated task pane by selecting it and clicking
. When you are finished making
modifications in the Standard Preferences tab, click
Save to save your changes. If you choose not
to save the changes, click
Close to close the Schema Configuration
utility without saving the changes.
Note: If you click
Close before
Save, you will be prompted with a message
asking if you want to save the changes before closing.
|
 This option lets you edit/add
which standard preferences are available and how they are defined for a class.
This option lets you edit/add
which standard preferences are available and how they are defined for a class.