Report Form
Used to display, edit a report generated from the Select Reports dialog.
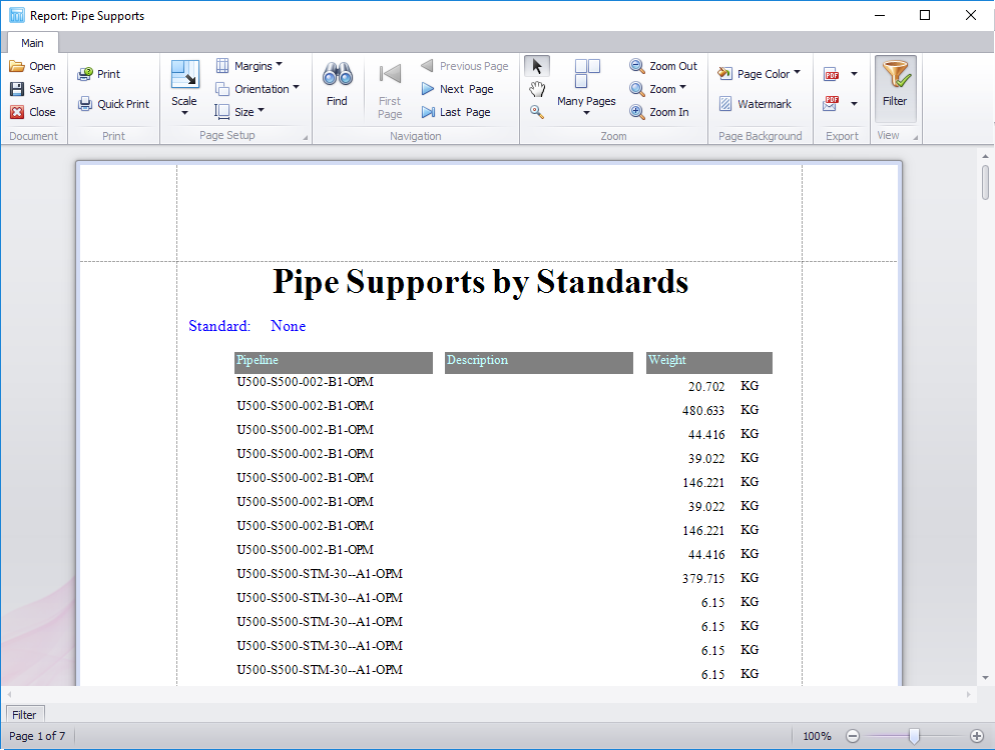
The report form has the following ribbon that provides editing options for the report.

| Setting | Description |
|---|---|
| Document Options | Provides options to save changes to the current report, or open an existing report. |
| Print Options | Options to print the report. The Quick Print option prints the report as is to the default printer, which the Print option will display a print dialog so you can define print settings if desired. |
| Page Setup | Standard page setup options such as scale, margins, orientation etc. |
| Navigation Options | Basic navigation tools for viewing multi page reports. |
| Zoom Options | Zoom options which apply to the report for editing options only. |
| Page Background | Options to apply background color, or watermarks to the report. |
| Export Options | Options to export the report to a defined location
using different file formats. The option to email the report in different file
formats is also available.
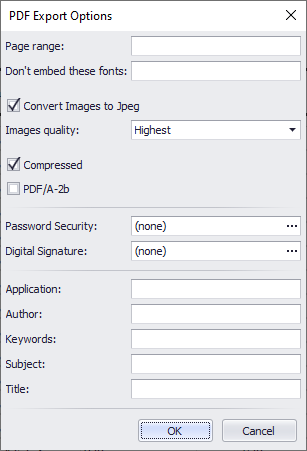
When you press the Export button, an Export Options
dialog will display. For example, the PDF Export Options is shown below:
Set the options as desired and click OK. You will be prompted with a standard Save As dialog where you can enter a name and location for the report. |
| View | The view options toggle the display of the Reports and Filter windows in the main window. The Reports window window displays the navigation tree listing all of the available reports, while the Filter window displays an interface to build filters to apply to the report views. |
Export Report to ProjectWise
The reporting tools recognizes if you are working in a project from a ProjectWise Managed Workspace. When a managed workspace is detected a ProjectWise Options button is added to the ribbon.

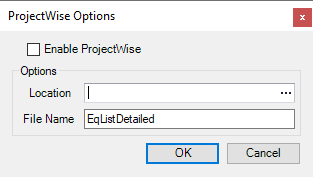
| Setting | Description |
|---|---|
| Enable ProjectWise | This option Enables/Disables the ProjectWise integration with the Exporting process. If it is disabled, the export tools will work as they do in a local workspace and allow the user to select a directory in which to export the report. |
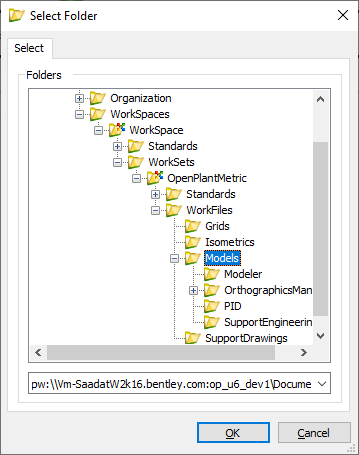
| Location | Click the Browse icon to display the ProjectWise Select Folder dialog where you can define the directory where the report will be exported: |
| File Name | Enter a name for the report file. The report template name is used as a default placeholder for the file name. |
| OK | Once you have defined the Location and File name click OK to save the settings. |
Once you have defined the ProjectWise export options select a format in which to export the report from the Export list. An options dialog will display options for the type of report selected the same as if you were exporting to a local directory.
A notification message will display once the export process is complete.