Change Spec/Size
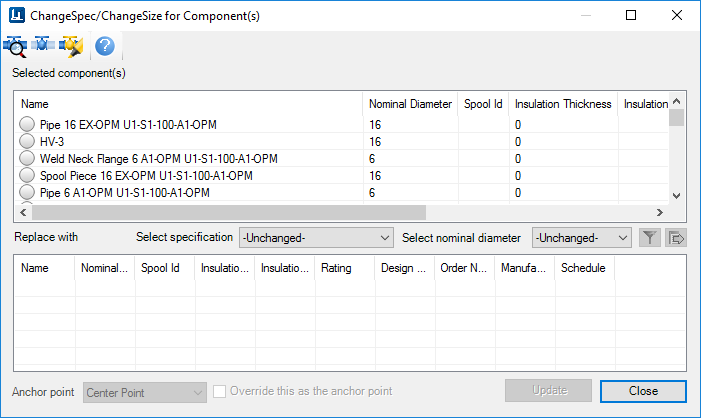
This function enables the user to select a series of components that have already been inserted into a drawing, and change their Size and/or Spec interactively. The new components can then be inserted into the drawing, using the old component class, location and connection information as well as the old component data for line number, service, insulation, etc.
Accessed from the Pipeline ManagerTo change the Spec/Size of the selected components, you need to select the new value from Select specification and Select nominal diameter drop down lists. By default, the value is set to unchanged which means that property will not be changed. This gives you the option to change either the Size, the Spec, or both for the selected components.
| Setting | Description |
|---|---|
| Zoom Options | |
| Selected Components | This grid lists the component(s) that were selected from the Pipeline Manager. The new size and specification will apply to all of the components listed here. |
| Replace With |
|
Define Filter for Spec/Size

|
Displays the Component Selection Filter dialog which lets you define a filter to refine the search for available components to use when changing the Size or Spec of components. |
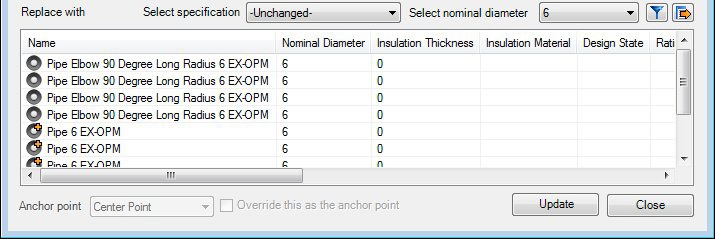
Execute Spec/ Size

|
Click this button to apply the new size/spec to the
components. Upon completion the selected components will display in the bottom
grid with the new size values applied as shown below:
If a component has a
 symbol next to a record as shown
above, there is more than one component record in the spec that matches the
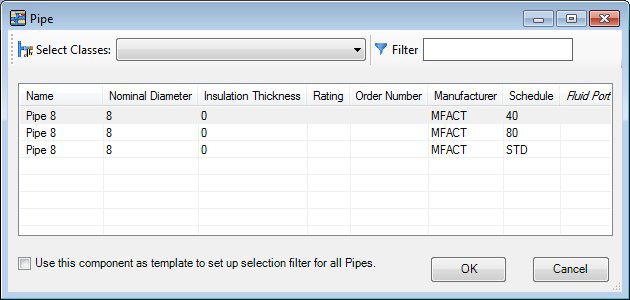
size/spec criteria. Double-click on the component to display the
Spec Record Selection dialog which will list the available
component records which match the size/spec criteria. symbol next to a record as shown
above, there is more than one component record in the spec that matches the
size/spec criteria. Double-click on the component to display the
Spec Record Selection dialog which will list the available
component records which match the size/spec criteria.
|
| Anchor Point | These fields are used for the Replace Components command and not available here. |
| Update | Updates the model with the changes to the components. |
| Close | Closes the dialog without saving the changes to the model. |
Use Template Instance
Auto-Match the Original Component
There is a configuration variable which makes it possible to auto-match a replacement component without defining any custom filters. This auto-match works similar to the custom filter but it uses the original component as a template and will try to find the best matching component from the available components in the specification.
Using the following configuration variable, you can configure which properties to use to best match the component:OPM_AUTO_MATCH_PROPERTIES_FOR_REPLACEwhich points to a semicolon (;) separated list of EC properties. User can include EC properties of components along with port properties. Port properties must be prefixed with the keyword (PORT.). The default properties are defined as follows:
SCHEDULE;RATING;PORT.FACING