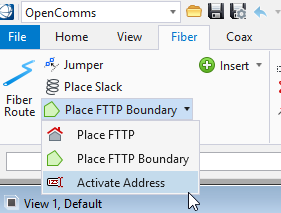
Activate Address (FTTx Design and Operations Utility)
This command is used to generate a technician work order and apply a status change to a customer location in a FTTx design architecture.
Locate an Address
- Select the Activate Address icon in the Modify/Delete section of the Fiber tab:
- The Find An Address dialog box opens.
- Enter the Street # and/or Street Name.
- Select Locate Only.
- Click Go to proceed.
- The Select Address dialog box opens.
- Click OK for the map to zoom in to the address that is highlighted.
Activate an Address
- From the Find An Address dialog box, select Activate and click Go.
- The Activate Customer dialog box opens.
- Populate a status to be rippled from the customer ONT to the termination port on the LCC feeding the area as well as a fiber drop cable type to be used from the fiber tap to the ONT.
- Once the customer activation command has been run in OpenComms, an install technician work order is created as a text file or it can be interfaced into other database systems. The work order lists the customer address, drop cable distance, connection point instructions to connect at fiber taps and splices and all connections to the Wire Center rack and port location.


