Creating Thematic Classes
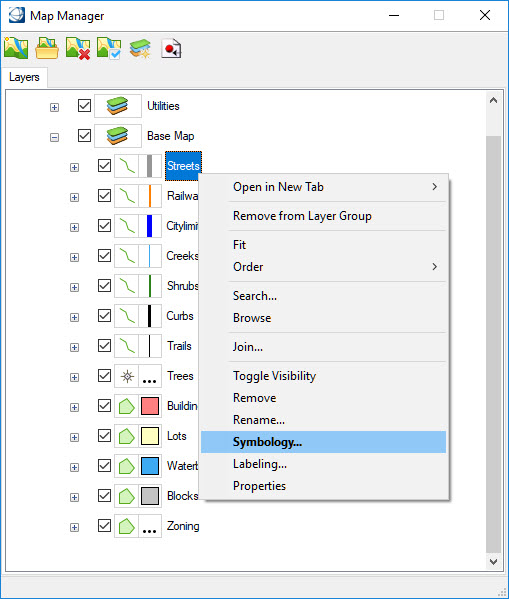
Using the Map
Manager, thematic classes can be created on layers with associated
non-graphical properties by selecting Symbology from the right-click menu.
Definition of a Class
It's not recommended to apply thematic mapping to layers attached seamlessly as this causes performance issues.A class is a grouping of feature instances based on a set of criteria. The criteria can be based on a scale range or on the values of one or more properties. Refer to the chapter 'Symbology Dialog' for creating classes based on a features display range.
Note: To create thematic
classes, the Thematic Definition Set must be set to User Defined 1, 2, or 3.
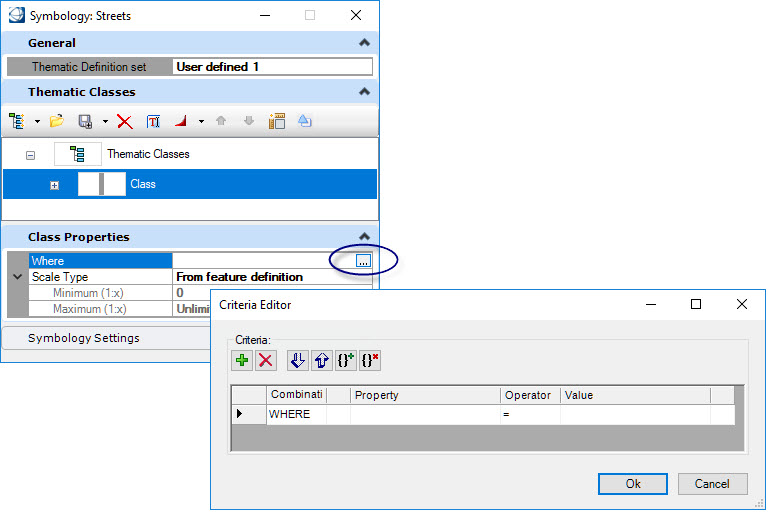
Generating Thematic Classes
A new class is added under the Thematic Classes tree. By
default, the new class does not have any criteria. You can add criteria by
opening the Criteria Editor dialog. This dialog is opened by clicking the
ellipses icon on the right side of the Where field in the Class Properties
panel.
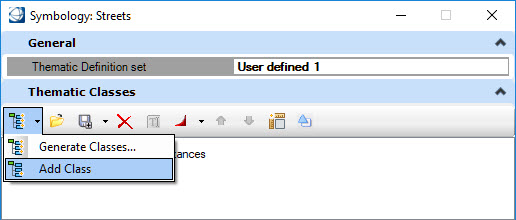
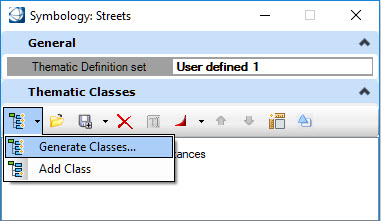
To create multiple classes in a single operation, choose
Generate Classes from the Thematic Classes tool bar.
The Class Generator dialog will open. In this example,
the dialog shows how classes would be generated to display streets in
graduating colors and weights based on the speed limit.
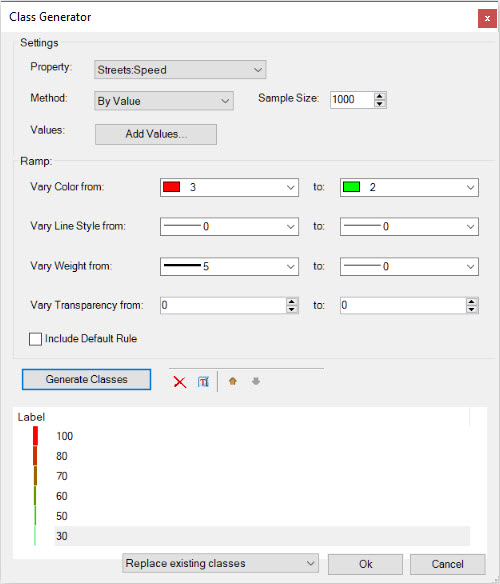
The following describes the general steps to create classes. using the Class Generator dialog.
Settings:
- Select the Property to be used for the class creation.
- Select the Method. The available methods depend on the data type of the selected property.
- Specify the Sample Size. The sample size defines how many records are analyzed to determine ranges or how many records to search for unique values. This is especially useful when there are excessive amounts of feature instances, or if the instances are in a database. In each case, querying all of the instances would require significant memory and processing. The default value is 1000 which should be adequate for most cases.
- Select the type of ranges
or the specific values.
- By Range
- If the By Range method is selected, choose the Type of range to generate and
the number of intervals, or classes to create.
- Equal count (quantile) - The ranges are calculated so that each class will have the same number of instances. The ranges would not necessarily be equal using this method . This is useful for large quantities of data where there is a distinct concentration in one class, as in a bell curve.
- Equal range - Calculates the ranges so that each class has the same numeric range. The extent of the values is divided in equal ranges without looking at the distribution of the instances in the different classes. This is useful for data that is evenly spread across the range, as a random sample.
- By Value - If By Value
is selected as the method, the Add Values button is used to open the Add Value
dialog.
- The Add Values dialog presents a list of available values on the left. Select the values to be included in the class and move them to the right side by using the arrow buttons. All values can be moved at once by using the double arrow. To create a class with multiple values, select the values to add on the left and the Add Into option. Only the unique values found in the sample data are listed. If you want to be sure to have all possible values, use the Get Complete List button. It is also possible to add a value not listed in the Available panel. To do so, enter the value in the text box above the Get Complete List button and click on the arrow at the right of the field. Click Ok when done.
- By Range
- If the By Range method is selected, choose the Type of range to generate and
the number of intervals, or classes to create.

- You can optionally set the desired ramping values to specify the color, line styles, weights and transparency. The start and end values are used to determine intermediate values to vary the symbology of the generated classes.
- Turn on Include Default Rule to create a class for properties outside the range of generated classes.
- Click the Generate Classes button. The classes will be listed in the panel below the button. After the classes have been generated, you can move them up or down in the list, delete and rename them.
Note: At display time, the
classes are evaluated in their listed order. As soon as an instance is valid
for the criteria of a class, the software stops and ignores the other classes.
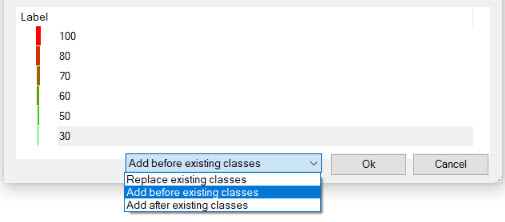
You can replace existing classes, add new classes before or add new classes after the existing classes. These options are located next to the OK button.