Routing with Multipipe
Multipipe can be
routed around obstacles by using a combination of the
AccuDraw Compass and the <Shift> key to
reorient the multipipe layout to fit the route properly.
-
Select
 (Multiple
Pipe) from the ribbon.
(Multiple
Pipe) from the ribbon.
The Multipipe Settings dialog opens, and the Placement ribbon is updated with multipipe options.
-
Manipulate the settings:
- Change Pipe Dia/OD and Center Offset values to suit your design.
- Add more pipe definitions to the multipipe.
- Apply insulation to pipes by specifying an Insulation Thickness value.
- Change Family/Part assignments as needed.
- Change the End Type designations for each pipe. Example: fl-2;fe-.13 creates a flange at End1 with size 2, and a female connection at End2 with an overall reduction of component's dimensions of .13
- Set options on the Placement ribbon.
- (Optional) Uncheck Promote to 3D in Process to route in single line mode.
-
Click
Place.
The settings dialog closes. Multipipe is now in placement mode.
-
Begin routing in the
Top AccuDraw Compass orientation.
Pipes are dynamically displayed in the model as you enter the data points with the offset and justification options applied. Fittings are also auto-generated.
-
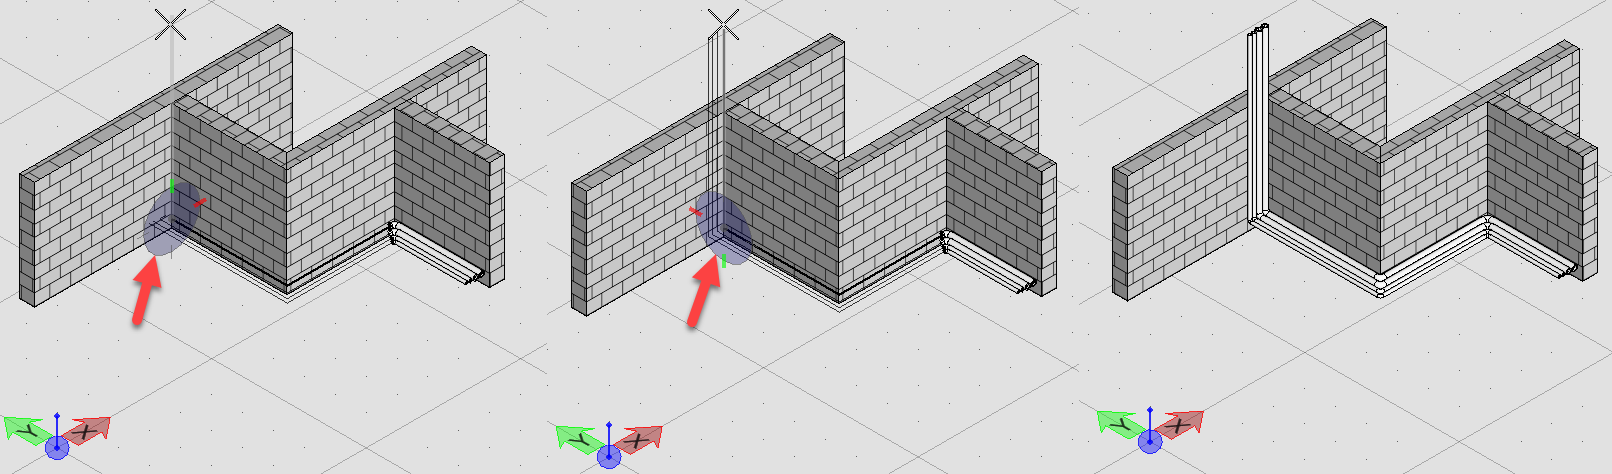
Change the AccuDraw Compass orientation to the
Front plane to route vertically.
The pipes appear to be stuck in the Top plane (below left). Press the <Shift> key to resume routing vertically (below center).
-
Reset to complete the routing.
Multipipes are placed around the obstacle (above right).