To Create a DataGroup Annotation Cell for the HVAC Round Elbow
-
Select
 (
Manage DataGroup Annotation
Cells ) from the ribbon.
(
Manage DataGroup Annotation
Cells ) from the ribbon.
The Manage DataGroup Annotation Cells dialog opens.
- (Optional)
Click
 (Create New Cell Model) in upper
left corner of the dialog.
(Create New Cell Model) in upper
left corner of the dialog.
The Create Model dialog appears.
- (Optional)
Complete the necessary information and settings for the Create
New Cell dialog. Use Round Elbow as the name of the new model, and finish by
clicking
OK.
The newly created model Round Elbow becomes the active model.
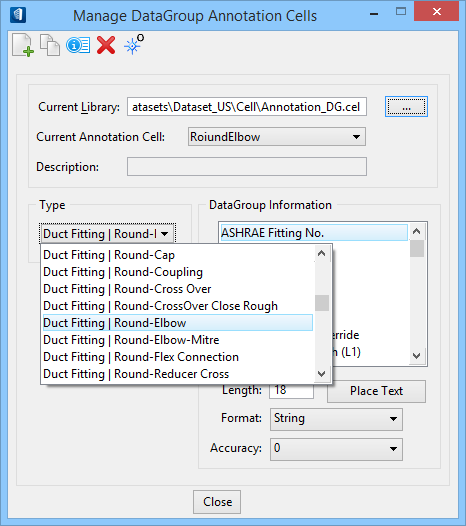
-
Select
RoundElbow from the
Type drop down.
The Round Elbow type's DataGroup Information appears in the dialog.
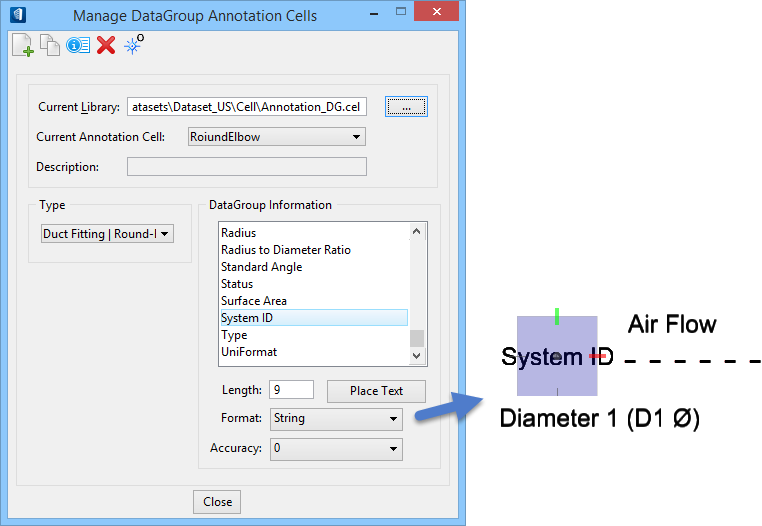
-
Select individual DataGroup property information from the
DataGroup Information list.
The Length, Format and Accuracy settings update depending upon how the DataGroup Information was defined.
- Assign a text string length for the annotation component. The dialog automatically inserts a minimum length based on the property name. It is recommended that this be made longer for user inputted data such as SystemID or variably valued data like Catalog Name for instance.
- Click Place Text, and place the text element in the model. The location of the text and any other elements comprising the annotation relative to the model origin are defined in this step.
- (Optional) Repeat steps 6 and 7 for additional annotation data.
- Define the placement reference point by clicking the define cell origin icon. It is the right most icon at the top of the dialog.
- Click Close to complete the annotation cell. The Manage DataGroup Annotation Cells dialog closes. The cell library closes and the original design file is reopened.