Wire in First Floorplan
The prerequisite for wiring in Electrical discipline is setting up the Distribution Panel.
-
Select
 (Setup Panel).
Opens the
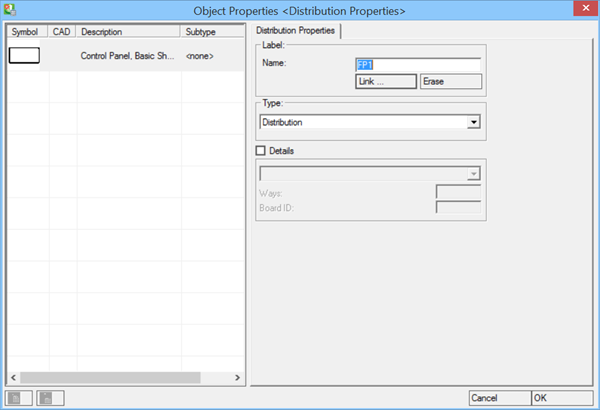
Object Properties ‹Distribution Properties› dialog.
(Setup Panel).
Opens the
Object Properties ‹Distribution Properties› dialog.
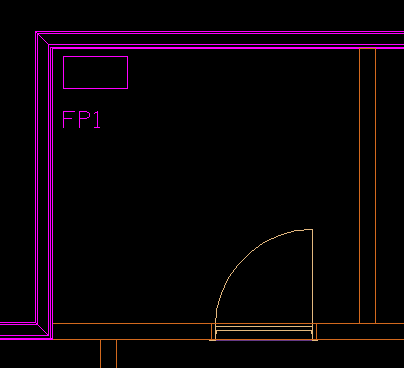
- Enter FP1 for Name and make sure to set the Type to "Distribution". Then click OK. The label FP1 appears next to the distribution panel symbol.
-
Next, select
 (Cable Manager) tool.
Opens the
Cable Manager dialog.
Click on the
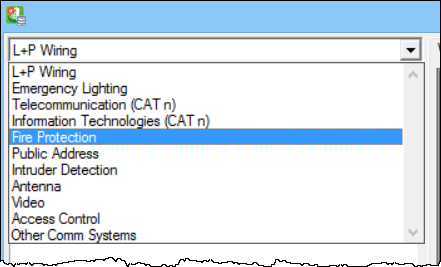
Cable System drop down menu and select
Fire Protection.
(Cable Manager) tool.
Opens the
Cable Manager dialog.
Click on the
Cable System drop down menu and select
Fire Protection.
-
Click the Edit Structure
 button.
Opens the
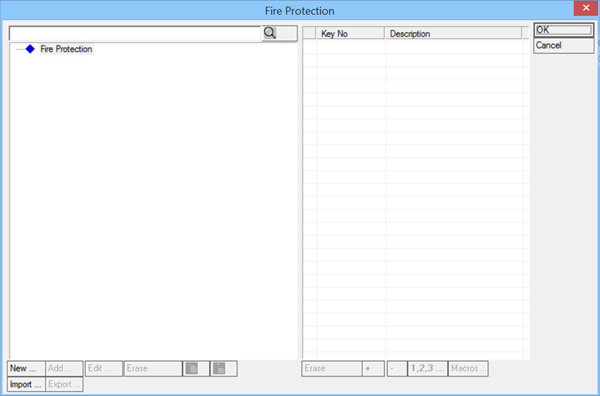
Fire Protection dialog.
button.
Opens the
Fire Protection dialog.
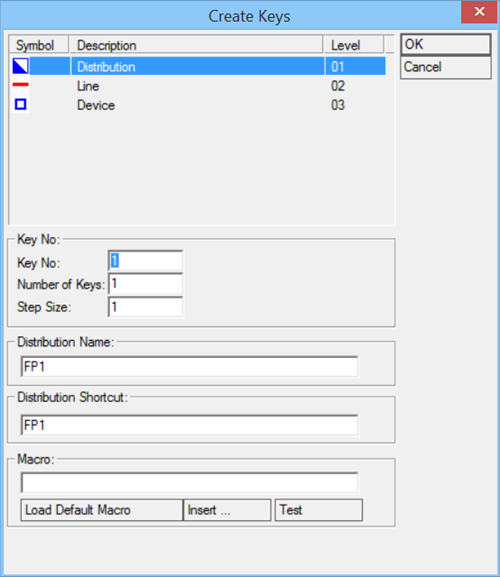
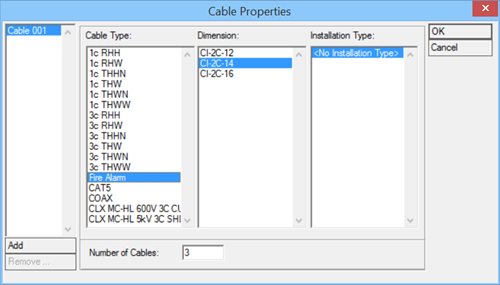
- Click New. Opens the Create Keys dialog.
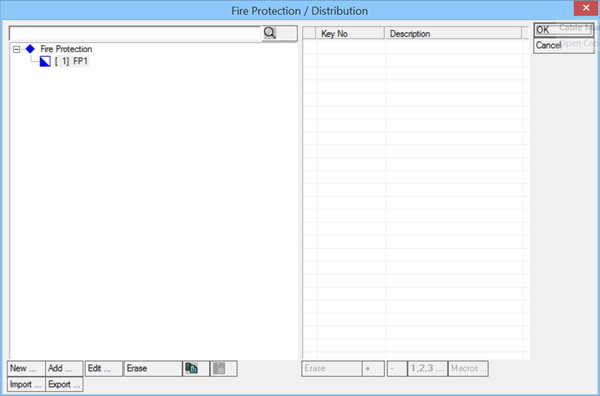
- Enter FP1 for both Distribution Name and Shortcut, and click OK. The Fire Protection / Distribution dialog lists the [1] FP1 entry in the treeview.
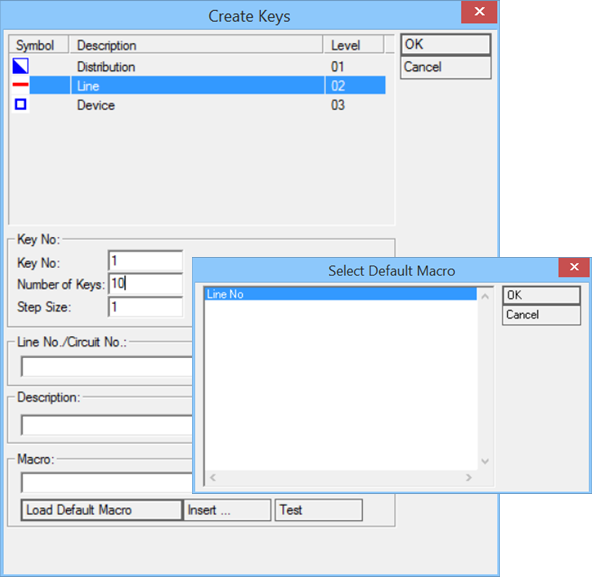
- Select the [1] FP1 icon and click in the Fire Protection / Distribution dialog. Opens the Create Keys dialog. Enter 10 for Number of Keys, representing 10 Lines.
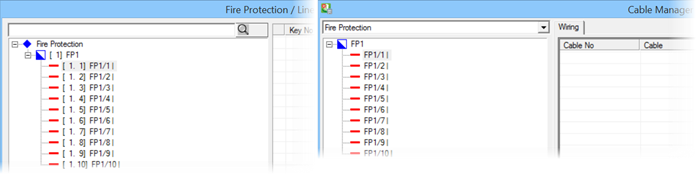
- Click Load Default Macro and in the Select Default Macro dialog select Macro "Line No" and click OK to apply. Returns to Create Keys dialog. Click OK. The Distribution / Lines structure is now available in Cable Manager.
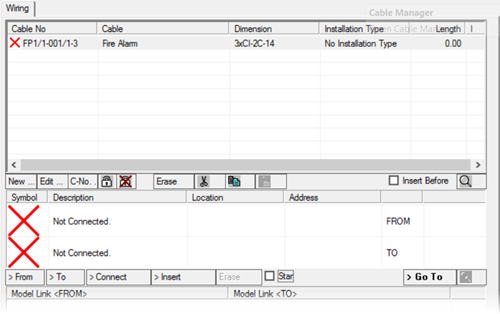
- Select Line FP1/1 and follow these steps to wire a loop for the detectors in the drawing: In the Wiring section in Cable Manager, click New.
- The Wiring section lists the cable entries. The red "X" indicate that no symbols have been connected, they are placeholders.
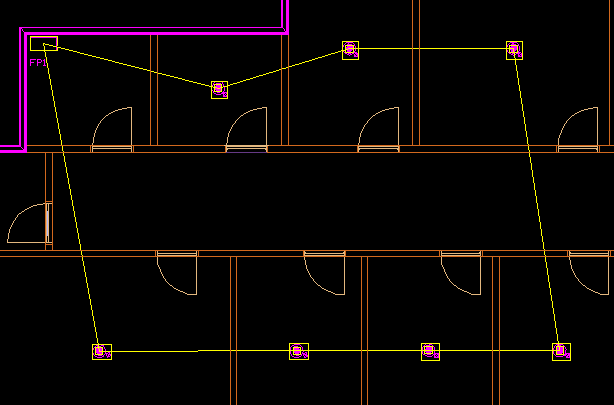
- Click > Connect to begun wiring process. The Cable Manager dialog disappears and fucus shifts in drawing view. Start wiring by clicking on the Distribution Panel symbol with datapoint. Then click on all detectors one-by-one. The order of the selection defines the cable route.
-
In order to create a loop, the last symbol selected must be again
the distribution panel. Right-click mouse button when the loop is finished.
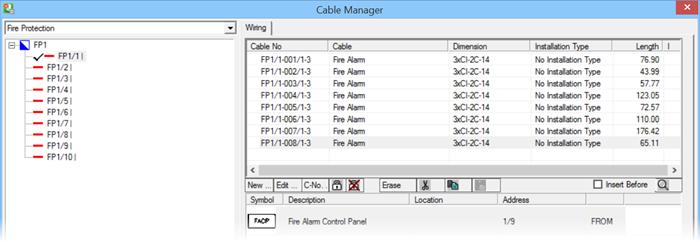
The Cable Manager reappears.
To visualise the loop, click
 , and right-click mouse button to
return to Cable Manager.
, and right-click mouse button to
return to Cable Manager.
Note the tick mark next to wired panel icon.