Import RFA to Catalog
 Used to create catalog
entries from RFA content using the Bentley RFA Interpreter Wizard.
Used to create catalog
entries from RFA content using the Bentley RFA Interpreter Wizard.
When RFA files are brought into OpenBuildings Station Designer, the RFA Interpreter creates catalog entries that represent each type defined in the RFA and stores the mapping settings that are used for each RFA file. In other words, the properties contained in each RFA and their values are stored in a catalog entry, and the RFA is interpreted each time it is placed into a new DGN.
Accessed from: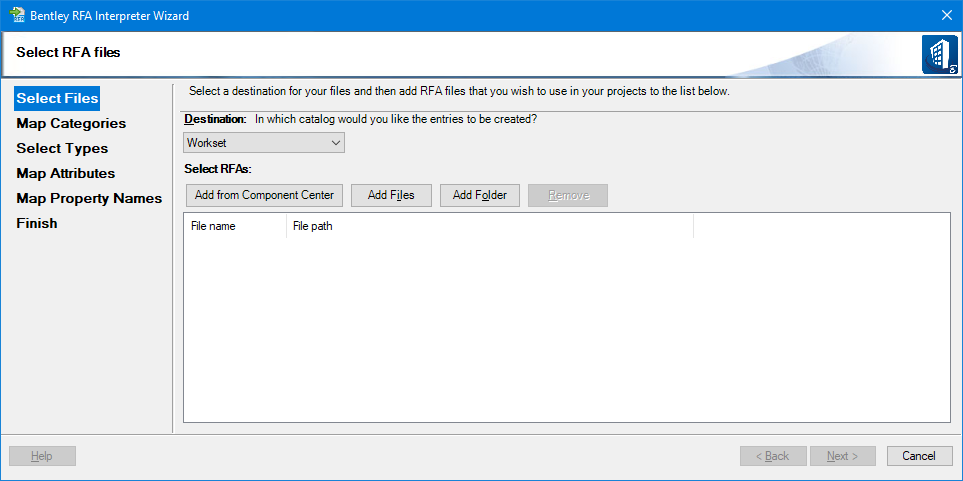
The labels in the left panel indicate wizard state. They are highlighted in sequence as you move in the workflow of wizard settings. For each state, the dialog controls on the right panel vary.
| Setting | Description |
|---|---|
| Select Files | Sets destination for RFA files, and select files or
folder to be added in the list.
|
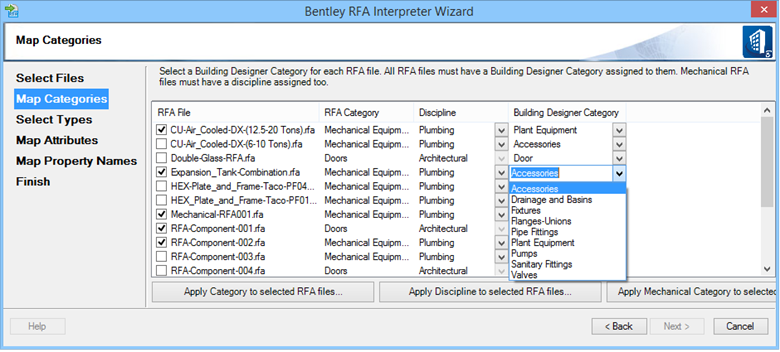
| Map Categories | Opens when one or more RFA files were selected and
Next button is pressed. The screen is used
to map RFA categories with Building Designer categories, as well as Mechanical
category and apply valid discipline to each RFA.
The screen also lists errors, if any encountered in reading RFA data. The list box has the following columns:
The only time
discipline does not fill in automatically is when there are both mechanical and
plumbing connectors in the MEP RFA. When this happens you need to select a
discipline.
Note: Mechanical objects can also have their discipline set to Architectural, which discards the mechanical connectors and treats them as a random piece of equipment. When the discipline is set to Architectural, an architect can place the objects without connectors (sinks, toilets, and other items) to place them for design and spacing purposes and not for mechanical coordination. When the discipline for mechanical and plumbing content (that is
used only for Architectural purposes) is changed to Architectural, that content
can now be placed using the Place Object (User Defined Type) tool instead of
the Place Mechanical Content tool.
Tip: Mechanical and plumbing content disciplines can also be changed for Structural. When valid categories and discipline RFAs are selected, they are convertible. The Next button is enabled, that will lead to next level of import. |
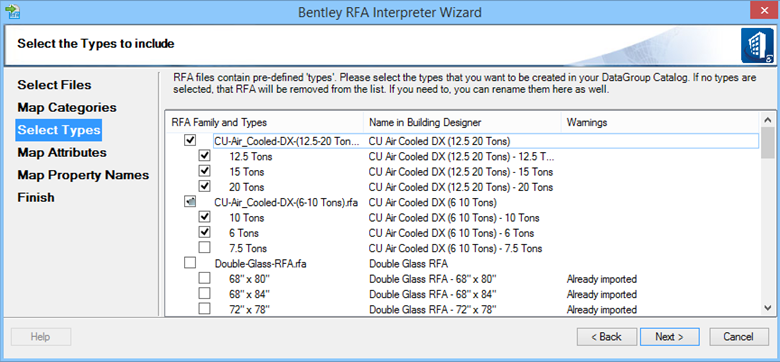
| Select Types | Selects the types to include in DataGroup Catalog.
You can rename the items to suit your workset requirement.
|
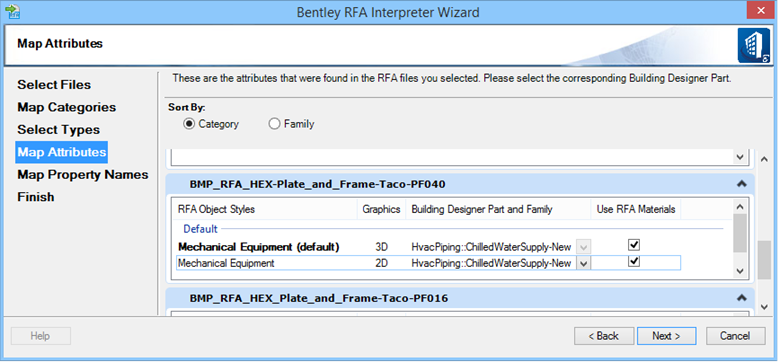
| Map Attributes | Maps RFA object attributes with Building Designer
Part and Family and assign whether to use RFA materials.
Sort By — Sorts the object list in the
order of Category or Family.
For each RFA, the list has the following fields:
The
Next enables once all RFA object styles are
mapped.
|
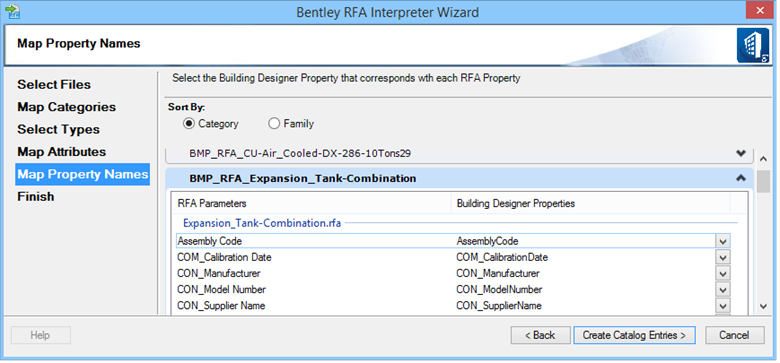
| Map Property Names | Maps Building Designer Properties with that of RFA
properties. The empty or missing Building Designer Properties can be set
manually.
|
| Create Catalog Entries | The Wizard interprets and translates the RFA files,
and reports the result after datagroup entries are created.
When you
define property mapping in the Wizard, the Wizard remembers the property
mapping settings by Revit category. For example, if you map properties for a
window, the next time a window is imported, the mapped property settings
defined for the previously imported window are offered by the wizard as the
default settings.
Note: You can of course change mapped property settings whenever another window or RFA file is imported. Mappings that are changed from the default, display in bold type. Mapped property settings are stored in the directory \Worksets\<template>\support\dataset\setting\rfawizard. |
| Back/Next | The Back button remains activated in the flow, allowing revising the settings in the previous screen as required. The Next button turns active in each state when valid settings are done. When clicked moves to the next screen. |
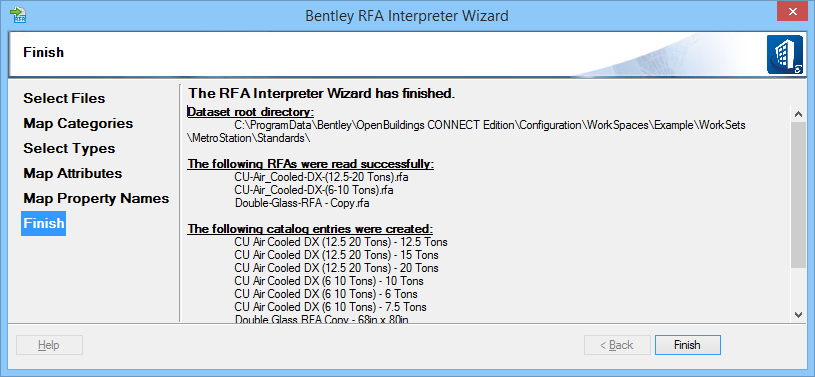
| Finish | After the Create Catalog Entries is processed, the Finish screen appears and lists the result of the interpretation. Besides the dataset root directory path, the result also includes list of RFA files processed, and the resultant catalogs being created. Clicking Finish dismisses the dialog. |
| Cancel | Closes the RFA Interpreter Wizard prompting confirming exit. No cancellation is permitted after the Create Catalog Entries are progressed. |