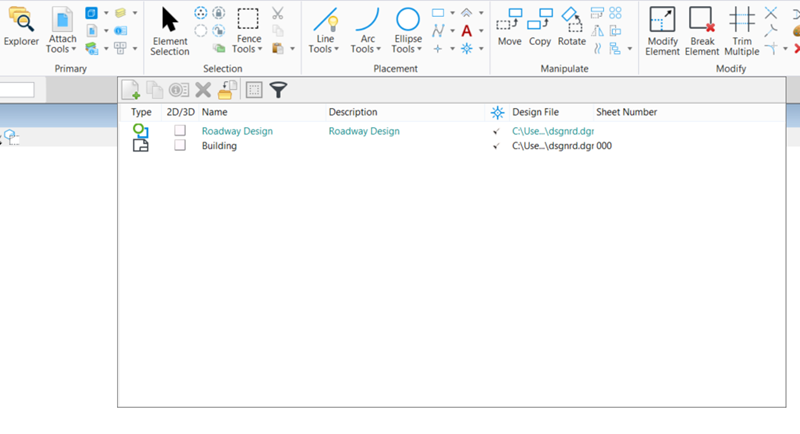
The ribbon provides controls that help you find tools you
need to complete a task.
Tabs
At the top of the ribbon are a series of tabs containing
relevant tools in groups. Tabs are loaded when selecting from the workflows
available in the Quick Access Toolbar.
File Tab and
Backstage View
In the left most ribbon tab are a series of tools and
settings dialogs typically associated with items found previously in the File,
Workspace, and Help menus.
Key-in:
RIBBON
BACKSTAGE <
OPEN |
CLOSE >
Groups
Within each tab are groups containing tools relevant to
tasks implied by the tab.
Panels
Panels are containers for grouping buttons. For example,
Mstn.View.Rotation2D.Panel and Mstn.View.Rotation3D.Panel in the delivered
ribbon group. Panels can be stacked horizontally within
a vertical panel so the buttons they contain are shown in rows. This is what is
used in <Space> ribbon group pop-up.
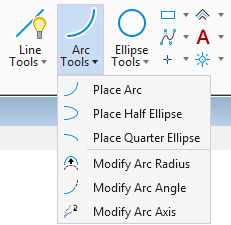
Split
Buttons
Split buttons contain a set of tools in a drop-down list.
There is also an icon of the active tool on the left side of the drop-down
arrow. Clicking the icon activates that particular tool. If you select any
other tool from the drop-down list, the selected tool replaces the active tool.
Drop-down
Button
Drop-down buttons just contain a set of tools in the
drop-down list.
Dialog
Flyouts
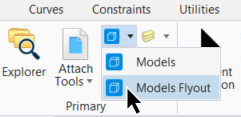
In the
Primary ribbon group of the
Home tab, you can choose to open certain dialogs
in the Flyout mode. Next to the Models, References, Level Manager and Level
Display icons when you click the drop-down arrow, you will see the option to
open the dialog in flyout mode. A dialog flyout creates a temporary pop-up
window which disappears automatically once you move your cursor off the dialog.
Once you have selected a dialog's flyout mode, the next time you need to open
the respective dialog you just have to click the icon to open the flyout. Only
when you need to switch modes you will have to click the drop-down.
The Models
Flyout
By default these tools open the dialog window when selected.
Tools or
Buttons
Within each group are tool or button icons. Selecting one
opens the associated tool settings window or dialog.
In-Ribbon
Galleries
In-Ribbon galleries display a graphical collection of
related items in the ribbon. For example, the Material gallery () displays different materials. You can click the desired
material in the gallery to select it. If there are many items in the gallery,
you can also scroll through the gallery or expand the gallery to display the
rest of the collection in the expanded pane.
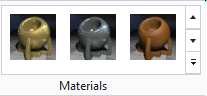
Material ribbon
gallery
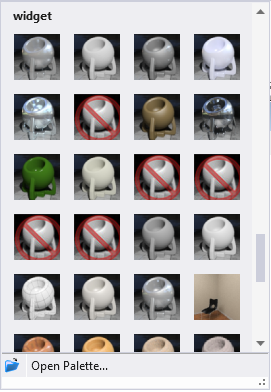
Expanded
Material ribbon gallery
Dialog
Launchers
At the lower right side of certain groups are small
buttons that open dialogs relevant to the tools in the group. These are
typically settings dialogs.
For instance, the
Dimension Styles dialog can be opened with the dialog launcher in the
Dimensioning group.
Enhanced
Tooltips
Positioning the pointer over ribbon items like tools and
dialog launchers displays the enhanced tooltips that display the item name
along with a short description.
Resize
Groups
The ribbon automatically resizes groups as the
application window is resized.
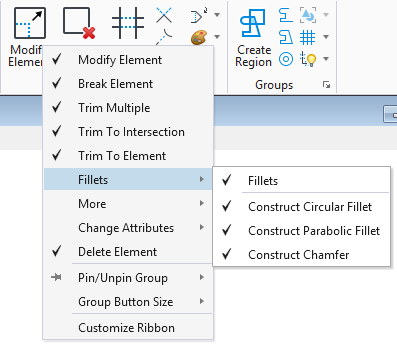
Group Pop-up
Menus
Right-clicking on a group lists the tools that are
available in the group. The tools that are displayed in the group have a check
mark. You can show/hide the tools by toggling the selection of the tool in the
pop-up menu. If the group contains split buttons, the tools in the split
buttons are listed as sub-menus in the pop-up menu. You can show/hide tools in
these sub-menus as well. For further details, refer to the topic
Pop-up Menus on Tabs and Groups.
Ribbon
Search
Ribbon search is an easier way to find tools or dialogs
across multiple tabs and workflows of the ribbon. For further details, see
Ribbon Search.
Minimize the
Ribbon
Clicking
 minimizes the ribbon. You can
expand the ribbon by clicking the same icon again.
minimizes the ribbon. You can
expand the ribbon by clicking the same icon again.
CONNECT Advisor
Clicking
 opens the
CONNECT Advisor
dialog.
opens the
CONNECT Advisor
dialog.
Access Help
Clicking
 opens the
OpenBuildings Station Designer help.
opens the
OpenBuildings Station Designer help.
Keyboard Shortcuts
Keyboard shortcuts are shortcuts to specific groups or
tools in the ribbon.
The product supports multi-level
keyboard shortcuts. Depending on the key-ins assigned, the tools, ribbon group
pop-ups, or pop-up menus are displayed.
The keyboard shortcuts can be created, modified, or deleted in
the
Keyboard
Shortcuts dialog (
).
The default keyboard shortcut for
<Space> key contains tools as well as shortcuts for different ribbon
groups.
The keyboard shortcuts
<Q> or
<[> open the quick tools menu. This pop-up menu
contains shortcuts to frequently used tools and ribbon group-pop-ups.

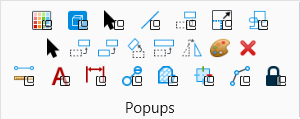
Left - Pop-up
menu displayed when you press <Q> | Right - Pop-up menu displayed when
you press <[>
For example, you can press
<QW> to start the
Move Element tool.
Another ribbon group pop-up is
that of the View tools. It displays the frequently used tools from the View
tab. It is displayed when you press
<Shift> and right-click in the
view window.
Note: You can also use
keytips for ribbon group pop-ups that display when you enter a keyboard
shortcut. With the ribbon group displayed at the pointer position, if you press
<Alt>, the keytips for the tools in the group are displayed. The
keytip for an individual tool is also displayed when you hover the pointer over
the tool in the ribbon group pop-up.
Note: When
Use Position Mapping (Preferences dialog,
Position Mapping category) is turned on, a keystroke is first sent to
position mapping for processing. If it is processed there,
then subsequent position mapping action takes place. However, if the keystroke
is not mapped to position mapping, like the
<Space> key, it is
processed as a keyboard shortcut.
Keytips
Keytips are small keyboard tips that
indicate which key to press to access a tab or a tool in the ribbon. The
following steps explain how to use the keytips:
- With the input focus in
Home position, press <F2> to see the keytips for tabs and the Quick
Access Toolbar.
- To access the keytips of
tools within some other tab, press the keytip for the respective tab after
pressing <F2>.
For example, to
view the keytips for the tools in the
Analyze tab, first press <F2> and
then <Z>.
- To access the keytips of
the tools in the currently displayed tab, press <F3>.
- Press the keytip of the
desired tool to activate it.
For example, press
<TT> to activate the
Place Text tool.