To Define the Parts that Make Up the Cell
-
Select the
 (
Compound Cell Manager
).
(
Compound Cell Manager
).
The Compound Cell Manager dialog opens.
- The new cell will be stored in the BasePlatewGrout.bxc cell library, so set the Current Library menu selector to BasePlatewGrout.bxc.
-
Click
Create.
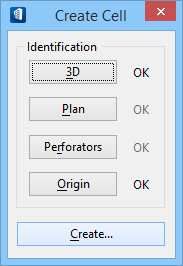
The Create Cell dialog opens.
- Create a selection set of the base plate with grout, concrete pedestal, and the concrete spread footing cells using the Element Selection tool.
- Click 3D, and note the prompt in your status bar.
-
Identify element: Following the prompt, we accept the selection
set by placing a data point in a blank area.
The OK label item on the Create Cell dialog, initially grayed out, is enabled indicating the 3D compound cell component is selected correctly.
- Now click Origin. Your status bar prompts you to define the origin. Click your snap mode button to the right of the status bar, and select Center for a single shot snap. The snap button reflects your selection.
- Place a tentative snap on the very top edge of the base plate, and continue tentatively snapping until you see the center of the top of the base plate highlight. Then place a data point. A highlighted square identifies the location of your origin point, and your status bar tells you that the origin is defined.
- In the Create Cell dialog, the OK label to the right of Origin turns black, and the Create... button is enabled. This indicates the minimum requirements required for defining a cell are complete.
-
Click
Create.
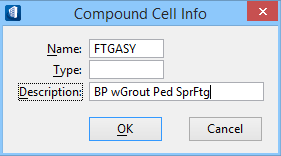
The Compound Cell Info dialog opens.
-
Name the cell FTGASY for footing
assembly.
In the Description field, enter BP wGrout Ped SprFtg.
- Click OK to create the new cell and dismiss the Create Cell dialog.