Create a User Defined Wall
-
Activate the
 (Place
Wall) tool setting and click the
(Place
Wall) tool setting and click the
 (Edit Catalog Item) icon
in the Catalog tools.
(Edit Catalog Item) icon
in the Catalog tools.
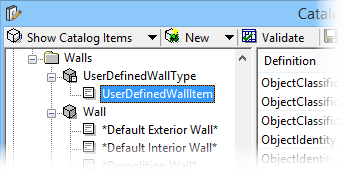
The Catalog Editor opens.
-
While the
Wall type is selected in the tree,
or select
 New
> New Catalog Type.
New
> New Catalog Type.
The Catalog Type Definition dialog opens.
- In the Settings group, override the default string NewCatalogType in the Type Name by keying-in a name UserDefinedWallType for the new catalog type. Also, enter a suitable display name. Make sure the Destination settings File Name is the Wall.xml.
- In the Catalog Type Definition dialog, in the Definition settings group, select Tool Template: Place Wall.
-
Make sure the
Wall_Common (and
Wall_Application and
WallQuantities) is in the
Selected Definitions column. Click OK to save and close
the Catalog Type Definition dialog.
Note: You can have your own schema definitions established such as Bearing walls, toilet partition walls, exterior retaining walls, curbs, etc. and associated with catalog types.
The UserDefinedWallType type appears in the catalog items tree in catalog editor.
-
Next, make sure
 > Show Catalog Items is checked.
-
Select the newly created catalog type and
or select
New > New Catalog Item.
The New Catalog Item dialog opens.
- Leave the destination path as is, and in Name key in the name UserDefinedWallItem, for the new catalog item. Make sure the destination File Name is the Wall.xml settings file. Click OK.
-
Select
 > Save in Catalog Editor dialog.
Close the Catalog Editor dialog.
-
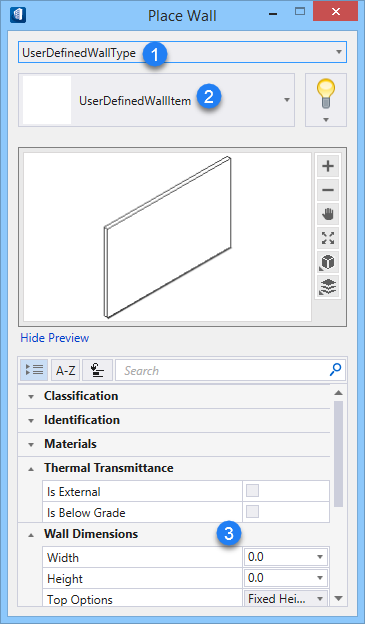
Open the
Place Wall tool settings dialog and select the
 (Refresh
Library) tool.
(Refresh
Library) tool.
The new catalog type UserDefinedWallType and catalog item UserDefinedWallItem are added to the Place Wall tool settings.