To define a roof section
- Navigate in the view to desired closed look shape existing in the model.
-
Select
 (Define
Section).
(Define
Section).
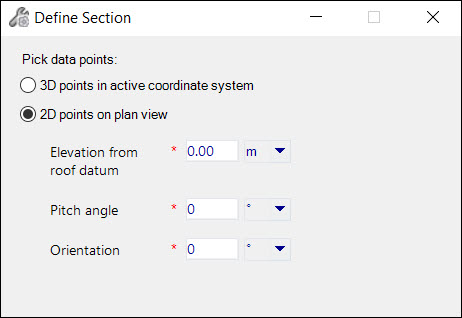
The New Segment tools settings open.
Note: The steps in this procedure assume you are already inside the OpenBuildings Energy Simulator roof designer mode, and have created a new roof definition using the "Add New Roof" option of the Roofs tool. - Pick data points that define new segment either in 3D or 2D. To set a desired inclination follow the active coordinate system in 3D and in 2D orient the data points by entering respective values.
- (Optional)
Click the
 (Show/Hide
Floors) tool to display the project building floor plans.
(Show/Hide
Floors) tool to display the project building floor plans.
-
Pick the closed loop shape by clicking at least two points on the
roof section shape.
Follow the prompts:
Define roof segment > Enter point or get shape or reset to cancel command.
This selects the existing shape.
-
When you finish defining the roof section (by entering the last
data point), reset to complete.
The defined roof segment would apply to shape.