Create and Place an Assembly
You need to place
a repetitive set of HVAC components for inserting branches along a main duct.
Use Assembly Builder to create an assembly of these components.
- Create a selection of the components you want to make into an assembly.
-
Select
 (Create
Assembly).
(Create
Assembly).
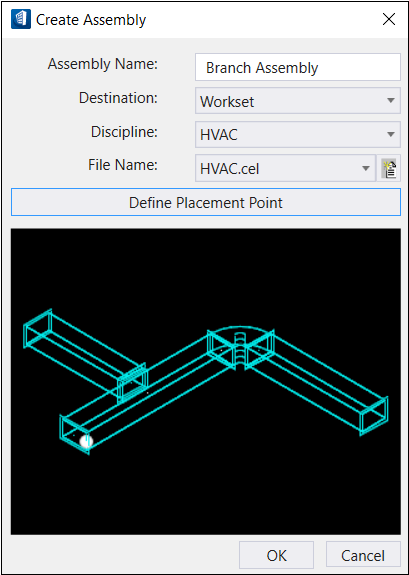
The Create Assembly dialog opens displaying the selected components.
- Enter a name for the assembly in the field provided.
- Select the configuration (Destination) in which you want the assembly to be available.
- Select the associated Discipline (HVAC) for the assembly.
- Select a destination cell library file (*.cel) from the File Name drop down.
- Click Define Placement Point.
- Select the placement point. The Create Assembly dialog reopens with the OK button enabled.
-
Click
OK.
Completes the creation of the assembly. The Create Assembly dialog closes.
-
Select
 (Place
Assembly) from the
Mechanical ribbon.
(Place
Assembly) from the
Mechanical ribbon.
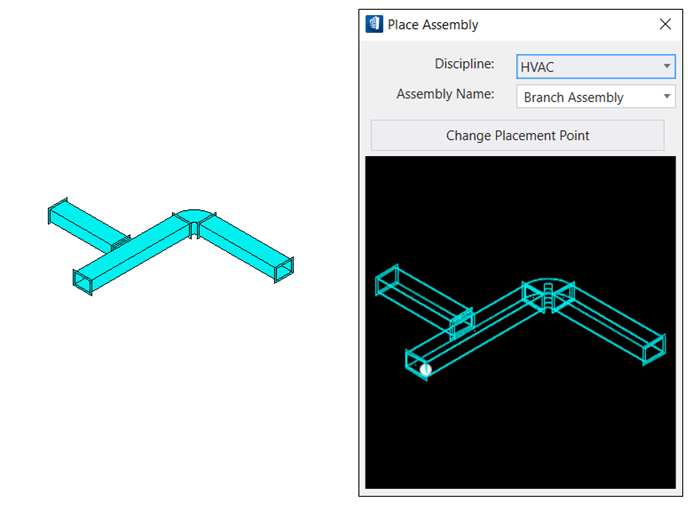
The Place Assembly dialog opens.
-
Select
HVAC from the
Discipline drop menu.
The selection made here determines options available in the Assembly Name drop list.
-
Select the new assembly from the
Assembly Name drop list.
The assembly is displayed in the Place Assembly dialog, and an instance of it is attached to the pointer.
- Enter a data point to tentatively place the assembly, followed by another data point to determine the rotation angle.
- (Optional) Click Change Placement Point to change and select the placement point before placing assembly.
- Click Finish.