To Place Compound Slab
-
Select the Place Slab tool.

The Place Compound Slab tool settings dialog appears with the Placement tab.
-
In the
Place Compound Slab tool settings
dialog, click
 Match Element Properties drop-down arrow and
then click
Load Compound Slab Settings.
Match Element Properties drop-down arrow and
then click
Load Compound Slab Settings.
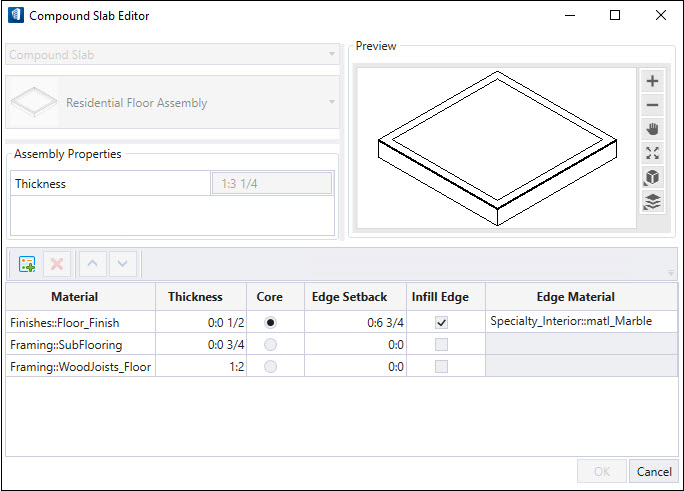
The Compound Slab Editor dialog opens.
-
Perform the following steps in the
Compound Slab Editor dialog.
- Click Add Layer to add multiple layers.
- Double click on layer in the Material tab, a drop-down arrow will appear. Click on arrow and then select Family and Part.
- Enter the Thickness value.
- Select the Core option.
- Enter the Edge Setback value.
- Enable the Infill Edge option.
- Double click on layer in the Edge Material tab, a drop-down arrow will appear. Click on arrow and then select Family and Part.
- Click OK to add the changes made, else click Cancel to discard the changes and close the dialog.
- Change the slab type and some of the placement options.
-
Position the first point of boundary and repeat the step for the
other three corners to create a compound slab.
Reset to complete the slab.