Wall Editing Handles
Selected (with the Element Selection tool) walls display editing handles used to move, scale, modify and make changes graphically.
Handles appear on an object when it is selected initially and a slightly different set of handles appear on the object when it is selected a subsequent second and third time. The first selection invokes handles that represent the location of points along a baseline, entered when the object was created. Handles for each of the form faces are available when the object is selected a second time. When the object is selected a third time, handles appear at locations for scaling the object.
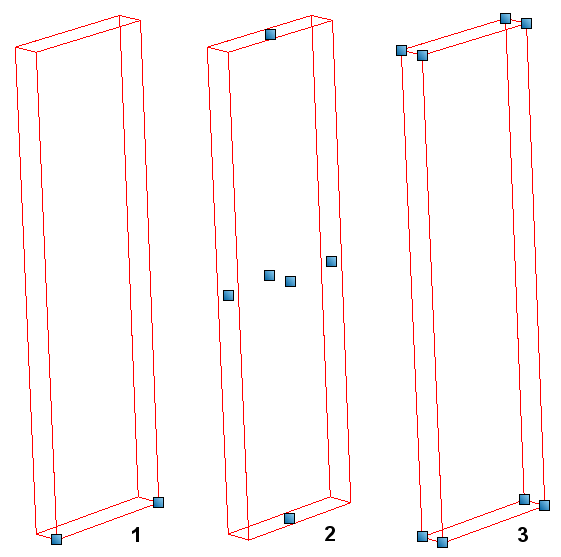
After an object is selected and handles display, a tool tip indicates what each handle represents when the pointer is passed over it. For example: (referring to the figure above) a tool tip in the first set of handles can report a start point or end point; a tool tip in second set of handles can report a side, roof, or floor; and a tool tip in the third set of handles can report a sequentially numbered scale handle. Actual tool tips and verbiage varies depending upon the type of object (form) selected.
When objects are modified, multiple handles can be selected and used simultaneously. This is particularly useful for complex objects, in situations where multiple faces need to be modified and manipulated together. To select (deselect) multiple handles, hold down the <Ctrl> key and data point on each required handle (handles highlight when selected).
With handles selected, you can: