To add a roof section
-
Click the Add Section icon.
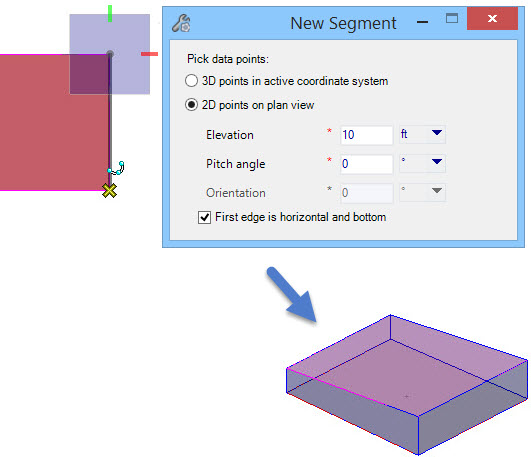
The New Segment tools settings dialog box opens.
Note: The steps in this procedure assume you are already inside the OpenBuildings Energy Simulator roof designer mode, and have created a new roof definition using the Roofs tool. -
Pick data points that create new segment either in 3D or 2D. To
achieve a desired inclination to floor segment follow the active coordinate
system in 3D and in 2D orient the data points by entering respective values.
The status bar at the bottom left corner of the OpenBuildings Energy Simulator application window prompts active command instructions.
- (Optional) Click the Show/Hide Floors icon to display the project building floor plans.
- Trace the roof section based on existing shape or pick data points forming a closed loop shape for the roof section. Follow the prompts: "Add roof segment > Enter point or reset to cancel command". Use the AccuDraw compass to precisely place data points using the floor plan as a reference.
-
When you finish creating the roof section (by entering the last
data point), reset to complete.
A shape element is created representing the new roof section.
- Repeat the steps to create more roof sections.