How to work with Lighting Interface RELUX
Electrical discipline comes with a bidirectional interface to the lighting design package RELUX. The interface enables the export of room dimensions and existing lighting arrangements to RELUX and also imports calculated lighting arrangements and luminaries properties such as: name, load information, exact 2D and 3D dimensions back to the Electrical discipline and the floorplan.
-
Select
 (RELFUX). Click data point and right-click inside a room where you want to perform a lighting calculation.
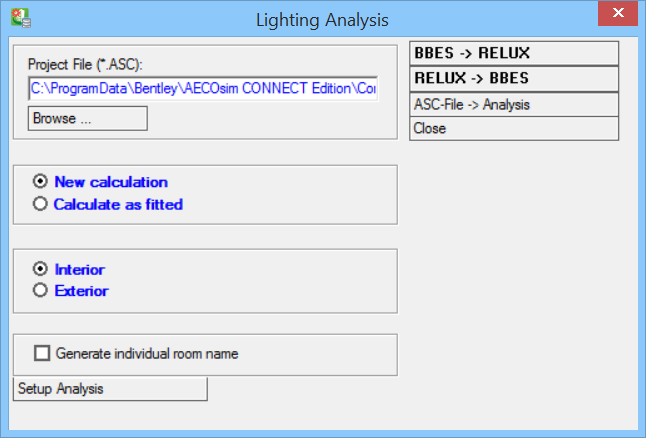
Opens the Lighting Analysis dialog.
Click BBES->REFLUX.
(RELFUX). Click data point and right-click inside a room where you want to perform a lighting calculation.
Opens the Lighting Analysis dialog.
Click BBES->REFLUX.
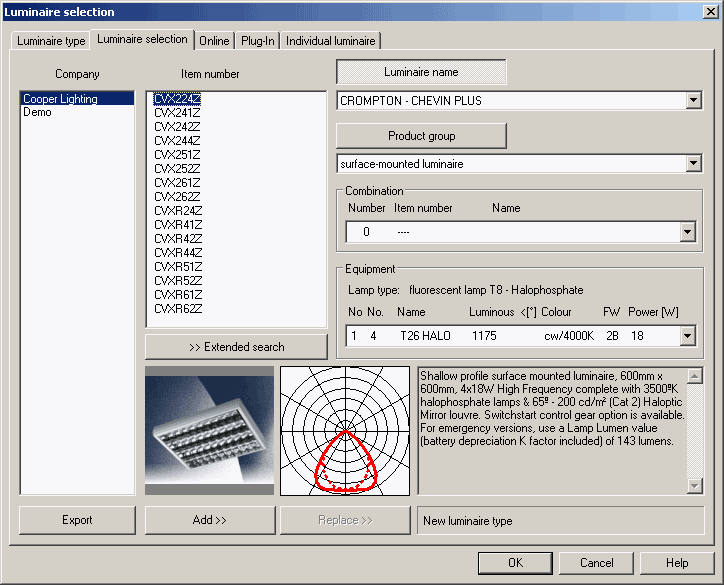
- First you need to select a lighting fixture. Click menu option. Opens the Luminaire selection dialog.
- First, click on the Luminaire selection tab select the following:
-
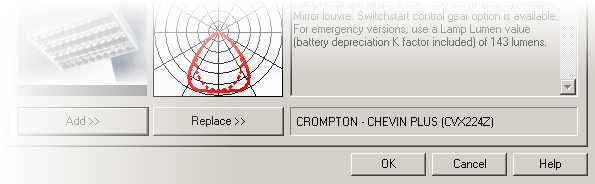
Then click Add >> to accept this lighting fixture for the lighting calculation.
The lighting fixture name appears in the lower right section of the dialog.
Also, it enables the Replace >> button.
Click OK to complete Luminaire selection.
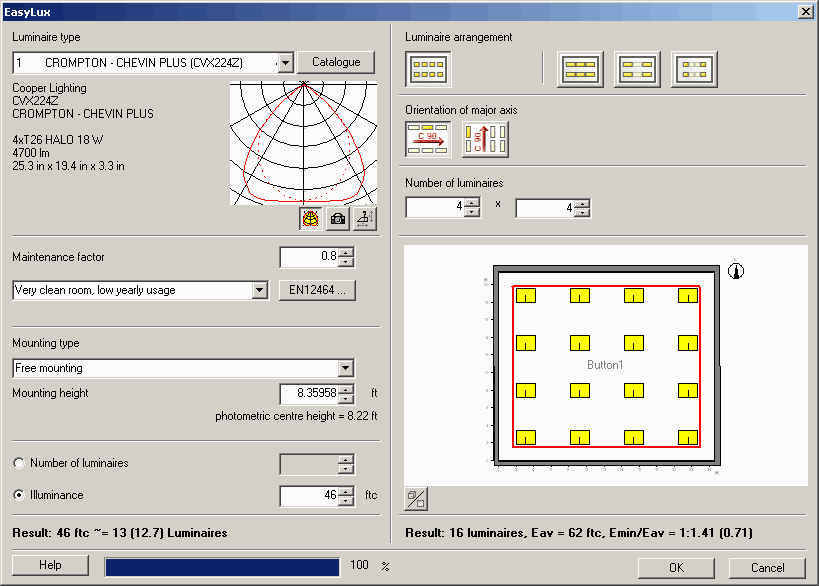
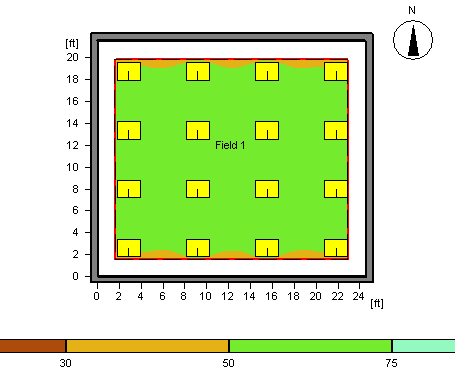
- Click menu option. Opens the EasyLux dialog. In the EasyLux dialog, enter settings as shown in the image, and click OK to apply. Next, make sure to save the RELUX file, use .
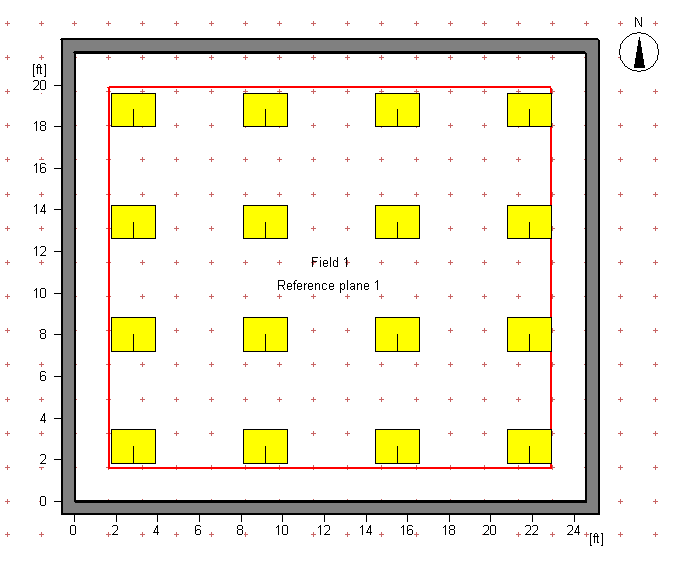
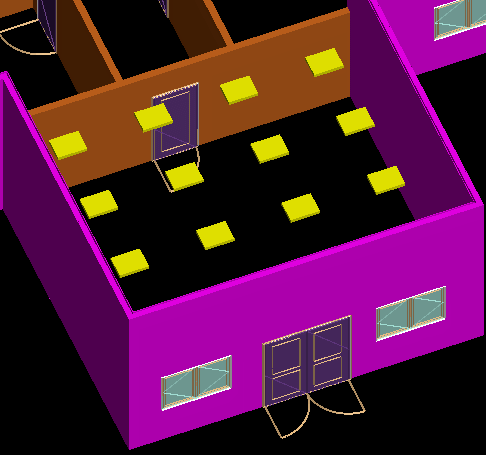
- Close the result overview by clicking on the "X" in the upper right corner in the window. RELUX now displays the room with placed lighting fixtures.
-
Next step, close RELUX. In the Lighting Analysis dialog, click RELUX->BBES.
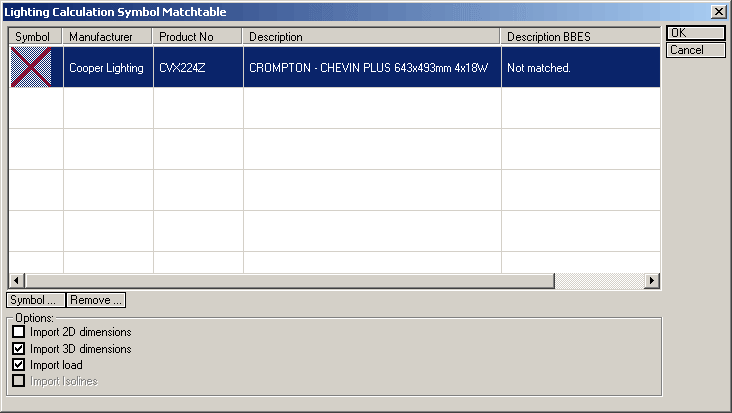
Opes the Lighting Calculation Symbol Matchtable dialog.
The matchtable creates a connection between the lighting fixture that is imported from RELUX into the Electrical discipline drawing. This only needs to be done the first time a new lighting fixture is imported, Electrical discipline stores the link information (which can be changed at any later time).
The red "X" placeholder symbol indicates that there is no match for this luminaire available yet.
- Click Symbol. Opens the Symbol Manager dialog.
- Select the Closed 2' 2" symbol in the TUBES CLOSED section and, for example, Subtype L1, and click OK. The RELUX lighting fixture is now linked to a lighting fixture symbol. You will see the symbols in place of red "X" placeholder in the Symbol Matchtable.
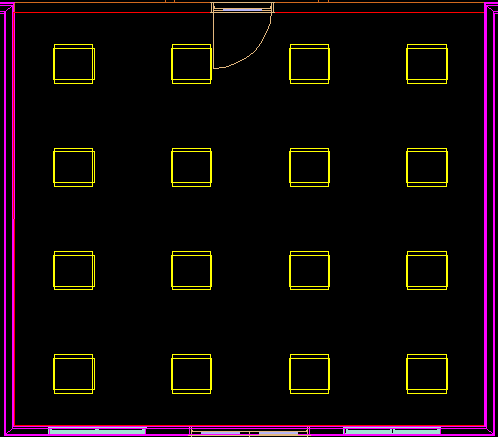
- Click OK in Symbol Matchtable dialog. The lighting fixtures are now inserted into the drawing.
-
Select
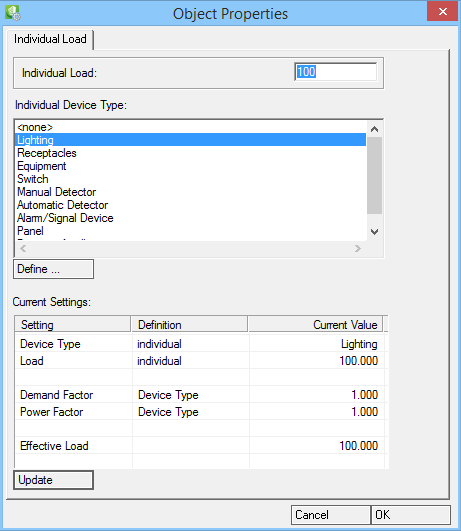
 (Modify Symbol Load).
Opens the Object Properties dialog with the Individual Load information.
This load information was handed down from the manufacturer database, then through the REFLUX interface into the Electrical discipline drawing/environment.
(Modify Symbol Load).
Opens the Object Properties dialog with the Individual Load information.
This load information was handed down from the manufacturer database, then through the REFLUX interface into the Electrical discipline drawing/environment.