Creating Named Group Hierarchies
From the Named Groups dialog, you can create a hierarchy of named groups. This lets you nest other named groups in a hierarchical structure. Take a simple example of an office layout with named groups for Partitions, Shelving, Workstation, and Chairs. You could set up the following hierarchies (as shown in the following diagram):
- Workstation (2) — with Visitor Chairs (A) and Workstation chair (B) as child groups.
- Partitions (1) — with Shelving (3) and Workstation (2) as child groups.
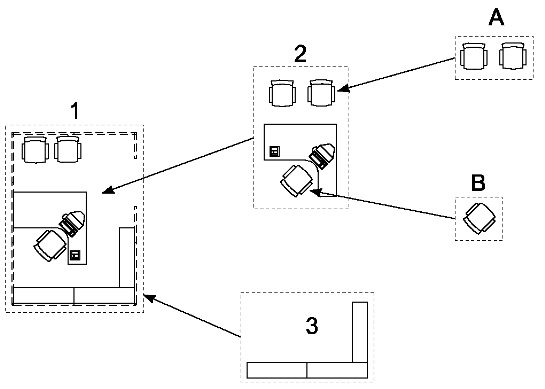
With the above setup, for example, moving:
- Partitions (1) — would move the entire layout
- Workstation (2) — would move the chairs as well, but leave the partition and shelving.
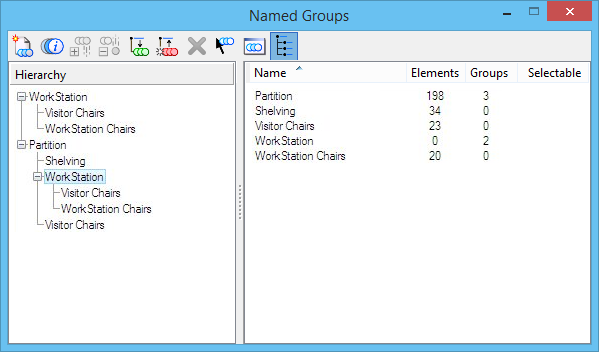
When you are creating a hierarchy, you first drag a named group from the Named Groups list to the Hierarchy list. From here, you can use the drag-and-drop technique, or the Add Named Group to Parent icon, to add Named Groups to the hierarchy.
You can select entries in the Named Groups dialog individually, with data points. Additional entries can be selected with <Ctrl> data points or <Shift> data to include all entries in-between the previous selection and the current.