To create a 2D template
To create a deck, beam, or barrier template, use the following procedure.
-
On the
Utilities ribbon tab, in the
Libraries group, select either:
Note: Alternatively, you can right-click on the Decks, Barriers, or Beams entries on the Project Explorer Bridge Features tab and then select Manage Templates from the pop-up menu.The Template Creation dialog opens. The list of template types is limited to the tool selected.
- Right-click on a folder and select Add Template from the pop-up menu.
- Type a Name in the prompt and click OK. The Template Creation window minimizes.
- Data point an existing view window or open a new view window and data point there for drawing the template shape.
- Use the Drawing Composition task tools to draw the outline of the template.
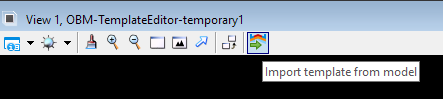
- When you have completed drawing your template shape, select the Import template from model tool in the view window toolbar.
- If prompted to save changes, click Yes.


You must now apply point details to describe how the shape behaves when
extruded along an alignment as well as key points. You can optionally mark
selected points as Deck Elevation Points, and then chose them in the deck
elevation report settings dialog for reporting of deck elevations.
To facilitate easy definition and transfer to analytics (RM Bridge) of tendon points in segmental bridge cross sections, OpenBridge Modeler allwos you to place circles and then tag them using the Tagging tool in the Template Editor. You can type in group names and assign the tendon points to different groups. These tendon points will be seen in the variables tables of the templates and they can be constrained similar to all other elements in the templates.