Create Template Drop Workflow
-
Select the Create Template Drop tool. This tool is automatically invoked at the end of the Create Corridor tool, but you can use it independently of the Create Corridor tool.
-
Select the Corridor wherein the template drop will be added.
-
Select Template - Select the template from the pulldown list of recently used templates, or select <Alt> <Down> on the keyboard to open the active template library and select the template. Data point to accept the template and move to the next prompt.
-
Start Station - Graphically define the start station or enter the value in the edit field. Data point to accept and move to the next prompt. The Start station can be locked by <enter> after keying in the station or selecting <Alt>. Selecting <Alt> again unlocks the field.
-
End Station - Graphically define the end station or enter the value in the edit field. Data point to accept and move to the next prompt. The End station can be locked by <enter> after keying in the station or selecting <Alt>. The template is copied to the new station range. Selecting <Alt> again unlocks the field.
-
Drop Interval - specifies the distance between each processing of the template (in master units). Generally, this value is equal to or less than (but still a multiple) of the desired interval for the final cross sections, since cross section stations should be coincident with processing stations. Note that this is impacted by the Design Stages.
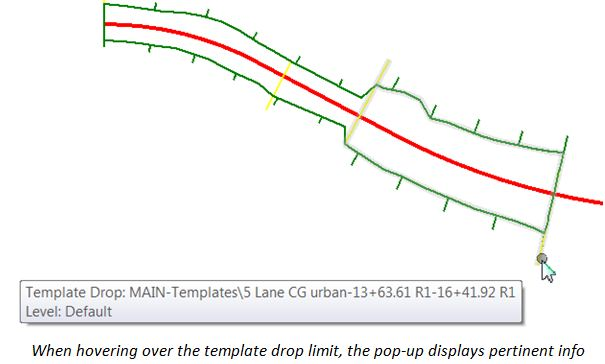
The following example demonstrates what the plan view might look like after two template drops (and transition in between) have been added to the corridor (and the corridor has automatically processed). Notice that the template drops are shown as yellow lines drawn orthogonal to the corridor on the left side at the beginning of the drop and on the right side at the end of the drop.