Horizontal Insert Fillet
 Used to insert a curve into a previously created element.
You can access this tool from the following:

Use the Horizontal Insert Fillet tool to insert a curve into a previously created element.
-
Open the Civil Tools task pane to the Horizontal Geometry section then click the Horizontal Insert Fillet icon.
-
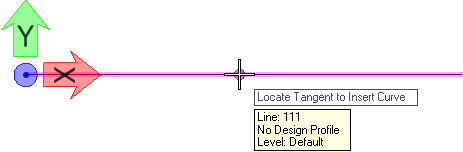
When you move the cursor into the View, it is equipped with a command prompt requesting that you "Locate Tangent to Insert Curve", so move the cursor to the element that you wish to convert to a curve then data point, example, left-click on it.
-
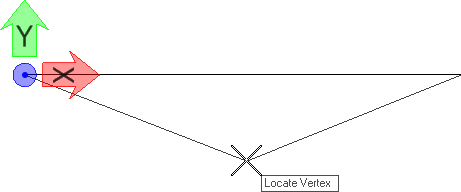
The prompts says "Locate Vertex", so move the cursor to the peak or trough of the curve then left-click.
-
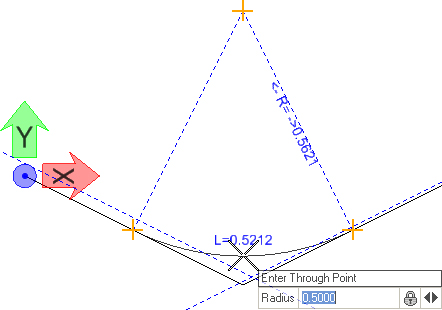
The prompt says, "Enter Through Point", so use one of the following methods to designate a point through which the curve must pass (navigate the options by striking the left or right arrow keys):

Manipulators
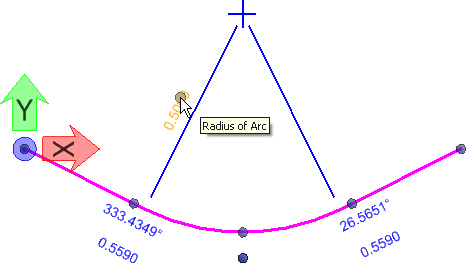
Manipulators are available for:
Properties
To View the new element's properties, equip the Element Selection tool.

Left-click on a horizontal insert fillet in the View then let the cursor hover over the selected element. Click the Properties icon to access rule data for the chosen element.