Arc Between Arcs
 Constructs an arc between two
previously placed arcs.
Constructs an arc between two
previously placed arcs.
You can access this tool from the following:

Arc Between Arcs constructs an arc between two previously placed arcs. This tool has the ability to optionally apply both a back and/or forward transition between the base arcs and the constructed arc.
Workflow
Any of the inputs can be locked in the dialog at any time. Locking some values may limit or otherwise affect the other values.
-
Select the Curve Type as Compound or Reverse.
-
Select the back element arc to construct the line from. Left mouse-click to accept.
-
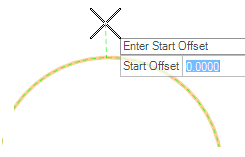
Select the offset distance from the first or back element. This can be selected graphically with the mouse or keyed in.
-
Select the ahead element to construct the line to. Left-click to accept.
-
Select the offset distance from the second or ahead element. This can be selected graphically with the mouse or keyed in.
-
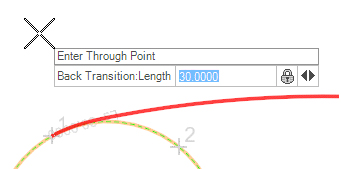
Another option is to populate the Back Transition information. This information can reside in five possible format combinations:
Using the left or right arrow keys to toggle between the fields, type in the desired value, and strike the Enter key to accept.
-
If the Back Transition option is set to None in the dialog, you will not be prompted for this information.
Spiral Definitions:
-
Length = Length of spiral
-
Avalue = Square root of RL
-
RLvalue = Radius multiplied by the length
-
Deflection = The deflection at the spiral PI, sometimes called spiral angle in the United States
-
DeltaR = The offset from where the simple curve would be without a spiral to the curve with a spiral; this is referred to as throw or offset in the United States
-
-
Another option is to populate the Back Transition information. This information can reside in five possible format combinations:
Using the left or right arrow keys to toggle between the fields, type in the desired value, and strike the Enter key to accept. -
Select the radius of the arc. This may be chosen graphically or keyed in directly.


Select the truncation method. Choose from the following:
This will truncate or trim the elements used for the construction of the arc.
Use of ALT Key
During the operation of the command, the keyboard ALT key can be used to switch between alternate solutions. When the onscreen dynamics show the (up to) four solutions, pressing the ALT key switches between the alternates.
Spirals
The spirals in this construction can be:
Values that can be used to create the spiral are listed here.
-
Double Spiral Use this tool to create two spirals; the first of which transitions in same hand as a reference element starting at the reference element radius and transitioning to infinity. The second spiral transition from infinity to the radius of the new curve and is opposite hand. Although this curved reference element is the most common use case, a double spiral can be used anywhere that is needed.
Manipulators

Manipulators are available for: