To Export the Esri SHP
File by Feature Classes Using a Selection Set
In MicroStation, select the elements you want to export.
The application will treat all these elements
as if they are part of the same feature class and will try to create one output
file with all the elements. If there are elements of different geometry types,
then one file per geometry type will be created.
Select
File > Export > Geospatial File Types > Shapefile
(*.shp).
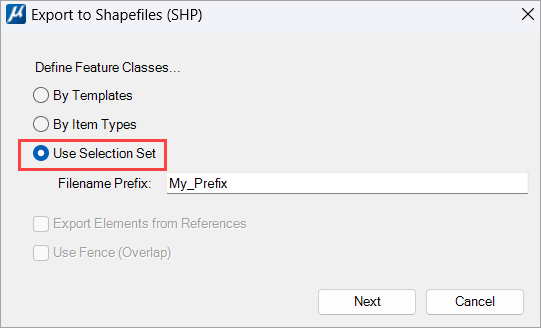
The Export to Shapefiles (SHP) window opens.
Enter the filename prefix you want to use to create the output
file(s).
The string
_Line, _Polygon, or _Point will be appended to
that name if all the selected elements are not of the same geometry type.
Click Export.
The folder selection dialog opens.
Note:
If there is no
element in the selection set when the export is started, then the option
Use Selection Set is not available and
Select by Templates is selected.
The Filename Prefix
field is available only when the Use Selection Set option is enabled.
The
Use Fence toggle is always disabled when
the
Use Selection Set is chosen.
Note:
In SHP files,
property names cannot be longer than 10 characters. The application will
shorten Item Type property names that exceed 10 characters in length.
In SHP files, it is
not possible to have more than 255 properties.
In SHP files, the
text string in a property that can't have more than 254 characters. The longer
text will be trimmed at the export.