Synchronize Changes with the Cloud WIP iModel in the iTwin Project
Once your project
administrator adds you to an iTwin Project on the Bentley Infrastructure Cloud
portal, you will receive an email inviting you to join the project. Select
View Project iTwin in the email and sign-in to
Bentley Infrastructure Cloud to access the iTwin
project.
- On the Project page go to Documents and select ProjectWise Drive options.
- Select the Synchronize Documents slider and click Save to synchronize the files in the project, down to your local ProjectWise Drive.
-
Start or Restart your
MicroStation session.
You will see the ProjectWise Drive Configuration enabled on the Work Page.
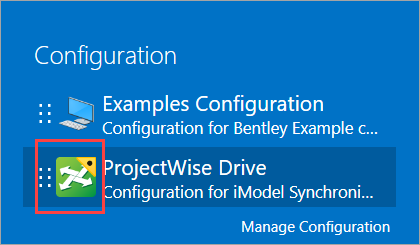
- Select the iTwin Project in the WorkSet drop-down.
- Select Browse to navigate to and open the desired DGN from the project. You can also create a new file in the project.
-
Make any necessary design changes.
On first click of Sync Changes, iModel Synchronization will be downloaded and installed. Please see message center for installation progress. Restart MicroStation for installation and setup to complete.
-
In
MicroStation, select
Sync Changes in the Ribbon
().

Your design changes will be synchronized and saved in the local iModel . Once sync is complete, you can view any warnings or errors related to the synchronization in the Synchronization Report window.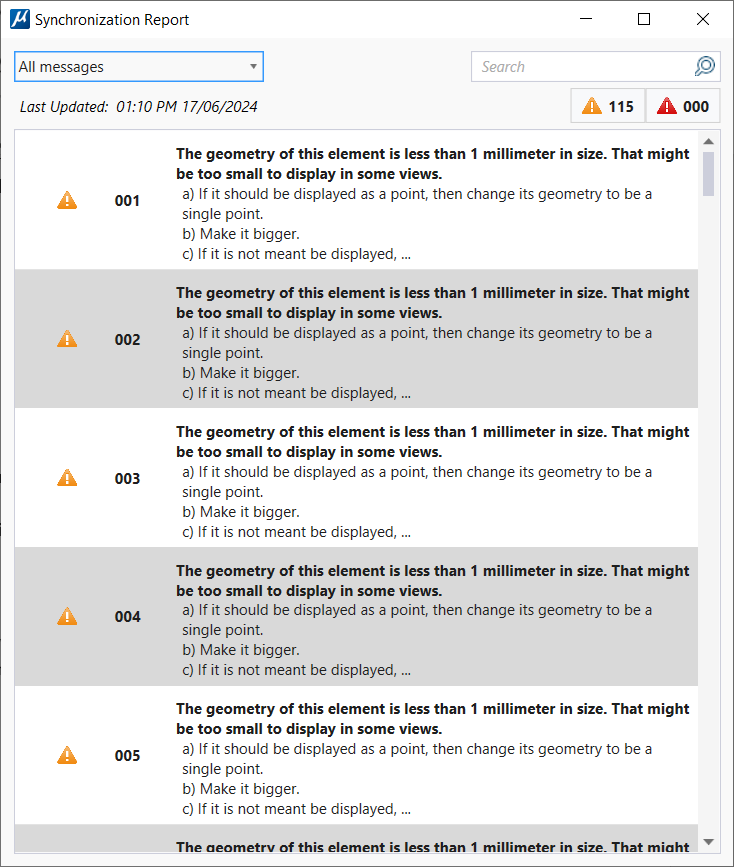
You can select to view messages from the latest sync in the All messages drop-down. You can also search for a message by name using the Search bar.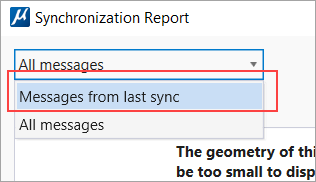
Clicking on the item in the list will bring you to the element (where applicable) that is causing the issue, so it can be fixed with the design file before re-syncing. -
Select Preview Changes in the ribbon
().

- Review and validate your changes. You can also see changes pushed by other team members that are already in the cloud WIP iModel.
- Add a description of your changes in the Description of this update section.
-
Select
Push.
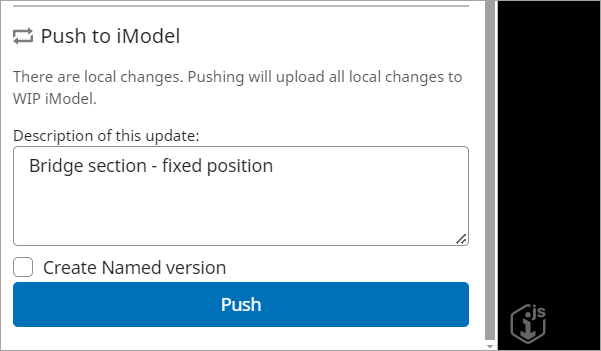
Optionally you can create a Named version of your changes by turning on the Create Named version checkbox.


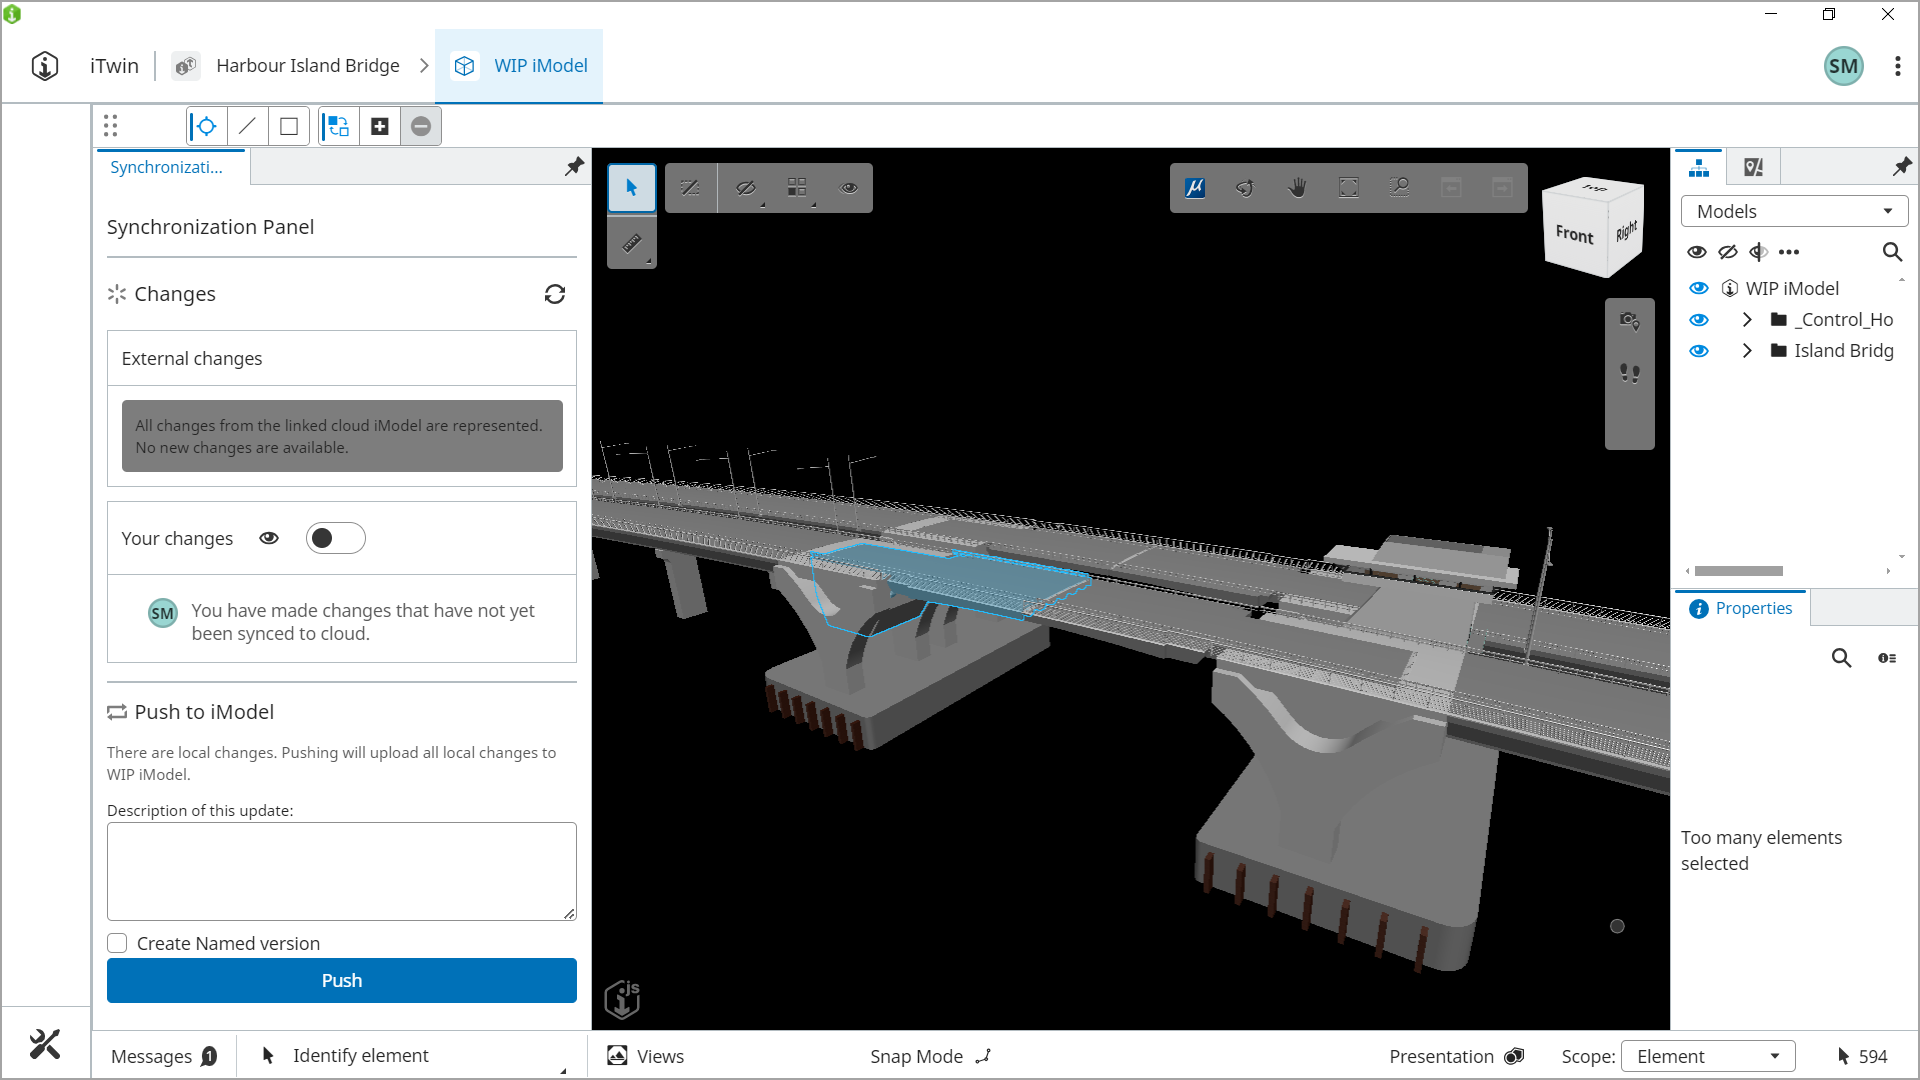
Your changes will be pushed to the cloud WIP iModel in the project.
Note: Once you have started the Sync Changes tool, if you make changes
to the design, and close the file, any un-pushed changes will be saved to the
local WIP iModel and pushed to the cloud WIP iModel. If any changes cause an
error in the sync while closing, then the synchronization report will appear
before the file closes. Please fix the errors and then close the file again.
Warnings will be ignored in this process.