Used to upload a component to
Component Center. Users in a role with Upload permission can upload components
to Component Center from
MicroStation using this dialog.
Used to upload a component to
Component Center. Users in a role with Upload permission can upload components
to Component Center from
MicroStation using this dialog.
You can open this dialog from the following:
| Setting | Description |
|---|
|
|
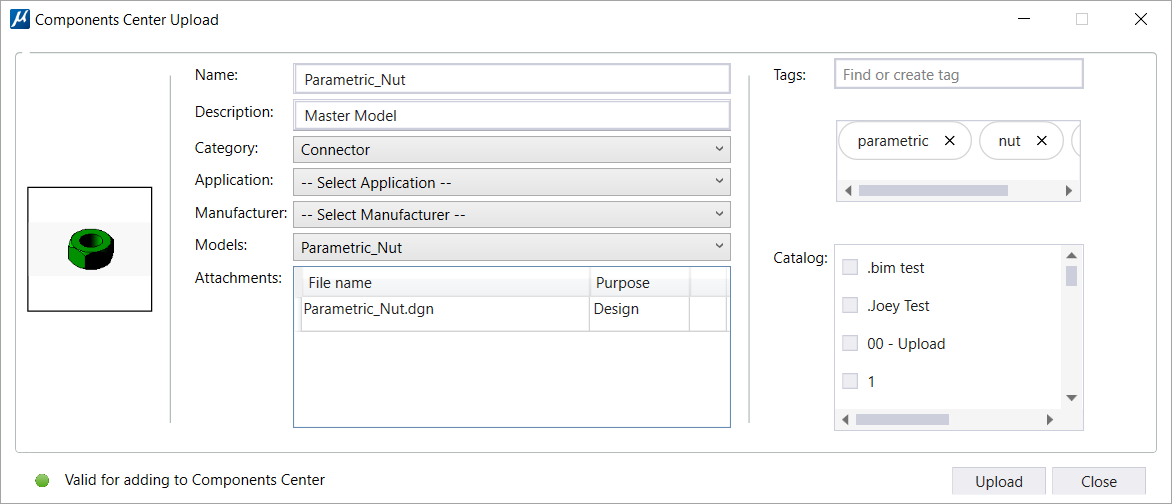
Following properties for the selected model, to be
uploaded as a component, can be set:
- Thumbnail Display
(Thumbnails are captured from the active view. Following settings are
recommended to get a good thumbnail preview:
- Switch off the
camera as well as Markers of the active view from the
View Attributes dialog.
- Use the
View Size tool and set the
Aspect Ratio as
Square 500 x 500.
- Use Smooth
display style with white background.
- Name - displays the
name of the model
- Description -
displays the description of the model
- Category - allows
you to select a category suitable for the component
- Application - allows
you to select an Application
- Manufacturer -
allows you to select a Manufacturer
- Models - allows you
to select a model to upload. By default the active model name is displayed in
this field. From the drop-down you can select the desired model to upload.
Note: You can only upload models that can be placed as cells.
- Attachments - lists
the names of attachments in the model in a tabular form.
- Tags - you can
further classify components by adding tags to them which will be available
during search.
- Catalog - lets you
select a catalog to which the component will be uploaded. You can select more
than one catalog.
|
| Upload
|
Lets you save and upload the component to
Components Center.
|
Note: If you do not have
upload permission, you will see the following message in the message center
when you select
Upload Component in the ribbon: