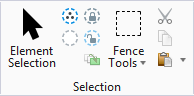
Element Selection
 Used to select and deselect elements for modification or manipulation. The set of selected elements is called the selection set.
You can access this tool from the following:
- Ribbon:
- Ribbon:
- Ribbon:
- Ribbon:
- Quick Access Toolbar: Element Selection
- Toolbox: Main
- Default keyboard shortcut: <Q, Q> or <[, [>
- Default Function key menu: <F10>
In the extended settings for the Element Selection window, tabs let you select elements by one or more attributes — Level, Color, Line Style, Line Weight, Element Type, Element Class, Element Template , Text Style, Dimension Style, Multi-line Style, Transparency, Display Priority, and Material. Alternatively, when you select elements graphically, the active set of attributes displays as a highlighted group in each tab's list box.
All tabs are not always visible by default. To see all tabs, right-click a tab and select Show All from the menu.
- Under the extended settings, you can add to the attribute set by clicking on additional (unhighlighted) attributes. If an element exists with an attribute, the attribute is included in the set. Similarly, you can remove an attribute from the set by clicking on it. Switching tabs lets you continue the process of adding or eliminating other attributes. Where you have a number of attributes selected you can <Ctrl+click> a highlighted attribute and all other highlighted attributes will be deselected.
- If you choose an attribute that exists in a complex element such as a cell, the entire complex element is selected. For example, if you choose the Element Type attribute for text, Element Selection finds normal text elements as well as cells that contain text. In each tab's list box, attributes that belong to complex elements are highlighted in gray, rather than the standard highlighting for attributes that belong to simple elements.
- If you choose a Color, Line Style, or Line Weight attribute, Element Selection finds all elements with this active symbology, including ByLevel attributes. For example, if you select the color blue, Element Selection finds blue elements as well as elements with ByLevel color that are set to blue. ByLevel attributes are listed separately in the list box.
While the Element Selection tool is not selected, it is available for selection in the Reset pop-up menu .
While the Element Selection tool is selected, you can use the tool pointer in conjunction with the Reset pop-up menu to operate on the element at the pointer location or on the selected elements.
While the Element Selection tool is selected, the pointer becomes an arrowhead with an aperture encircling the tip. The aperture denotes the design plane area in which MicroStation searches for elements. The aperture size or Locate Tolerance is a user preference that is adjustable in the Preferences dialog (Input category).
If the desired element is visible in the aperture but you cannot select it, check the following:
- To select a shape, the pointer must be close to one of the enclosing lines. To select a circle or an ellipse, the pointer must be close to the circumference or center. A filled element can be selected by its interior or surface, which is set in the Locate Interiors option menu of the Preferences dialog Input category.
- If Level Lock is on, you can only select elements on the active level.


| Setting | Description |
|---|---|
| Method | Sets the selection method. The method works in conjunction with the Mode setting. The Method settings allow you to select individual elements or drag to select elements with a dynamic rectangle, block, shape, circle, or line. Use a left-right direction for inside selection and a right-left direction for overlap selection. The line style for the dynamic rectangle/block/shape/circle changes from a solid line (inside) to a dashed line (overlap). A tap of the <Shift> key while dragging/defining points will invert the current inside/overlap direction.
|
| Mode | Sets the objective of using the tool. The Mode works in conjunction with the Method setting.
|
| Disable Handles | If on, handles are not displayed for selected elements. With the Individual method plus New mode, element handles are displayed by default if you select a single element or multiple elements using <Ctrl+click>. Element handles are not displayed when you select multiple elements by dragging a rectangle or with another selection method (Block, Shape, Circle, or Line). |
| Select Handles | If on, the Block/Shape/Circle/Line selection methods and the Add/Subtract/Invert/Clear selection modes apply to selecting handles rather than elements. (To use this icon, Disable Handles must be off.) |
| Attribute Tabs | Clicking the Show Extended Settings arrow expands the tool settings window to reveal the Attribute tabs.
|